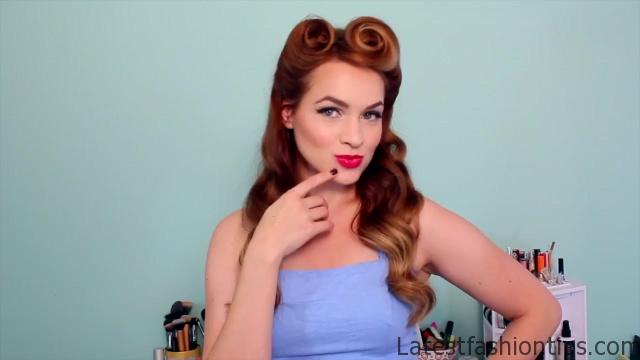
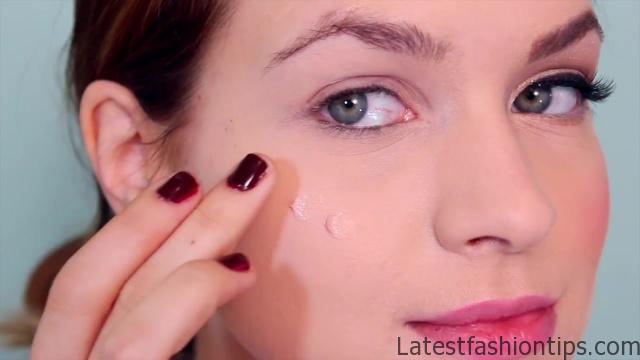
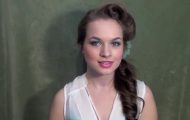
Hey everyone, Abbey here with this s slash’s pin-up rockabilly hair, and makeup tutorial., I have gotten. So many requests for this over the years. So let’s go ahead, and get started with the makeup. First of all, we are going to start out with highlighter. Because highlight, and very dewy glow looking skin is very important to a good pin-up or rockabilly look. So, I will using this Girl Meets Pearl highlighter and, I will putting it into the tops of my cheeks, and you can see that it gives me a really nice healthy natural luminous looking glow, and then, I will using this cream eye shadow on the inner corners, and underneath my eyebrows. Now shimmer is not exactly accurate to. But it does really provide a really great glow healthy skin look which. I think is very important. Then next step is to contour. It’s very important to any pin-up look, and we are going to be taking this Hoopla bronzer and, I will just take it through the hollows of my cheeks, and really building it up.
1940s-50s Pinup Hair, and Makeup Photo Gallery
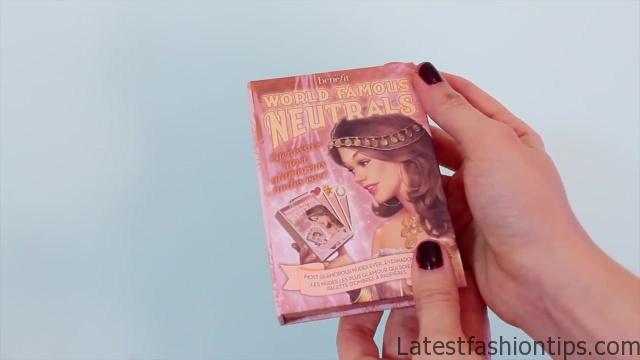

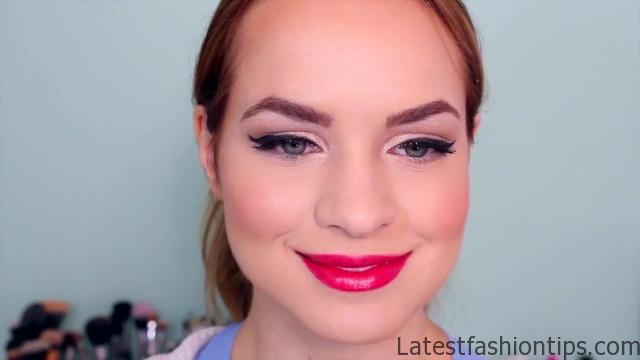
So that you get a more drastic contour than you would wear on a normal basis, and then we are going to move onto blush, and we want a really rosy cheeked application. So for that, I will taking Dandelion blush and, I will just going to pat it over the apples of my cheeks, and then slightly blend it back just. So it does not look crazy. You do not want little circles on your cheeks. But you do want it built up mostly towards the apples of your cheeks just to get that really rosy healthy glow, and now we are moving onto eye shadow., I will going to use the Most Glamorous Neutrals Ever palette and, I will mixing these top two colors. Because. I want to create a color that’s very close to my skin tone.
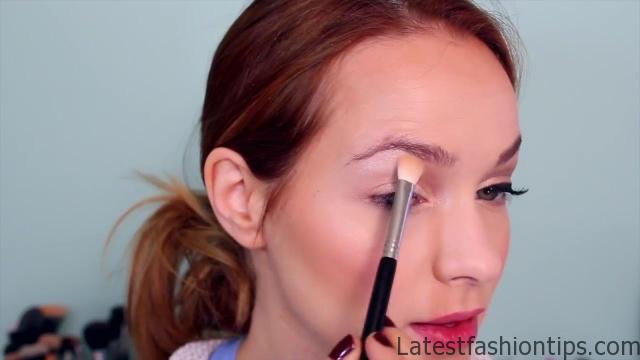
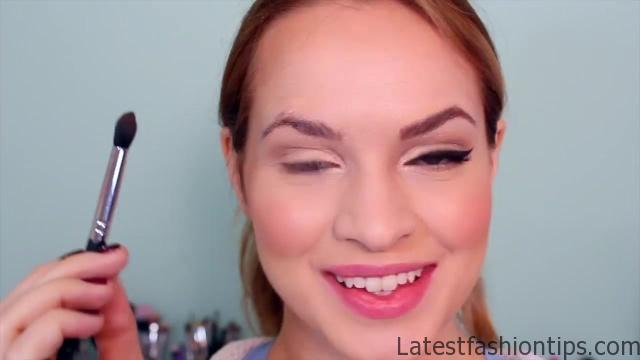
I’ll just putting that over my lid, and then, I will going to move onto my highlight color which is going to go in my tear duct, and underneath my eyebrow where we already placed that shimmery eye shadow base. Then once that’s done we are going to create a really great crease. The first thing that we are going to do to create that is to take this dark brown color, and then take a very fluffy crease blending brush, and basically that is going to create a really diffused application. So it is going to look very light, much lighter than the color actually. You get kind of a nice diffused airbrush look from it. Then you are going to take a more focused kind of pencil brush, and focus that right at the base of the crease. You can see this application is much darker. So you get a really great gradient from this really dark application at the bottom fading really nicely up to the highlight at the top which is very important. Now we are moving onto winged eyeliner.
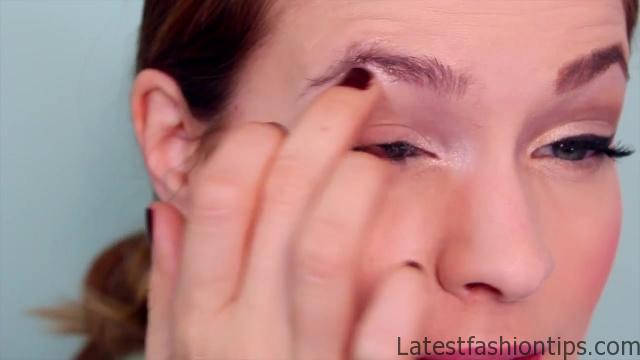
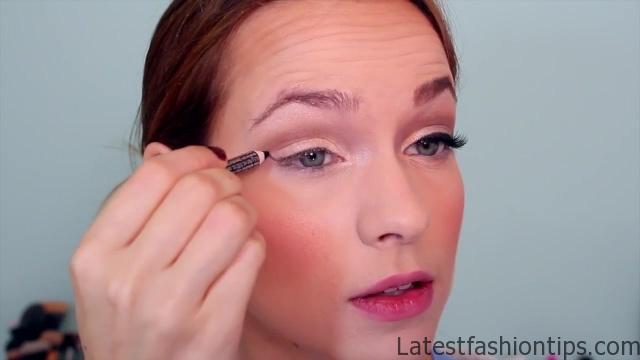
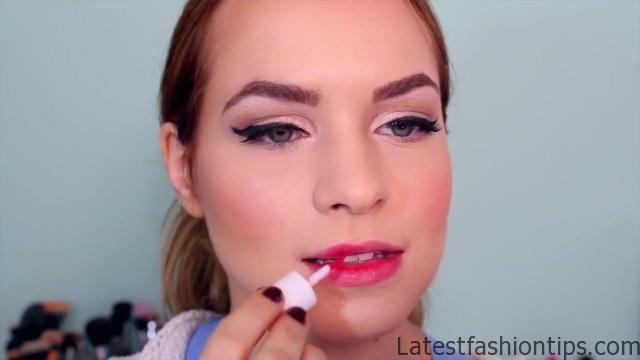
Now this one can be tough. And I do have a tutorial if you want to check that out. First you want to create a line that extends at the same angle as your lower eyelid, and you are going to connect that back to the middle of your upper eyelid, and then basically just line in a very thin line around the rest of your eyelid just to create a kind of flow to the rest of the eyeliner. Once you like how the outline looks just fill it in, and you have your winged eyeliner. Again,. I have another tutorial if that was really fast,cause it was, and now we are moving onto eyebrows. To get a really great defined brow,. I took the wax from Brow Zings, and took that under the bottom of my eyebrow to create a really nice edge, and then. I moved to the pattern to fill everything else.Cause that way it does not look like Sharpie eyebrows but you still get a lot of definition. But if it still looks a little too drastic to you, you can always take a spool, and kind of diffuse it a little bit. So it does not look too drastic, and the next thing that you want is definitely flirty eyelashes. So I used some Bad Gal mascara, and some false eyelashes to create a really great flirty look, and finally, I will going to finish off with luscious lips. Now if you are going to be wearing this to a party,. I really recommend going ahead, and staining your lips with Benefit first or any lip stain that you like to create a nice bit of color on your lips.
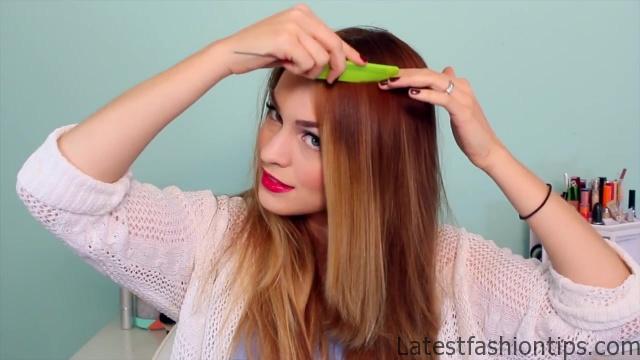
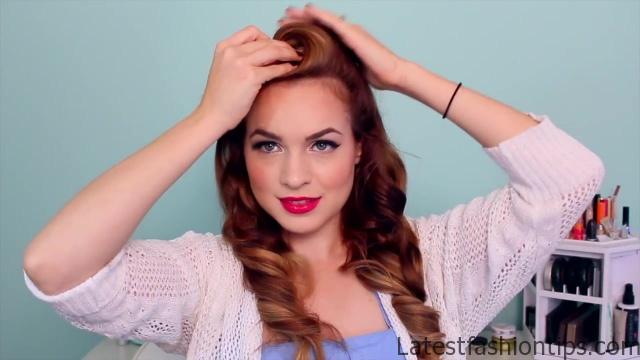
That way once your lipstick wears off, you still have some color there. Speaking of lipstick,, I will using this Hydra color in Dare Me, and it is a beautiful hydrating lipstick that creates that really nice luscious look, and hydrates your lips from the stain that we just used. So that your lips look beautiful all night long, and that’s it for the makeup, and now we are going to move onto hair. Now the actually not as hard as it might seem. We’re going to start out by sectioning, and curling the hair for the victory rolls. So you are going to go head, and part your hair on whatever side you prefer but it does probably need to be a side part. So this does not look silly, and then you are going to ahead, and part about three inches of hair from your hairline all the way down to your ear, and everything else from that back if you want to go ahead, and separate. Do the same thing on the other side, and clip the hair that it is in the back out of the way. Then we are going to curl the hair that’s in the front.
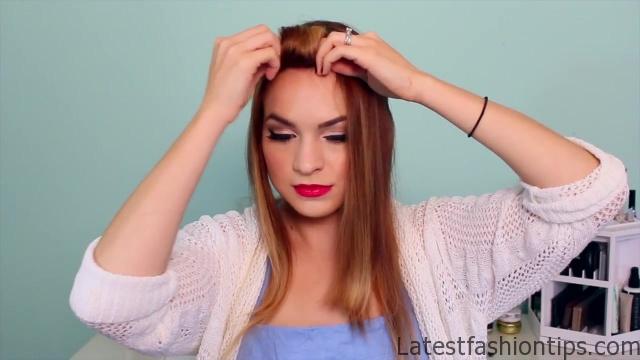
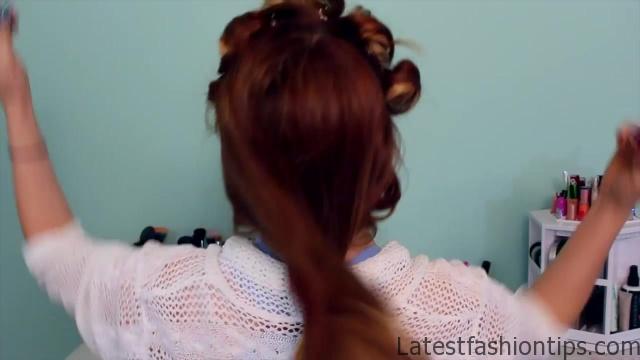
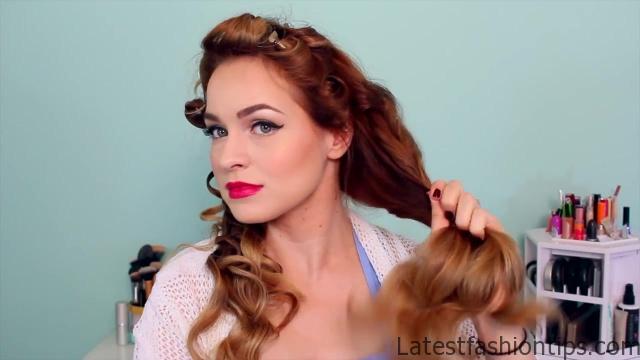
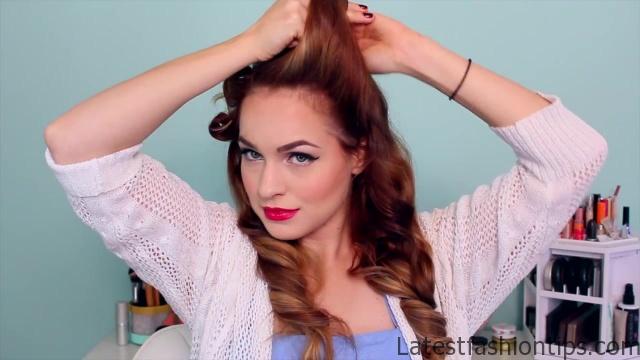
You want to curl it straight back away from your face, and once you are done curling it, you want to go ahead, and put it back in its curled shape, and pin it in place, and then if you have any especially wide areas, go ahead, and split them in half just to make sure that you are not curling too much hair at once, and continue doing that until that entire section is curled. Then go ahead, and repeat the exact same thing on the other side until your hair is curled, and placed. Now we are going to go ahead, and curl the remaining hair. To do this we are starting in sections, starting at the bottom. So you want to go ahead, and section your hair, leaving about two inches down at the bottom, clip the rest up. Now you are going to curl the hair in little square sections going in one direction and, I will doing this toward the right, and then clipping them back up once they’ve been curled. Once you have got that first layer curled, you are going to go ahead, and drop another layer that’s exactly the same width, clip the rest of the hair up,, and curl everything the exact same way again. The only thing that’s really important here is that you are taking the exact same size sections, and you are curling them in the exact same way. That way they all form together into great waves. But you can do this with rectangles if you want to.
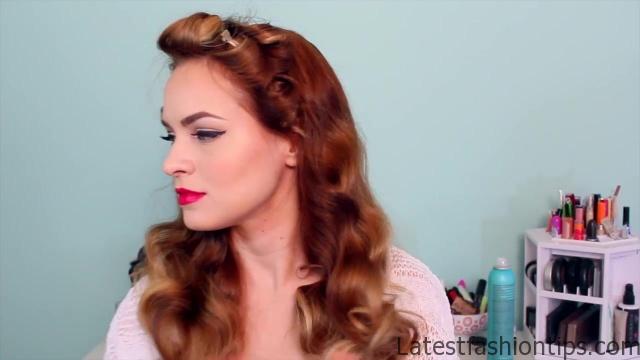
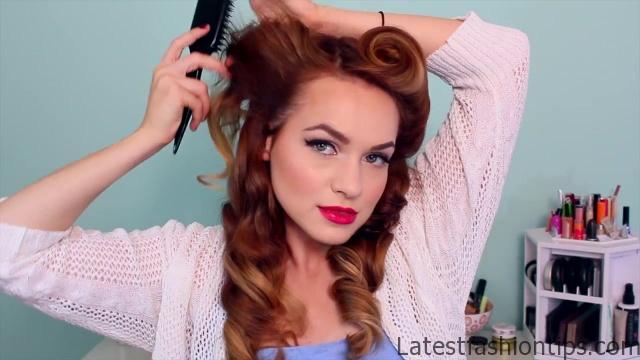
So you do not have to do as many curls. Because that would take less time if you want to. And I do. I have another tutorial on that if you want to check it out. Once those curls are completely cool you can go ahead, and let them down, and if you want to you can spray as you go to make sure that they stay really well like. I did just there, and now we are going to move on to the scary stuff. Which is to comb out the curls?, I will use a boar bristle brush to comb through my hair. And I use the inch iron before. Because my hair loses its curl pretty easily. So if your hair tends to be like that, go with the smaller iron. You can see that doing this creates some frizz, some kind of undesirable frizz which is actually very accurate to the s but not desirable in the sty century. So here’s what you can do to fix it.. I took a little bit of shine spray from Sexy Hair put it on my hand, wiped it between two hands, and ran it over my hair, and look what happened. The frizz went away, and the more you use, the sleeker, and smooth it will look. But you can see there’s a big difference between the two sides. So you can do this with a lot of different products and, I will probably make a post on it but just in case you guys need it now that’s what you can do to help fight the frizz. Now let’s move onto the victory rolls.
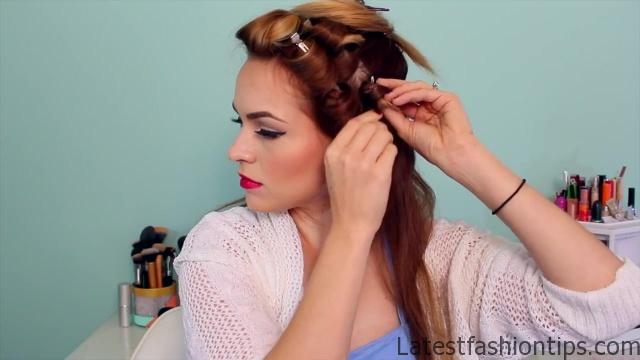
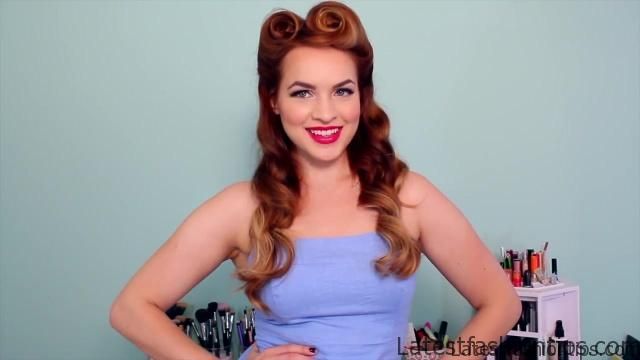
Once those curls are completely cool, go ahead, and let them down, and then tease. The teasing is going to give you that nice shape. To get that nice kind of roll shape, you do need both the curl, and the teasing to hold it in place. So once you got a tease, go ahead, and smooth over the top. So it does not look frizzy from the front, and then wrap your hair around two fingers, and you are going to create a little doughnut shape. Which you can see right here. Now you are going to take that doughnut, and roll it up like a sleeping bag until its right against your head. You can see, I will doing that very nice, and slowly, and meticulously, and then you let the back of that teasing just fall behind the little doughnut, and it creates a victory roll. That’s basically all it takes, and then. I went ahead, and after that was all placed the way. I wanted it, stuck a bobby pin or two through the middle of it, and basically. Because you got all that hair going on you do not have to worry about how you pin it, just crisscross them to make sure that they hold really well, and then you are going to repeat the same thing on the other side. Give it that teasing to give it the support it needs to stand up, smooth it. So that it does not look frizzy. Then you are going to create your doughnut by wrapping around two fingers just like. So, and then you are just going to roll that doughnut up like a sleeping bag until it is right against your head, and pin it in place, and that’s it for the hairstyle.. I hope you guys like this, and if you try it out, definitely send me pictures,. I love seeing them, and also make sure to check out my previous Halloween tutorials,, I have been loving them,, and you guys have been loving them. So you should just check them out if you haven’t, and that’s it,, I will see you guys in my next post, muah,, and bye.
Maybe You Like Them Too
- Easy Glowy Makeup for Everyday
- Bridesmaid Makeup
- 40s Pin Up Hair inspired by The Capitol of the Hunger Games
- Brows Lashes Lips – Simplified Makeup Tutorial
- Classic Makeup With a Glittery Twist Perfect for NYE