Mimi here today and I’m wearing it hat today because I’m gonna be showing you my go-to hairstyles that, I love to wear when I’m wearing a hat if you follow me on instagram you know that, I wear hats a lot, I have many different hats and, I love to wear them of course as an accessory but also they make a great cover-up on a rainy day to save you here from crazy humidity.
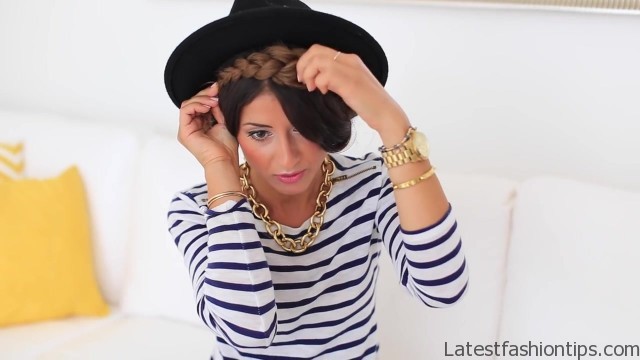
So today, I will be showing you those amazing quick hairstyles that you can create when wearing a hat let’s get started a lot of times when, I wear hat and I’m just running late, I just put a hat on and, I go out just with my hair down like that I’m wearing my lucky here expressions right now I’m wearing that um rich chestnut set however sometimes when, I feel a bit more creative and, I have time, I do these three hairstyles and I’m gonna start with one which is really cute and bohemian the first thing I’m gonna do I’m gonna stop touching my hair and I’m gonna quickly brush through my hair to make sure there are no tangles and the same on the other side and I’m gonna grab a random section of hair in medium size just something like that and I’m gonna start braiding it and I’m just gonna be doing a regular three strand braid now the interesting part here that you want to pay attention to is that as, I braid the hair and, I call this the organic braid. I have done this years ago on a regular three strand braid. So as I’m braiding the hair notice that the bottom of the hair starts tangling together, I can just push it down a little bit.
3 Cute Hairstyles for Bad Hair Days Photo Gallery

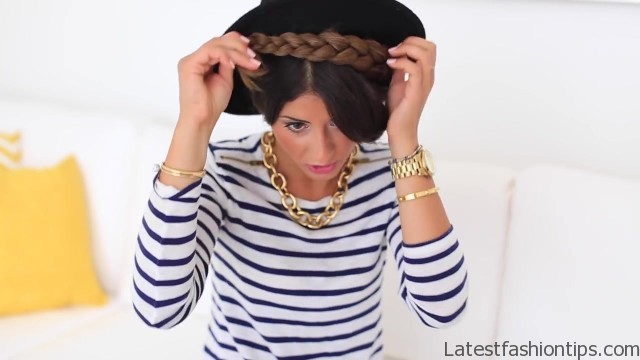
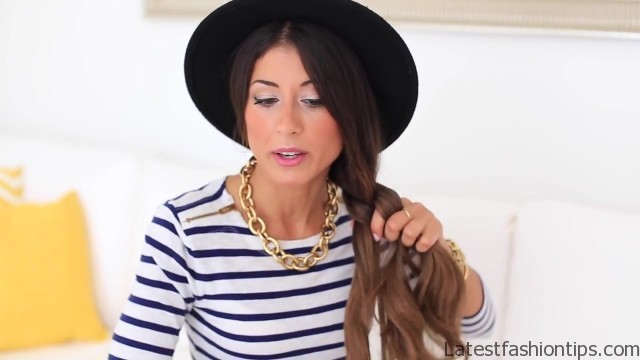
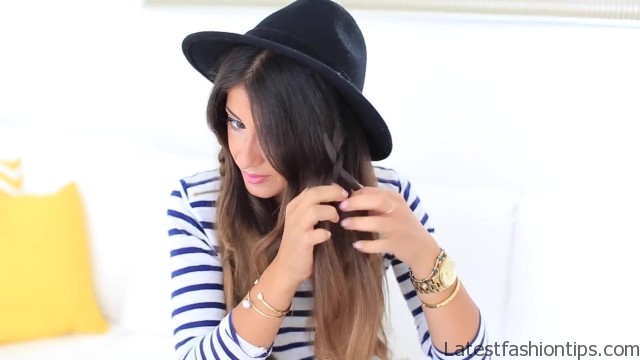
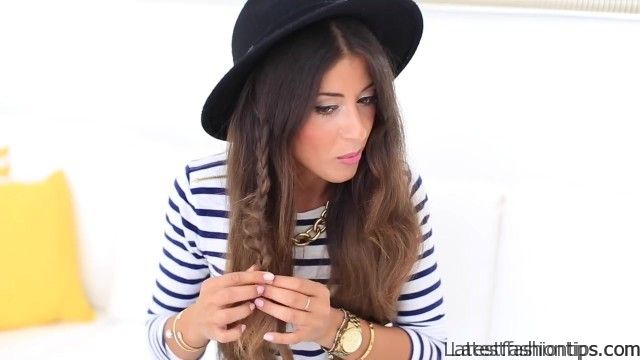
So as I’m braiding it the bottom also braids itself which will allow me to secure this braid without actually putting an elastic on it alright. So when, I run out of space, I just have one last section here what, I will do is pull the braid through that opening and then, I have nice break that has no elastic at the bottom this makes it look more effortless more natural now I’m not finished what I’m gonna do next is I’m gonna go back to this braid and I’m gonna start pulling random sections of the braid out to make it a bit more messy more bohemian. So just go back in the braid and start pulling out on sections.
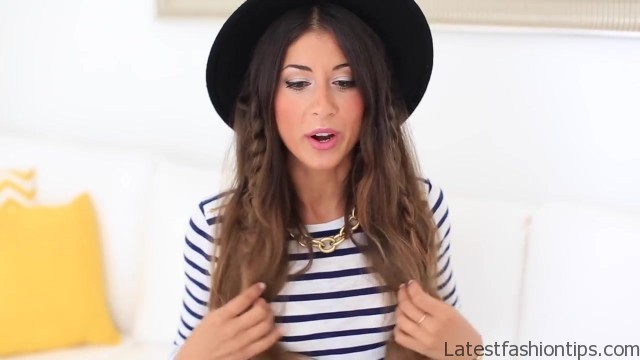
So this is what it is gonna look like when, I finish beautiful and fanned out now I’m gonna go ahead on my left side and do the exact same thing and once, I have the second braid I’m just gonna go into it and also fan it out to make it just as big as this one alright. So when you finish patting it out this is what you are gonna have and this is a great hairstyle to wear to music festivals some kind of a summer party or just wear it to school the second hairstyle I’m gonna show you today, I call the tuck away braid and it is a braid that, I do when, I want to hide my hair from humidity and water it is really easy to create and it is super quick. So I’m gonna start off with just bringing my hair to one side and quickly giving you a brush and I’m just creating a regular three strand braid first I’m gonna make this braid quite tight as well.
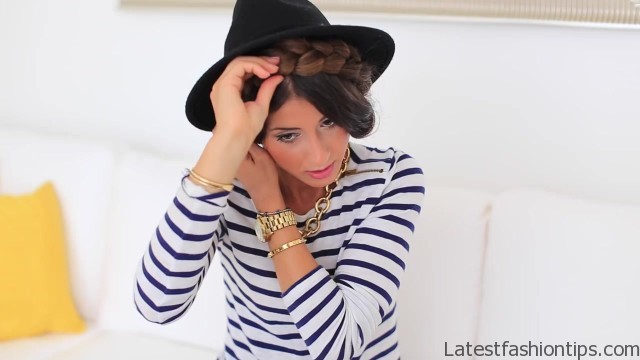
So make sure that at the base you are braiding it quite tightly and you also want to braid it all the way down to the very bottom now when, I get to the bottom what I’m gonna do is grab this braid and just position it like this I’m gonna hold my braid now and just slowly pull on some of the sections of the braid before, I pin it in place. So I’m just patting it out a little bit if you have any layers in your hair you want to be really careful here because you do not want them sticking out too much now at this point I’m just gonna hold the ends of the hair with my left hand with my right hand I’m gonna grab a bobby pin and just start pinning this in place first. So I’m always starting with the end of the braid and then while still holding on this braid because if, I let go right now it is quite heavy it is just gonna go back in its place, I’m gonna go in the middle and start pinning this braid in the middle alright.
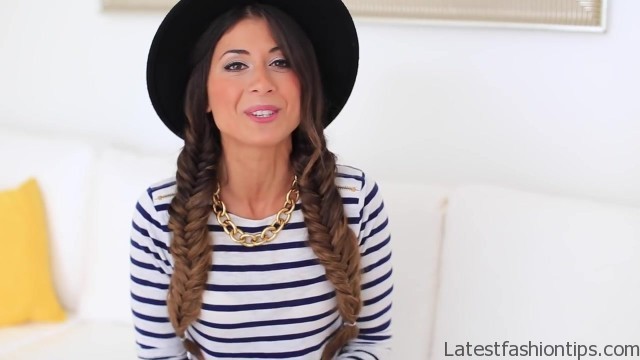
So just continue grabbing more and more bobby pins and inserting it at different sections of the braid to ensure that the braid is safely pinned onto your head and we are gonna do the same thing here at the base and if you have any layer sticking out remember that you can always position the hat towards or like over the layers for example, I have this little layer here at the top and I’m just gonna cover it under the Hat. So you won’t really see it. So you just have to be a bit more creative with the way you hide it and then once you feel like it is safely pinned in place the hairstyle is finished and the last hairstyle I’m gonna show you is definitely one of my favorites of course because, I love fishtail braids in here I’m gonna be creating not just one fishtail braid but two one on each side.
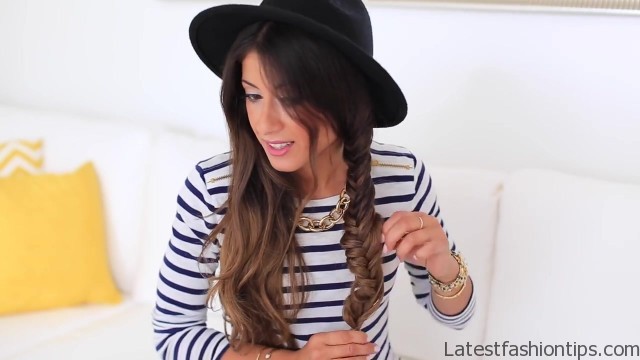
So I’m gonna start with my left section I’m gonna quickly give it a brush I’m gonna split the hair into two equal sections and start braiding it downwards. So the fishtail braid works as you have your work with two sections and you take one section bring it to the left and then with your index finger you take a section bring it to the right, I do have a post on how to create a fishtail braid and I’m gonna link it down below and here. So watch that post if you do not know how to create a fishtail braid it is super easy it just takes a lot of practice but it is definitely worth it because it looks beautiful alright.
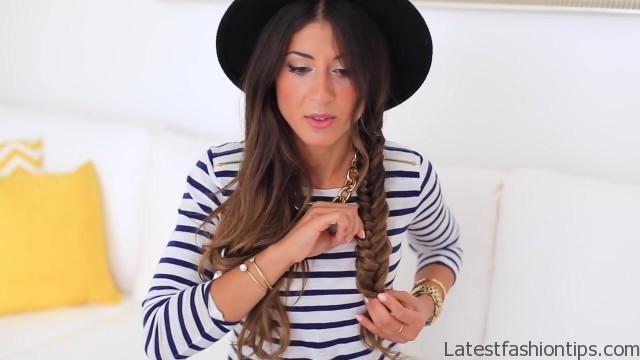
So it is gonna be a really nice chunky fishtail braid. So I’m making sure that I’m using quite big sections as, I break down and that is all I’m gonna be doing I’m gonna spit this up and when, I get to the bottom of the braid, I just got my hair elastic and secure it with that and now I’m gonna go back into the braid and fan it out I’m just gonna grab different sections of the braid and lightly pull on them and as you do that make sure to hold the bottom of the braid tightly because you do not want any of the hair escaping from it alright. So one down now I’m gonna go ahead and do the exact same thing on my right side and now I’m gonna do the same thing with this braid I’m just gonna grab the sections and start tugging on them and expanding the braid to be as big as the left one.
So what’s better than one fishtail braid to fishtail braids and that’s the finished hairstyle and that is it for today my beauties thank you. So much for tuning in let me know which one out of these three hairstyles is your favorite I’d love to hear from you. So leave me a comment down below make sure to LIKE this post it will totally make my day and when you recreate one of these hairstyles make sure to tag it on Instagram.
So we can repost your pictures thank you. So much for tuning in, I love you guys and I will see you soon bye.
Maybe You Like Them Too
- Tamar Braxton A Life in Music
- Sunny Hostin A Biography
- Steve Coogan A Life in Comedy
- Sterling K Brown A Biography
- Stephen A. Smith A Biography

