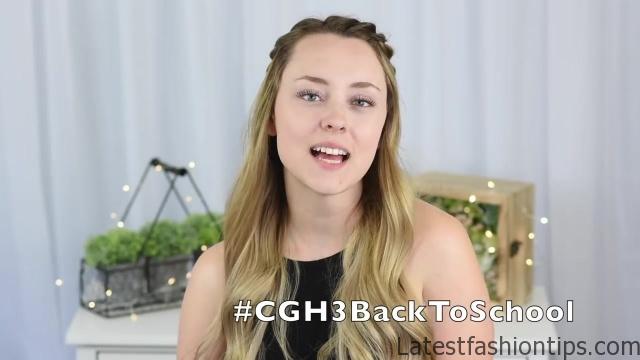
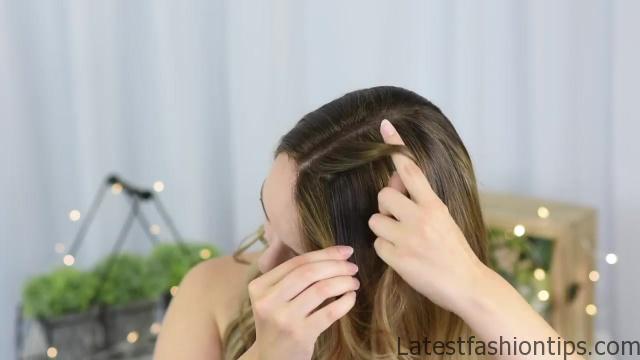
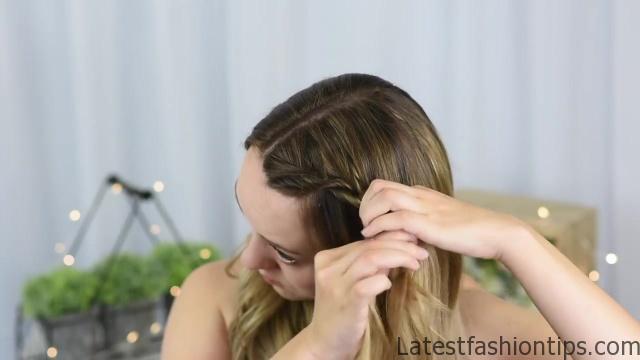
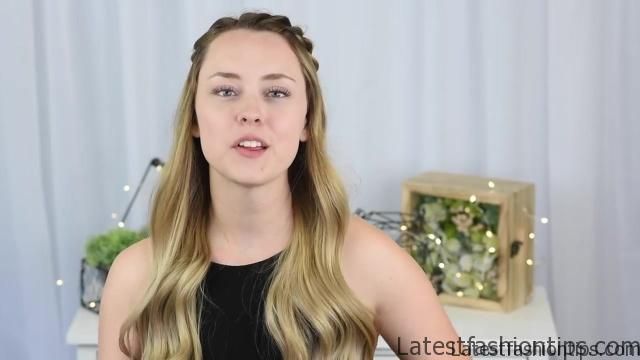
Hey everyone, I’m Jordan from Braids by Jordan. Today we are going to be showing you how to do three quick and easy hairstyles that I think will be great for back to school. If you have not already comment to Hairstyles make sure to hit the comment button and give this post a big thumbs up. So, let’s get started. The first style I’m going to be showing you how to do is the half up rope twist bun. Take a section of hair from the front of the head and divide it into two. Twist each section down and then back together in the opposite direction. And then add in a new section of hair to each piece and again, twist each section down and then back together up in the opposite direction. And then after that first section, I’m only adding in new hair to the top part of the rope twist to create a lace rope twist braid. Then just repeat those steps until you reach the back of the head.
3 Easy DIY Hairstyles Back to School Hairstyles Photo Gallery
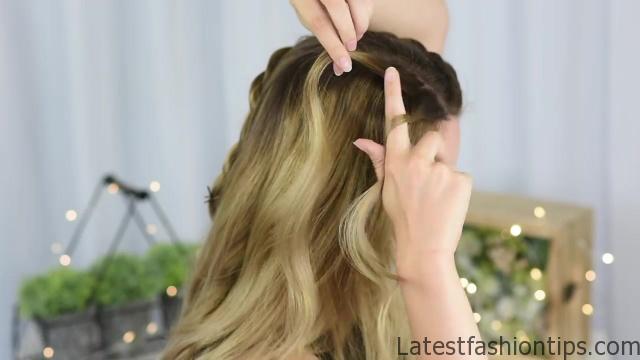
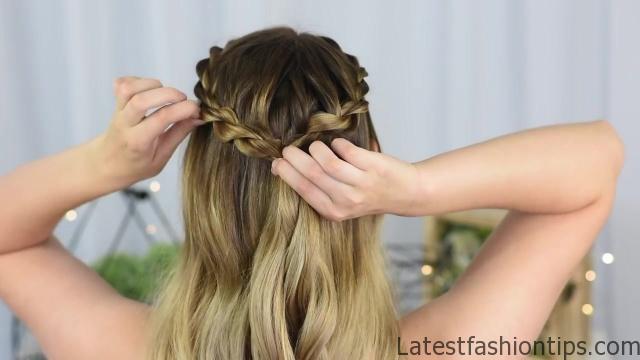

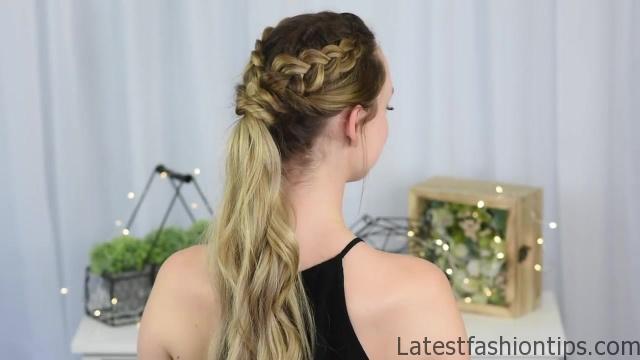

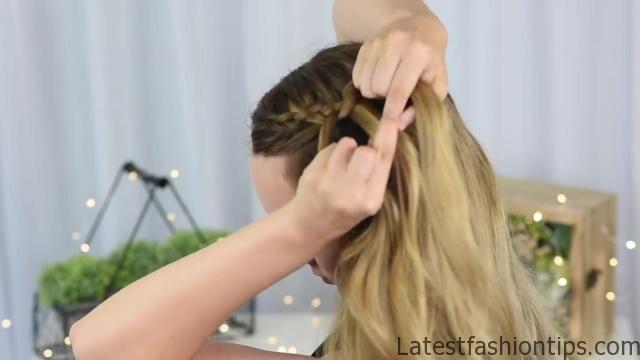
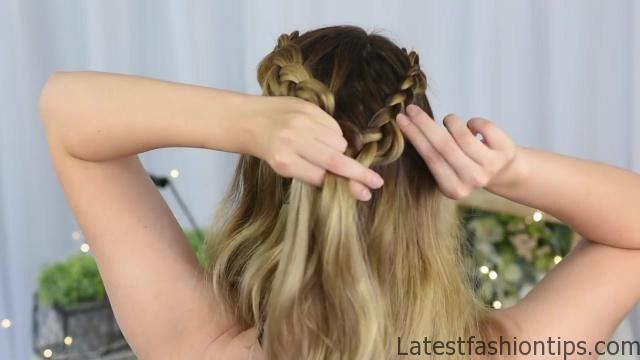
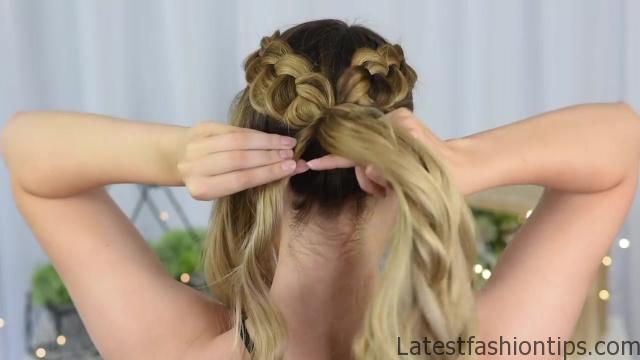
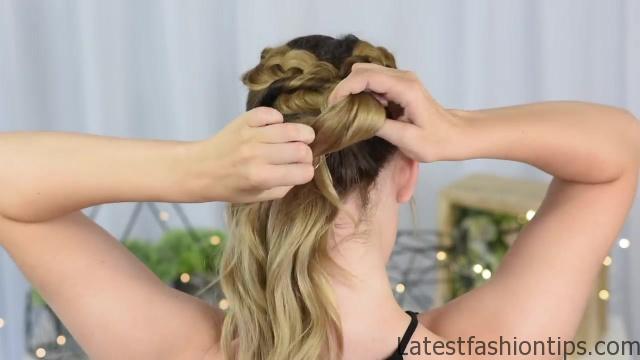

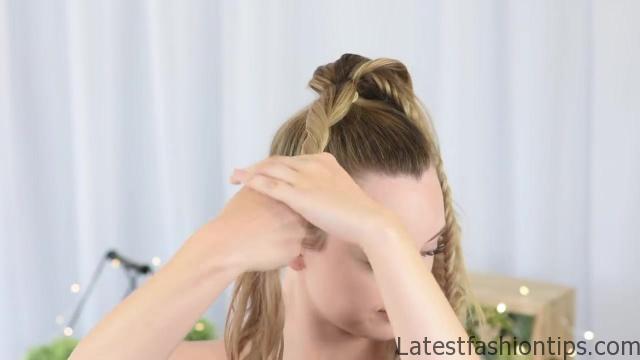

Once I reach the back of the head, I just continue the rope twist without adding any new hair for a few extra stitches before using some bobby pins to hold it together while I did the other side. Then repeat on the other side, making sure to always twist the strands down and then back together in the opposite direction. Once the second braid reaches the back, secure both braids together with a clear, baby elastic. Then I like to go back and carefully pull on the edges of the rope twist to give it more volume. Divide the ponytail into two and start another rope twist braid. So, just twist each section in one direction and then back together in the opposite. Once the braid reaches the end of the hair, I’m just going back and really pancaking my braid to give it lots of volume and then securing it with another elastic. Wrap the braid around itself to create a bun shape and then secure it with bobby pins. And then I went back and pulled on any pieces if they needed to be adjusted. And that’s is. The second style is this twisted dutch braid pony. Take a section of hair from the front of the head and divide it into three pieces. Then take the top piece and cross it under into the middle and take the bottom piece and cross it under into the middle. Then again, take this top piece, but this time we are going to add in a small section and cross it under. And then take the bottom and add in a new section and cross them both under. And just repeat those steps for a couples stitches, so I’m must adding in hair to the top piece and crossing it under and then adding in hair to the bottom piece and crossing it under. Then after a few stitches, I’m going to stop adding in hair to the bottom piece and only add in hair to the top piece to create a dutch lace braid. Then I’m just continuing that dutch lace braid until I reach the back of the head. Every so often, I like to go back and carefully pull on the edges of my braid to give it more volume. Once the braid reaches the back of my head, I’m just securing it with a bobby pin and then repeating on the other side. Secure the braids together at the back of the head with a clear baby elastic.
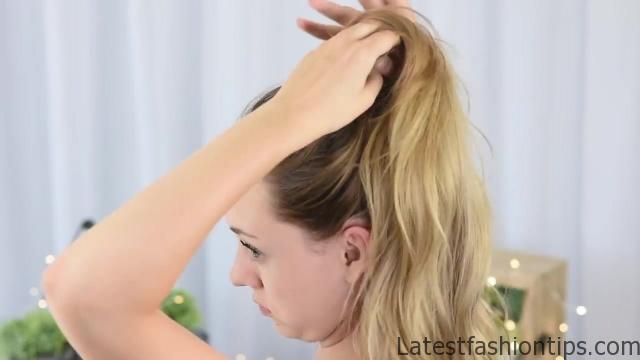
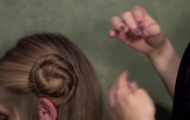
Section off the hair in front of the ears from each side and then pull the remaining hair into a ponytail. Take one of the sections and twist it back away from the face. Take the twist around the pony tail and then secure it with another elastic band. Then I like to go back and carefully pull on the edge of the twist to soften it. Then repeat on the other side. I like to twist this one around the ponytail twice to make sure that all of the elastics are hidden. And that’s it. The last style is the fishtail top knot. I like to start off by spraying a little bit of dry shampoo into my hair to give it some more texture. And then I’m just pulling all of my hair into a high ponytail. Take a section of hair from the ponytail and divide it into two. Then I’m just starting a fishtail braid, so I’m taking a small piece of hair from the outside of the right piece and crossing it under to the left and then taking a small piece from the left and crossing it under to the right. Then I’m just repeating those steps all the way down to the end of my hair. Then once I reach the end of my hair, I’m just securing it with a clear elastic band. Divide the remaining hair into two and then twist one of the sections all the way down to the ends. Take a small sliver of hair and pull on it to scrunch the twist up to the top of the head. Pull on the twist to adjust it and then secure it to the head with bobby pins. Then repeat with the remaining hair to create the second half of the bun. Take the fishtail and wrap it around the bun then pin it in place. And that’s it. I hope you guys like these hairstyles. And if you did, make sure you give this post a thumbs up and comment below which one was your favorite. If you want to see my last tutorial, you can click the link here, and if you want to see more CGH posts, you can click the link here. To comment to Hairstyles, make sure to click this link, and if you want to see more from me, you can head over to Braids by Jordan or they”ll be a link to my YouTube blog in the description box below. Thanks for watching, bye guys.
Maybe You Like Them Too
- Celebrating Natural Black Women’s Hair: A Guide to Gorgeous Hairstyles
- Short Hairstyles For Women Over 60
- 20 Thrilling Twist Braids Style to Try This Season
- The Top 10 Asymmetric Hairstyles
- 10 Gorgeous Shaggy Bob Hairstyles To Get You Out Of A Style Rut

