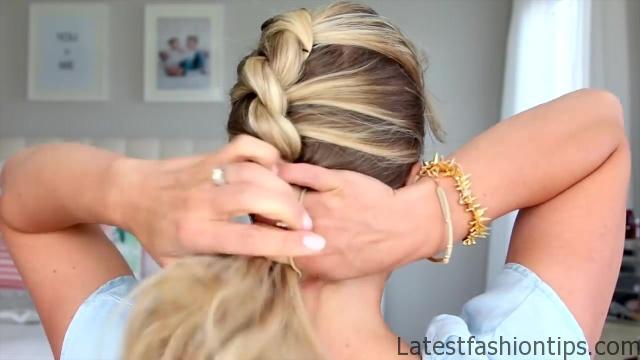
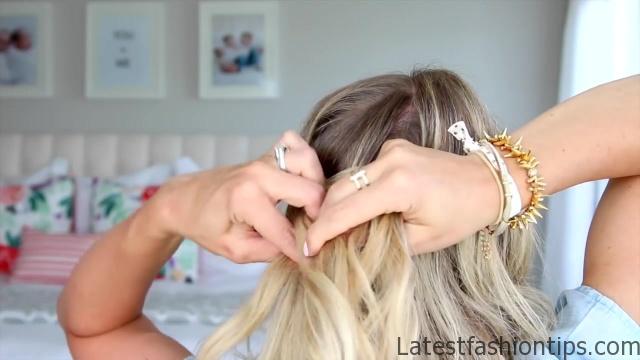
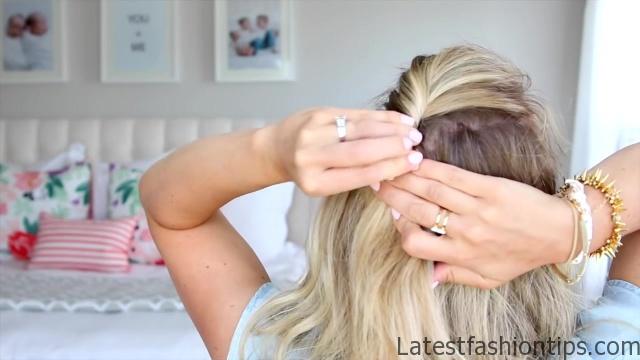
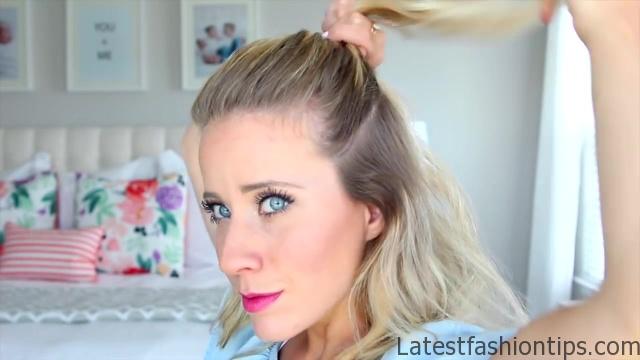
Hey guys, it is Abby, from Twist Me Pretty. I’m so excited to be back with CGH and today we are going to be doing five of my favorite back to school hair styles. I can’t even believe I just said those words. Summer is almost over you guys (crying). Thumbs up if you had a good summer. Hopefully you guys got a good tan and maybe some of these hairstyles will get you at least a little bit excited to go back to school. Make sure to comment below to CGH if you have not already. We do not want you missing any future posts and yeah, let’s get started. Pull the top section of hair back from about the temples on up and then twist the hair with your fingers and secure right above the crown with a bobby pin. Then gather a small section of hair right below the bobby pin, split it in two, and twist the sections, and then add some more hair to the right side, add some more hair to the left side, and you are gonna twist those two sections together again. And just repeat all the way down until you reach the nape of your neck.
5 Easy Back-to-School Hairstyles Photo Gallery

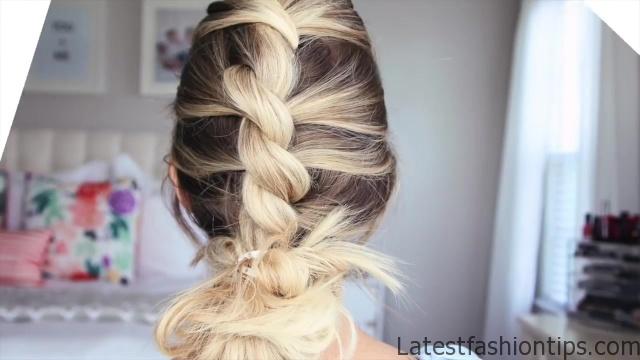

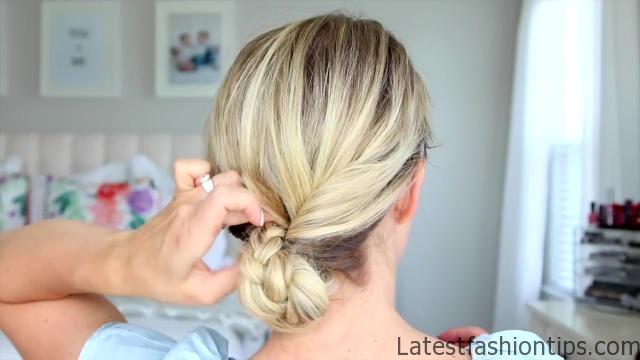
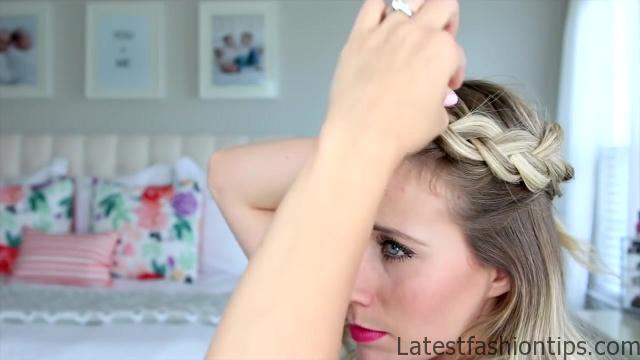
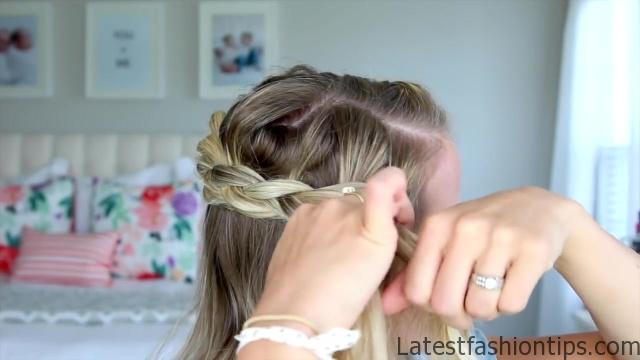
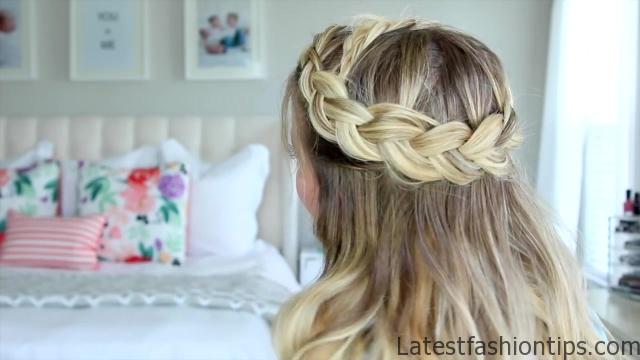
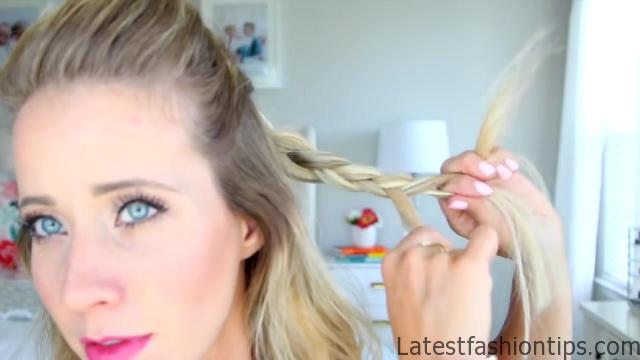
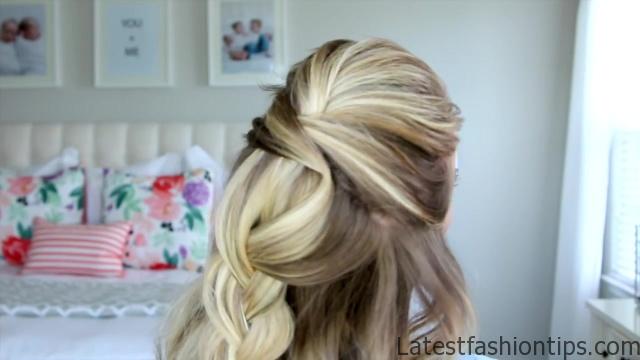
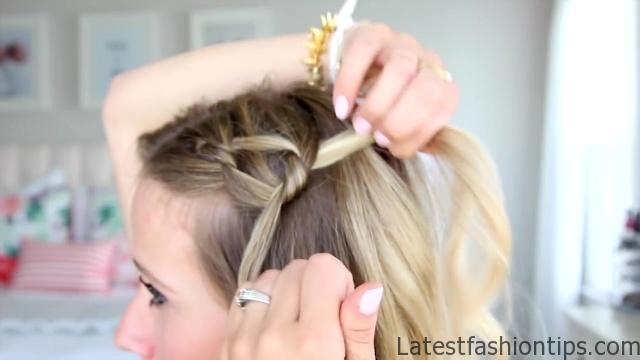

If you want your twist to look a little bit more full, go ahead and pancake those sections, and then just tie it off with a rubber band. And you can either leave it like this, or you can throw the tails into a messy bun. I like to wrap my tails almost all the way through the elastic and then just kind of wrap the elastic around that bun, and finish it off with a few bobby pins. This is one of my favorite styles, cause it is so easy, you are just gonna throw your hair up into a low ponytail, do a three-strand braid all the way down and tie it off with a clear elastic. And then you are just gonna make a hole with your fingers right above the elastic and pull that braid up into that hole and down, and you are just gonna do it as many times as you need to, until you run out of ends, so I can do twice. And then just go ahead and massage the braid so that it looks how you want, and pin it off with bobby pins. Gather a small section from the heavy side of your part, divide it into three sections, and we are just going to be doing a Dutch braid, so the outer strands go underneath the middle, then go ahead and add in a new section to the top strand, braid it underneath the middle, add in a new section of hair to the bottom strand, braid it under the middle, and we are just gonna repeat these steps until we wrap the hair around to about our ear. When your braid finally starts wrapping around towards the back, just go ahead and turn this into a lace braid, and all that means is that we are gonna add in a section of hair to the top, braid it under the middle, and then do not add in any new hair to that bottom section, and just braid it directly under the middle.
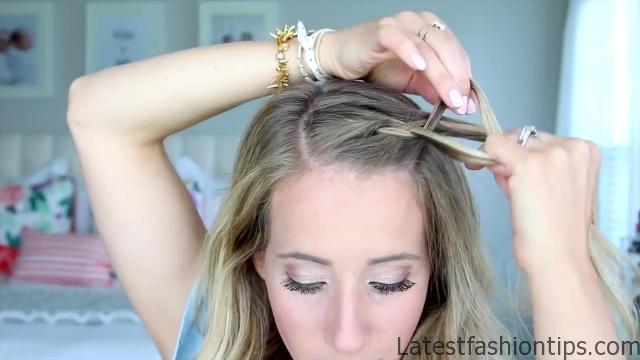
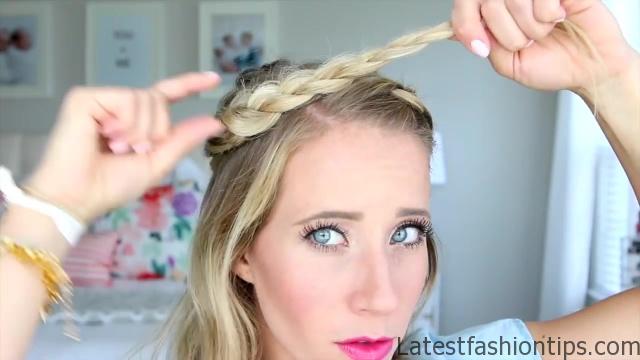
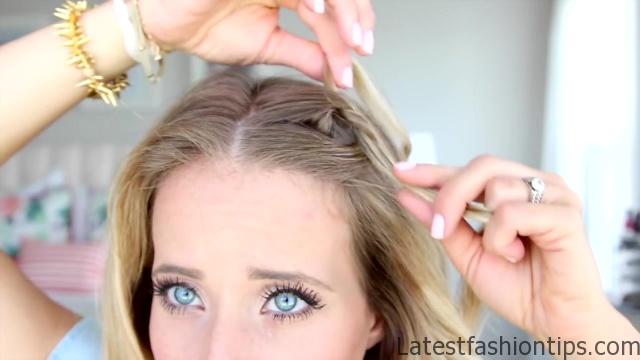
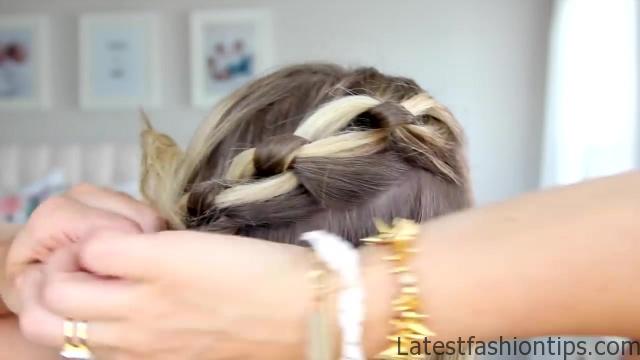
And repeat, so add in a new section of hair to the top strand only, braid it underneath the middle, and then do not add anything into that bottom strand, but braid it just directly under the middle. And you have now turned your French Dutch braid into a lace braid. When you finally reach the other side, you are gonna wanna switch your hands, so that you can keep braiding forward. Now this might take some practice to get used to, but just say the steps out loud, and your fingers should follow. When you run out of hair to add in, just do a regular three strand braid. And then I like to massage the braids just a little bit, to make it look more thick and full, and then tie it off with a clear elastic. Now you are just gonna hide those ends underneath the Dutch braid on the other side. So take a couple bobby pins and just hide them under that Dutch braid on the other side, and then go ahead and pull apart and pancake those braids to make it look like one big crown. Pull the top section of hair back, from about the temples on up, and then twist the hair with your fingers, and secure right above the crown with a bobby pin. Then gather about a two inch section from the front, smooth it down so there aren’t any bubbles, and you are just gonna drape it over that bobby pin. Where you are pinching the section with your fingers, just go ahead and take a new bobby pin, and secure it on the other side of that first bobby pin, and then you are gonna repeat on the other side. Now that we have our criss-cross sections done, we are gonna take a small section from below those bobby pins, divide it into three sections, and just do a simple three-strand braid all the way down. Before tying it off with a clear elastic, just go ahead and pancake this braid to make it look a little bit more full and elegant.
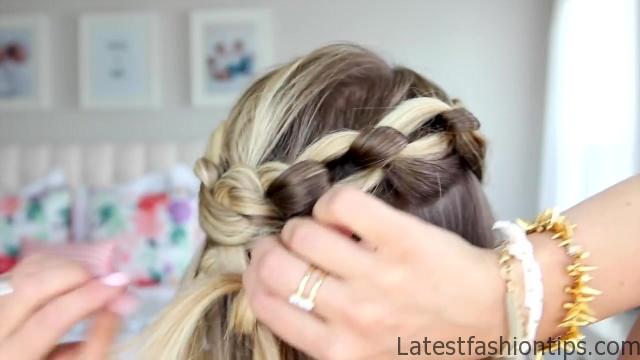
Split the hair down the middle, and then take a small section on one side of your part, and divide it into two sections. And we are just gonna do a simple knot. Cinch it on up so that it is nice and tight, and then put both of the tails in one hand, and add in a new section to the bottom piece, transfer both tails into the bottom hand, and add in a new section to the top piece. And then you are going to take the top strand over the bottom strand, and then the bottom strand is gonna be flipped through that hole, and you are just gonna repeat all the way around. When you reach the back, go ahead and just knot the tails right off, and secure with a clear elastic, and repeat it on the other side. And now we are just gonna combine the knots together, so you are gonna fold the left side over the right side, and you see where my finger’s holding? You’re gonna take a bobby pin and just secure the two knots together, and then you are gonna remove the elastics and undo the knots, and you are done. And that’s a wrap, I hope you guys enjoyed this post, and make sure to come find me, my name is Abby, and my blog is Twist Me Pretty. I will leave the link in the description box below. So go click it, come on over and say hi, comment if you want, watch a couple of my posts, let’s be friends already. If you guys wanna see the post that I did a couple weeks ago you can click that little i button right up there, make sure to comment below to CGH so you do not miss any future posts, and I hope you guys have a great back to school. So I will see you guys in a couple weeks for a new tutorial. Bye guys.
Maybe You Like Them Too
- Celebrating Natural Black Women’s Hair: A Guide to Gorgeous Hairstyles
- Short Hairstyles For Women Over 60
- 20 Thrilling Twist Braids Style to Try This Season
- The Top 10 Asymmetric Hairstyles
- 10 Gorgeous Shaggy Bob Hairstyles To Get You Out Of A Style Rut


