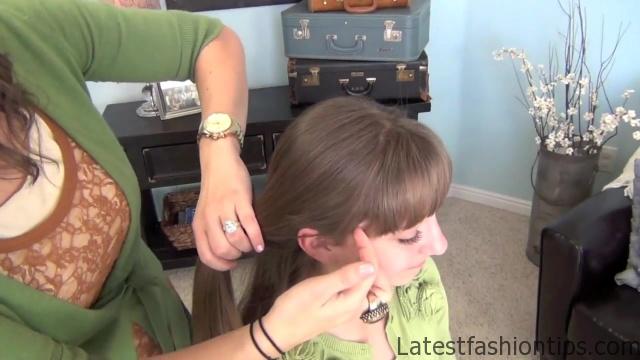
Hey everyone. I’m Abby from LA, and today we are going to film a hairdo I’m calling the waterfall twist. Now, for those of you that have not been able to master the amazing waterfall braid, this is a great version that looks very similar, but it is a little bit easier because you are only dealing with two strands instead of three. So I have straightened her hair. Well, it is straight from her hairdo yesterday. And I’m going to show you. We’re going to turn her a little bit. OK, now I’m going to just pick up a little piece of hair. I’m not going to go all the way down to the ear just because I want to leave a little down so it looks nice. But you want a pretty good size chunk because this is going to be what you use as your main strand all the way around the head. So you are going to take this and divide it into two pieces and go ahead and just twist one over the other.
Beautiful Waterfall Twist Hairstyles Photo Gallery

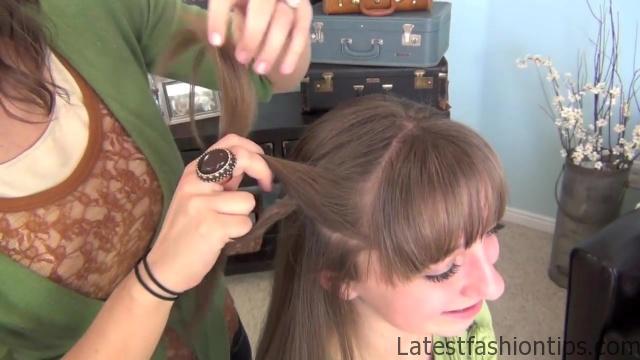

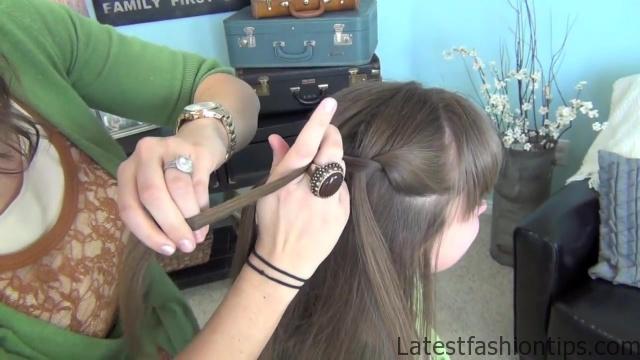
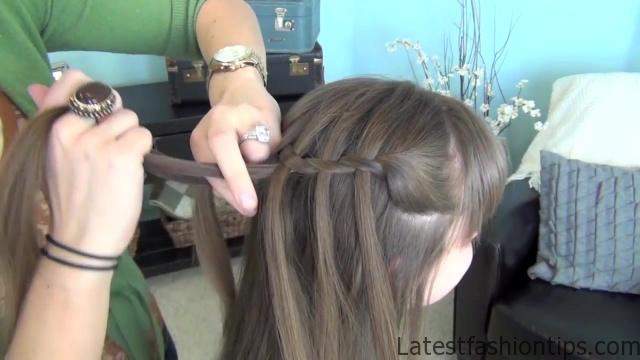
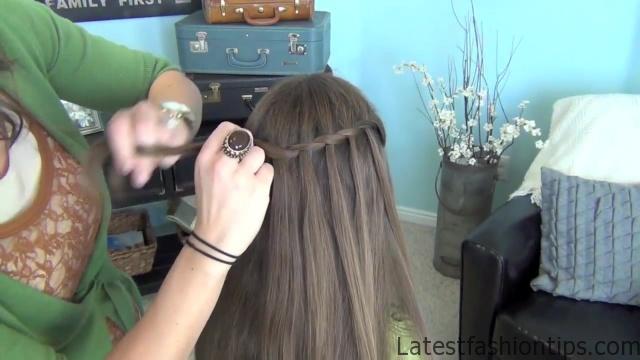
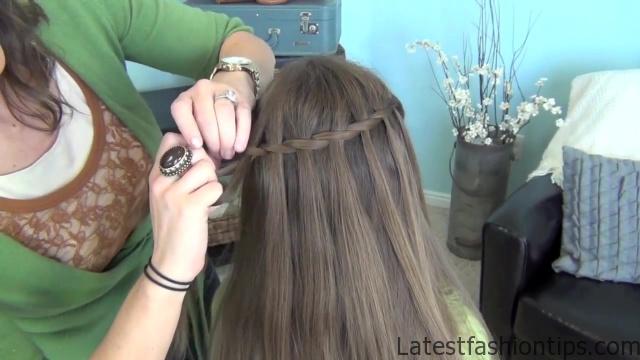
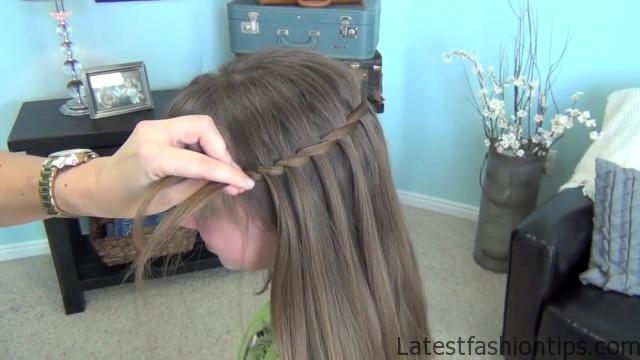

OK? Now, coming from the top, we are going to pick up a chunk of hair. And you can do small chunks or big chunks. It does not matter. We’re going to take that chunk right over the top and just let it fall right through the middle. OK? And then we are going to twist the hair again. So I will continue to show you. Now, a waterfall twist always has hair that comes from the top and goes through the braid or the twist and down, and then you can see the strands loose underneath. So, again, pick up a chunk from the top. I’m doing relatively small chunks on her hair this time, and I’m going to show you on myself in another post how to do bigger chunks. Now, I’m crossing it over that top strand but just then letting it fall through the middle so it is actually going to end up underneath the other strand. Can you see that? Then take the two strands, twist them over each other just once. OK, again pick up a hair. Put it right through. So you can see it is going straight through those. Then just take them and cross them. And again, you can do it as tight or as loose as you want with as little of chunks or as big of chunks as you want. Now I’m going to just twist it. I will turn her some more so you can still see.
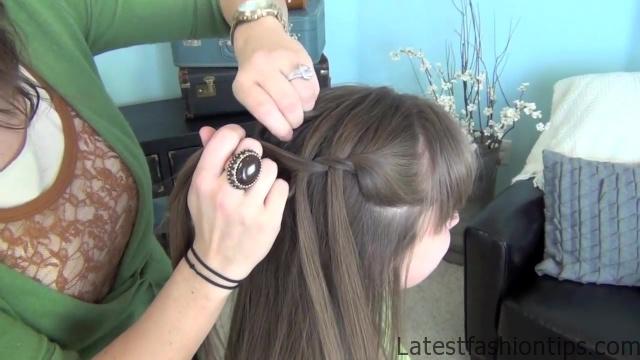
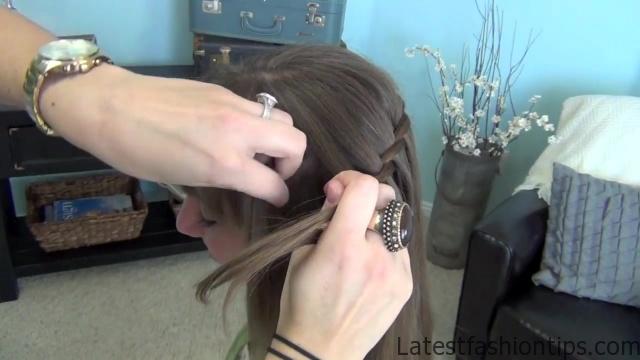
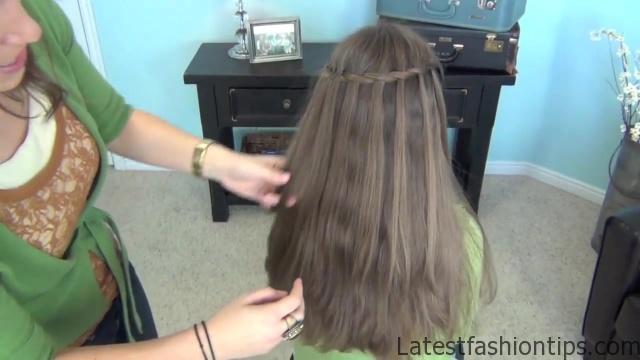
Pick up a strand. Just let it fall through the middle. Twist the strands over each other. And do not be afraid to just smooth them if you need to. And with hers, I’m going to go all the way around the head. Now, as you can see, these two strands are still that original piece of hair that I pulled from clear over here, which is why you want to get a pretty good sized chunk to begin with, because if you only grab a little teeny tiny wispy piece, you are going to be having a hard time by the time you get to this side. OK, let’s spin her just a little bit more. Maybe two more, so let it fall through, then twist the strands. Now on the last one I’m going to turn her just a little bit more I try to pick up this piece so that it kind of matches the other side. So I’m going to pick up that piece right here, take it through like so, give it one more little twist. And then what I’m going to do is take a bobby pin, and I’m just going to stick the bobby pin right inside that twist down as far as I can and then just hide it underneath the rest of her hair. So what we end up with is this beautiful looking stranded twist in the back. And you can see where the hair started at the top, goes through the actual twist, and falls down through the rest of her hair. And there you go. And it looks amazing, so, so easy. I’m sure you are going to love it. And I will be filming a self version on my own hair, and you can watch for that in an upcoming tutorial. See you later, guys.
Maybe You Like Them Too
- Celebrating Natural Black Women’s Hair: A Guide to Gorgeous Hairstyles
- Short Hairstyles For Women Over 60
- 20 Thrilling Twist Braids Style to Try This Season
- The Top 10 Asymmetric Hairstyles
- 10 Gorgeous Shaggy Bob Hairstyles To Get You Out Of A Style Rut

