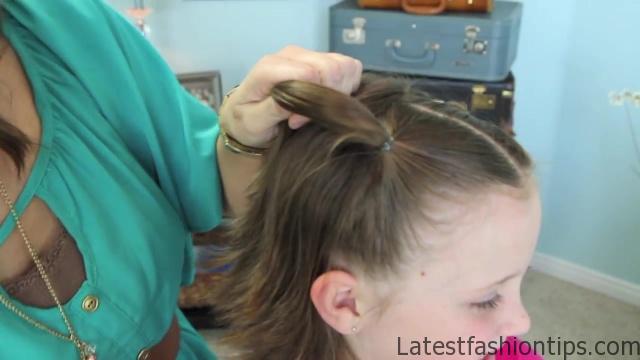
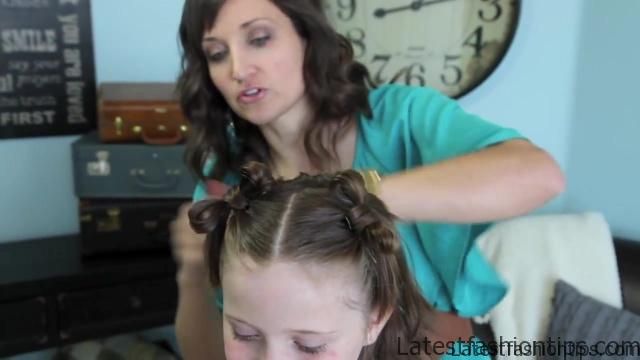
Hi, I’m Abby from LA. And this morning, we are going to film bow tails. So this sort of a take off of the Lady Gaga bow, but it is for short hair or for when you want to do you like a top bow, not your whole head of hair. This is a great one. So we have started by parting her hair down the middle and then doing like, a triangle shape over to her ears, and then securing it into just pig tails. And we are going to take the comb and divide that piece of hair turn her so you can see her just in half. So when you get the chunk the way you want it, then I’m going to clip this bottom section just out of the way for now. OK. And then we are going to split that top section in half. Will you hold that for me, babe?
Bow Tails Short Hairstyles Photo Gallery


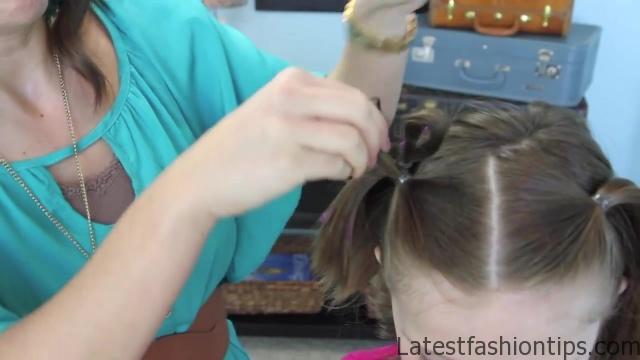
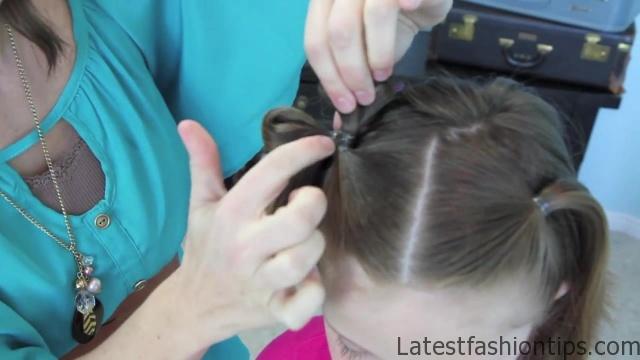
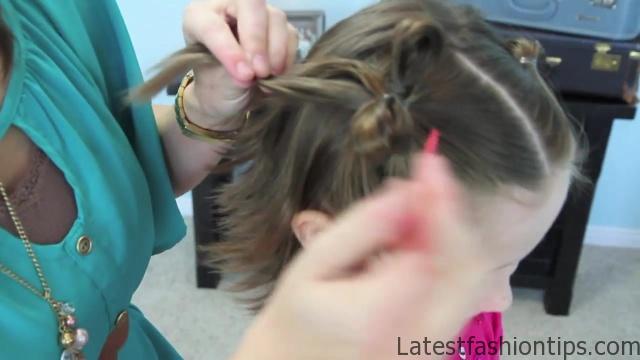
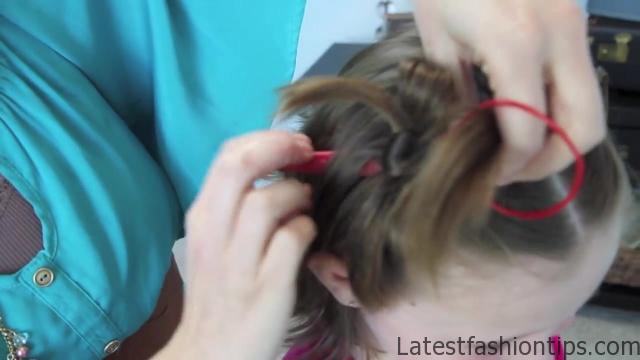
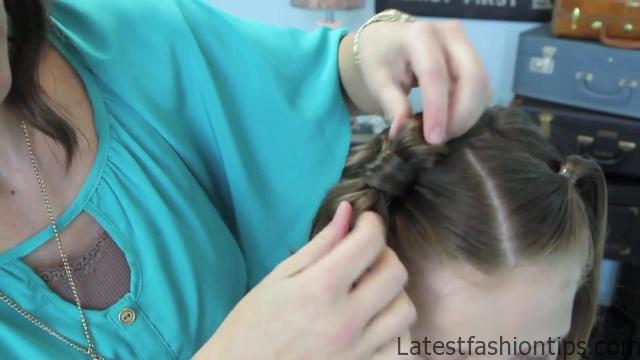
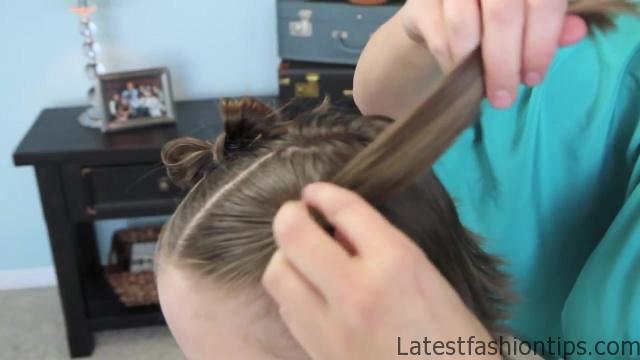
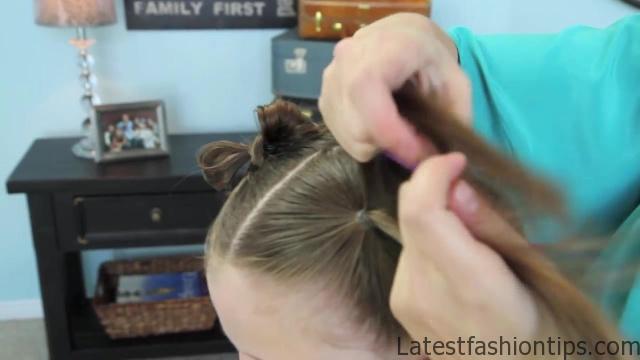
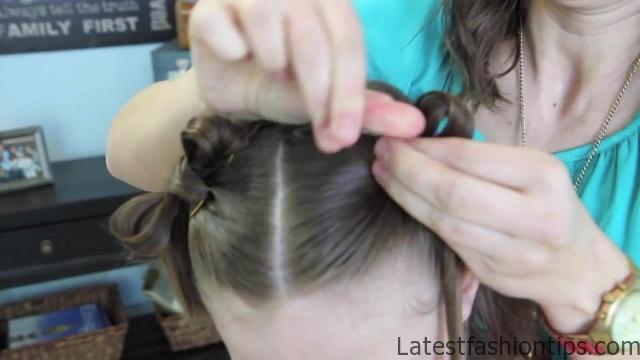
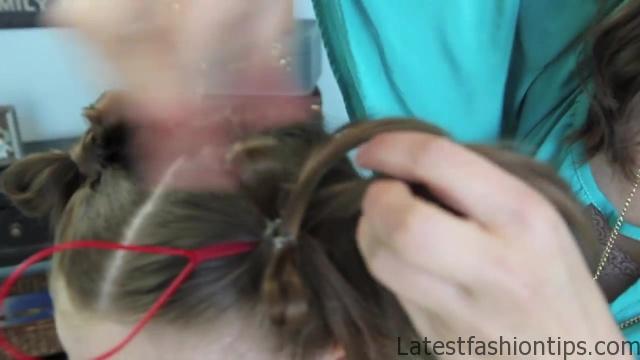
Now, I’m going to wet it down just because I think it stays in better if it is wet. But it is totally up to you whether you want to do that or not. We’re going to take this hair and make a bunny ear, like a little loop. And then we are going to take a clear elastic and we are going to go right over and secure that bunny ear as close to the original elastic as possible. And I will show you a better view of that in just a second. So you can see my original elastic and now the elastic we just did. OK. And we are going to make the other loop. Again, we are going to wet the hair down. Make a loop. Take our elastic. We’ll go over that piece of hair and try to get it down as close to that original elastic as possible. And secure it. So now you can see your original elastic and then two other little elastics in there. Now we are going to un-clip that back piece of hair we had. And you can see let me turn her so you can see the back that these two pieces crisscross over each other like so, and this comes up in between. Now we are going to take a topsy tail. And if you do not have a topsy tail, then I have a post on how to make one at home. Like a homemade one that you can try out.
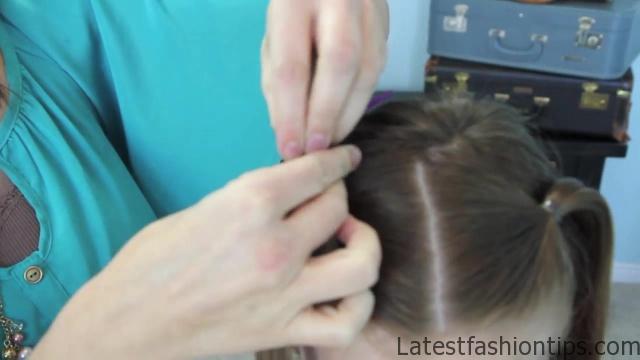
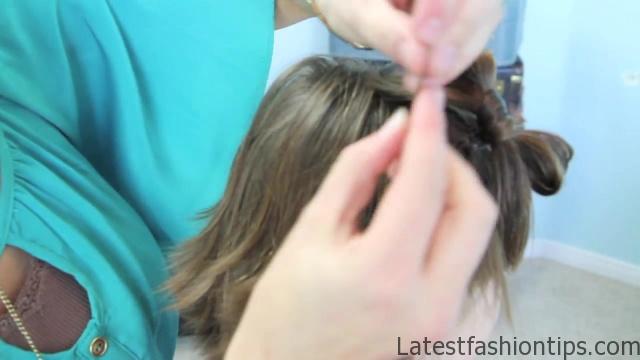
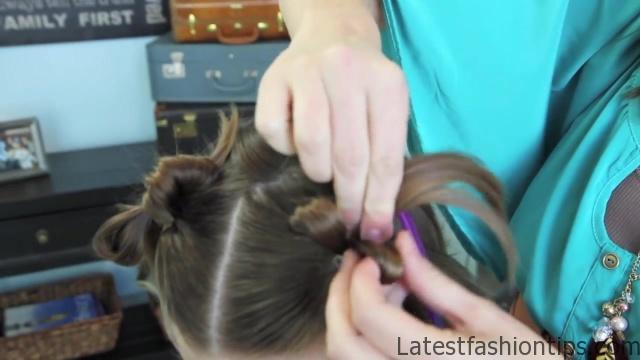
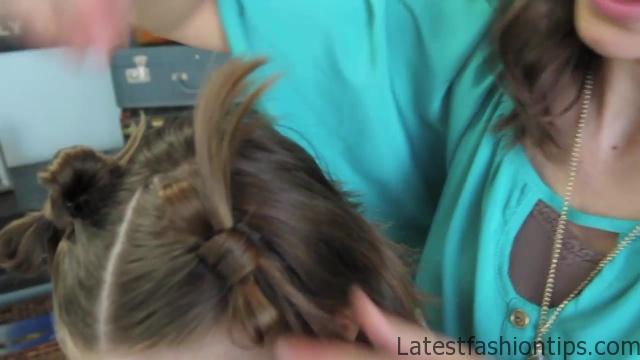
We’re going to take the topsy tail. We poked it in through just underneath the elastic. We’re going to pull that hair over and through the topsy tail, and then pull the topsy tail through. And it is going to flip that hair back underneath like so. Now, just for a little added security tip your head up just a little bit, there you go I’m going to just take a bobby pin and just tuck it right into that just to hold that hair in place. Then you can fluff your bow if you need to. Use some of these. OK. Now the other thing I like to do you can see that from the back, this is standing up just a little bit so it pokes up off of her head. I also like to just take a bobby pin and just grab that little piece of hair. I will show you again, so you get a good view. Grab a little piece of hair right here and then a bottom hair and secure it. So it just pulls that down and it sits it a little bit tighter onto her head. I think those just look cuter. OK. So let’s the other side. Switch over here. Again, going to just divide the hair in half. So we had a viewer send this hairdo in and we thought it was adorable on Facebook. So we thought we’d give it a tutorial. Promised that we would. OK. Split it in half again. Can you hold this one for me, sweetie? Thank you. Wet the hair down. Do you have an elastic? Make the loop. Take the elastic and secure. Next side, same thing. Make your loop. Take an elastic. Thank you. Tip up for me. Secure. OK. Take that center section of hair. Tuck the topsy tail in. Pull the hair through. Voila. And then bobby pin. Just going to do one right there. And one on the back, just to hold those down a little bit tighter. And there you go. And then you can just tug and pull and fluff. And as they dry, the bows will dry out a little bit cute. Like, the ends will dry and be a little softer looking. And there you have the super fun bow tails. We hope you enjoy and we will see you on the next tutorial.
Maybe You Like Them Too
- Celebrating Natural Black Women’s Hair: A Guide to Gorgeous Hairstyles
- Short Hairstyles For Women Over 60
- 20 Thrilling Twist Braids Style to Try This Season
- The Top 10 Asymmetric Hairstyles
- 10 Gorgeous Shaggy Bob Hairstyles To Get You Out Of A Style Rut


