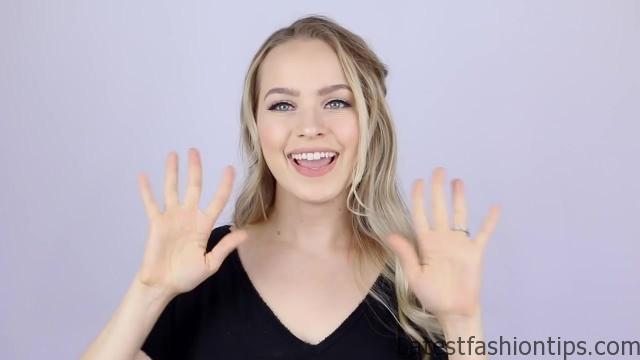
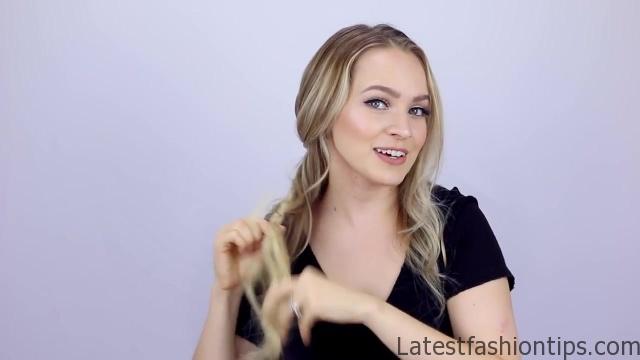
Hey everyone Kaylee here with another braid breakdown this is where I teach you guys the breakdown of how to do a little bit more of an intricate braid last time I showed you guys how to do a four strand lace braid today we are learning how to do a zigzag braid this is actually pretty easy compared to most intricate braids it looks really cool and it is a half-up half-down style without looking like a typical half-up half-down style so I’m loving it I hope you guys enjoy this and let’s go ahead and get into it this braid is just breaking down into two steps a lot of times.
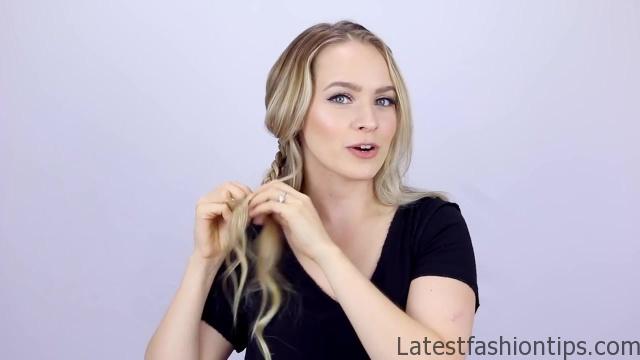
I feel like four or five steps just to this time step one is to lace braid for three stitches step two braid it normally I love the simplicity so you can start off by grabbing a nice large section of hair from near your hairline and your part you can choose to bring all this hair straight back or you can leave some out like I pretty much always do then you are just going to braid it a couple of times normally just to get your braids started the only important thing about this is to make sure that you braid under rather than over so to do that when you take your strands to braid it just bring it underneath the middle strand and underneath the middle strands and that way you make a d look with your braid and now we are gonna get started on step one which is to add in three stitches of a lace braid a lace braid is just when you bring in here to one side of the braid so we are only gonna be bringing in hair to the top side of the braid three times so you are just gonna pick up one piece of hair you are gonna put that with your braiding section that’s on top put them together and braid it in then on the other side you just sprayed it normally so that was one now we just have two more so one section of hair put it with your braiding section braid it in and braid the other side normally and now this is our third piece so it is the last one of the lace braid you are just going to pick up your last piece of hair put it with your braiding section.
The Braid Breakdown Zig Zag Half Updo Photo Gallery


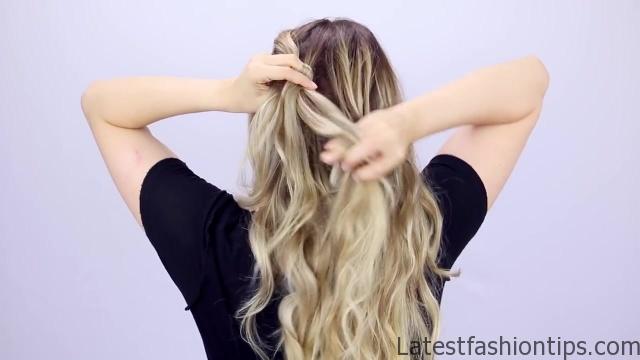
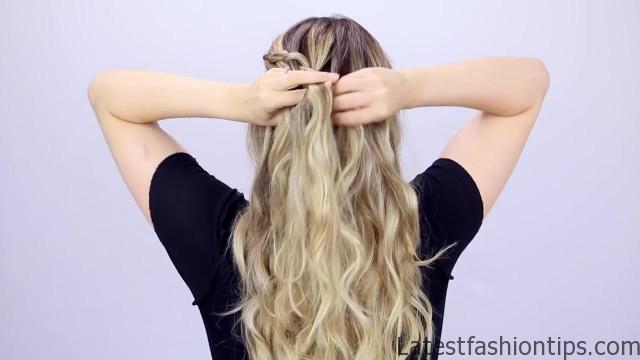


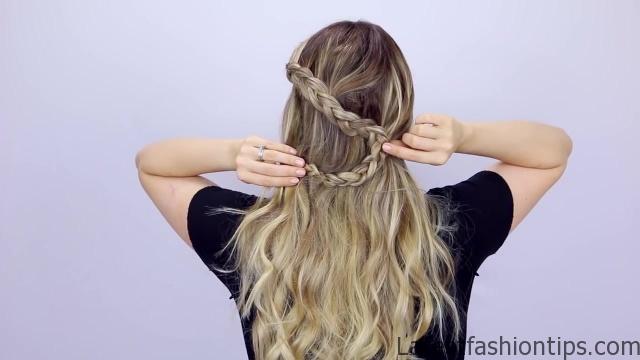

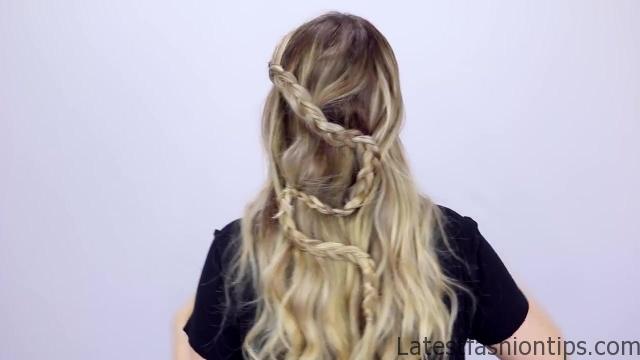

Braid it in now we are on to step two which is our nice little lazy girl hack and that is right a few inches normally because we need the braid to get from here to here and you could do that with a lace braid all the way across but why I’m gonna pull it over my shoulder and just braid this way which is lovely because I feel like my arms are gonna get really sore really fast if I do not give them a break an hour back to step one which is to lace braid three times the reason that we are doing that is to kind of hang the braid where we want it to be it is like hanging a picture we have got this little diagonal line going here we want to hang the braid right here.
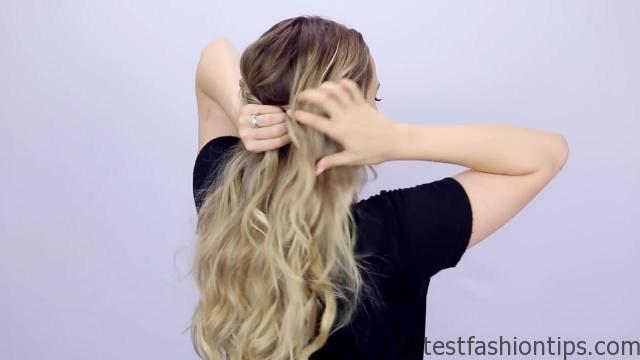
I’m gonna be pulling hair from right in this general vicinity that way I can pull this hair back into the half updo so I’m just going to start with my first piece of hair right here I’m gonna braid it in then you braid the other side normally pick up your second piece of lace braid braid that in Brahe the other side normally and finally pick up your very last bit of hair now you can give your arms a break and braid a couple of inches normally so the reason that I always do three pieces of lace braid everytime is so that each piece of the braid gets new hair so that you can keep it nice and long and you can keep doing this exact even though my hair is long there’s no way that if I started and then didn’t add in more hair it would be able to make a zigzag so adding in more hair and making sure that you add in long pieces of hair every time you do the lace braid is really helpful and making sure the spring gets as long as you want it to be once you have rated enough hair to get to the other side of your head it is time to go back to step which is to add in three pieces of lace braid make sure that it is slightly lower than our last hanging place and then we are going to hang the braid right here.
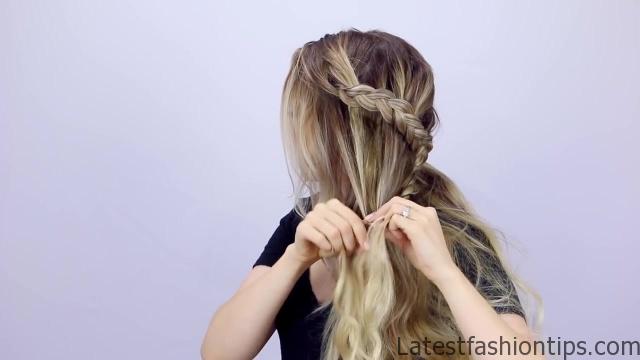
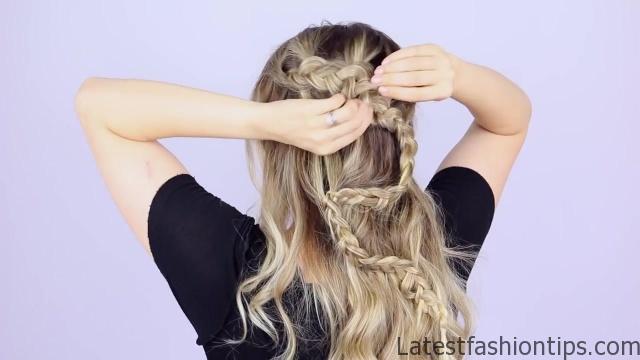
I’m gonna add in nice big pieces of hair for this because you can see my sections are getting pretty short so I’m just gonna take a nice big section of hair here put it with my braiding section and braid it in very good as I normally then pick up some more hair and braid it in and one final piece of hair and now step two braid a few more inches and you can do this as many times as you want you could have like lots and lots of them or you could just you like to whatever you are here let’s you do do that now I have reached as far as I want to go so I’m going to go ahead and finish my right off the way to finish it is that we are going to kind of hang it one more time but instead of adding in three more pieces I’m just gonna do it once because I want to get the hair hanging in this particular position but I do not need to add in more thickness I do not need to add in more length.
I just want to finish it so to make my job easier I’m just gonna add in one more section so I’m gonna pull my braid over to where I want its final position to be and I want to make sure that it is lower than this last piece so you are just gonna cut it where you want it grab a piece of hair from there and then bring both of those over your shoulders that you can braid it going to braid in that little anchor piece and then we are gonna be done now I have not been able to see what this braid looks like the whole time I’m doing it so it might look a little funny and awkward but the good thing about it is that we are gonna go through and we are gonna pull it apart and when you do that it makes everything flow so much better and it can really fix any little awkward things that you have accidentally done while you are braiding which honestly happens to me every time.
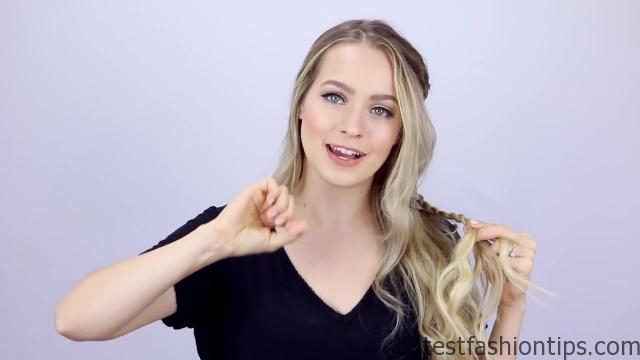
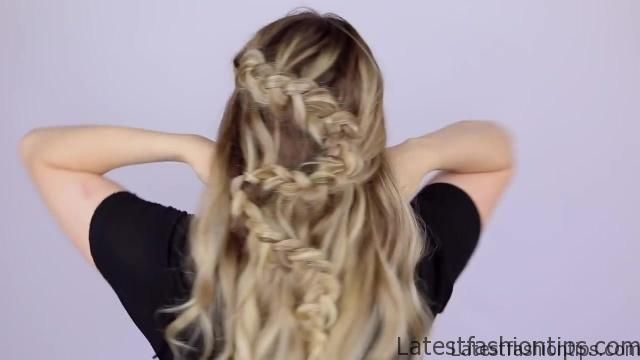
I do this braid just gives a character so this is what it looks like now and I’m going to go ahead and start pulling it apart so that it can get a lot more just seamless and pretty and how I want it to be and the way that I’m gonna do that is to use a little bit of texturizing powder here’s a little slippery so to combat the slipperiness and to make sure that the braid stays pulled apart and really nice and big and fluffy I’m just gonna put a little bit of this on my fingertips and then I’m going to rub that together and I’m going to use that on the braid so I like to start up at the top and I’m just going to massage each piece you guys if you watch my videos definitely know how this goes but you are gonna see is this happens that it helps to loosen things up and make all those like droopy saggy areas look a lot better because it is loosening things up it is just letting the braid breed and the more it can breathe the more just flows the way that it is meant to I find that once you get towards the bottom it is a little bit harder to pull it apart because basically all the slack from up here has been too get out of here so now it is super tight if that happens you can just kind of slide your elastic a little farther down your hair here and then start massaging at the bottom and that way you kind of introduce a little bit more slack into the braid it makes it a little bit easier to pull it apart those of you guys who are always telling me that you have really long hair and you do not know what to do with it should try this hairstyle because it would look SuperDuper cool this is it for the hair sale once we pulled everything apart the zigzag looks a lot better a lot smoother and I love that it is super bohemian and very and survivable very perfect for summer and I just love this method because I think it is a little easier but it looks super duper intricate so I hope that you guys try this out if you do snap a picture send it to me on any social media with the hashtag Talley Melissa I will find it I will like it and comment on it because I so appreciate seeing you guys recreating these hairstyles that makes my day so that’s it for this braid breakdown I hope you have enjoyed it be sure to click that subscribe button if you have not already and I will see you my next video well bye.
Maybe You Like Them Too
- Celebrating Natural Black Women’s Hair: A Guide to Gorgeous Hairstyles
- Short Hairstyles For Women Over 60
- 20 Thrilling Twist Braids Style to Try This Season
- The Top 10 Asymmetric Hairstyles
- 10 Gorgeous Shaggy Bob Hairstyles To Get You Out Of A Style Rut


