Today, I will going to show you guys how to DIY some cute new workout shirts from old t-shirts that you might have. I have a giant pile of old t-shirts that. I do not want anymore. And I was ready to give them some new life. And I thought. I would give you guys a tutorial in case you wanted to do something similar. So let’s go ahead, and start off by talking about things that you will need first of all you will need a t-shirt or possibly two, and then some fabric glue, I have got this at Wal-Mart, and a pack of three for , and then some scissors we are going to start off by cutting the shirt into a racer back, and the is going to be the base for all three different shirts start with your shirt laid out flat, and then if you want to if you need some kind of guideline take a racer back that already fits you pretty well, and lay it on top, and then that way you can see the line that you need to cut to cut off your sleeve then go ahead, and fold the shirt over in half to make it a little bit faster, and make sure that it is lined up perfectly once you have it lined up you can either put your Razorback back on, and trace the outline on the Razorback or you can do what.
DIY No Sew Workout Shirts from T-shirts Photo Gallery
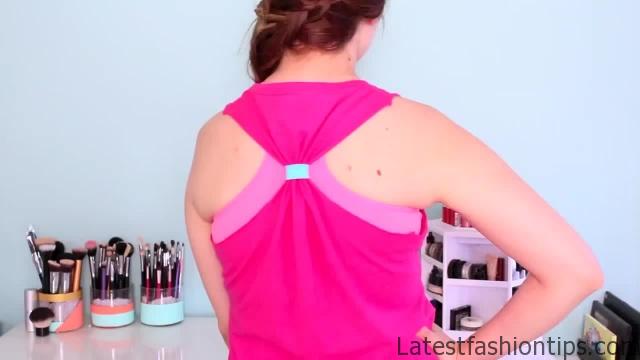

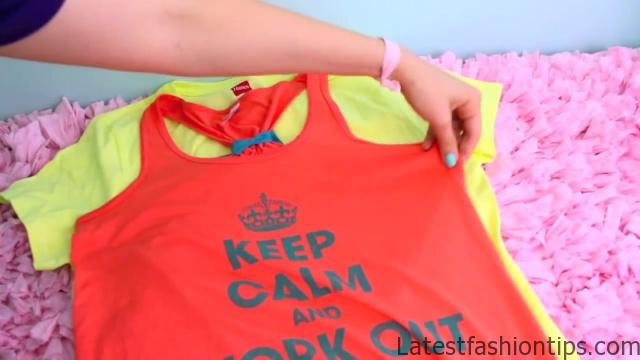
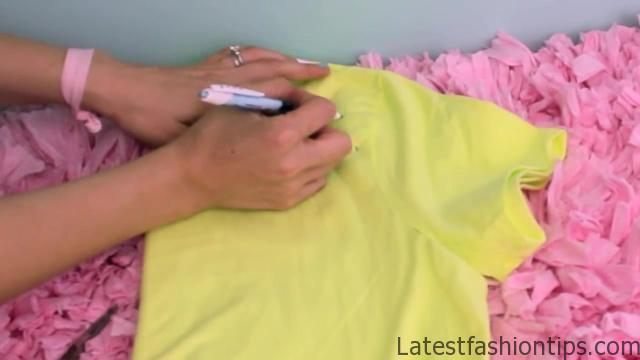
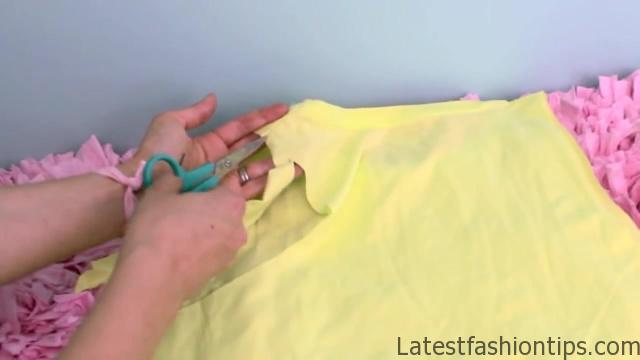
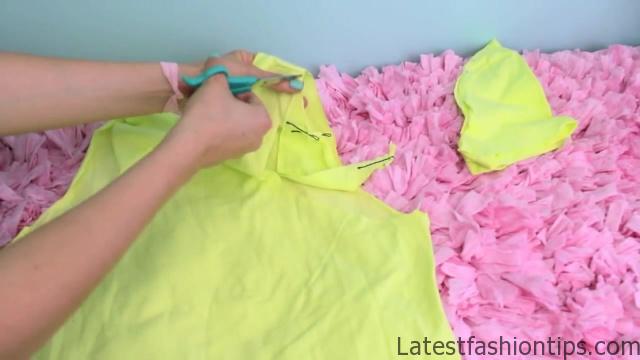
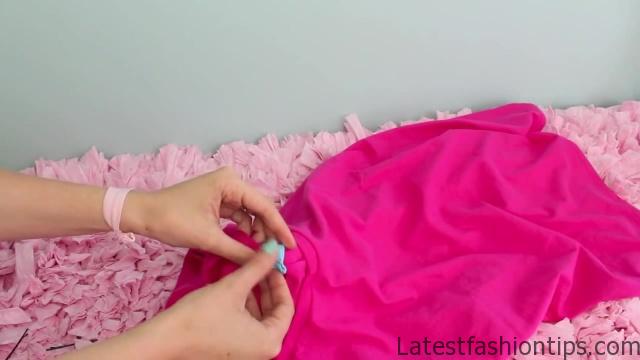

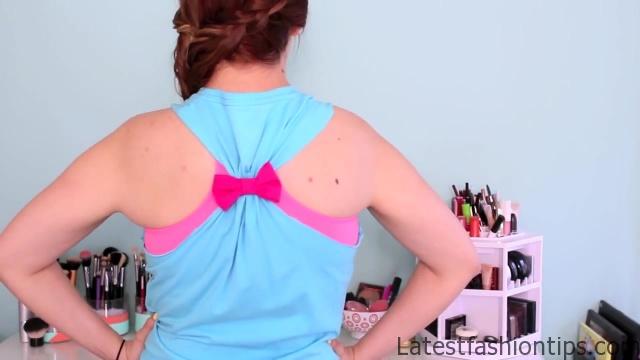
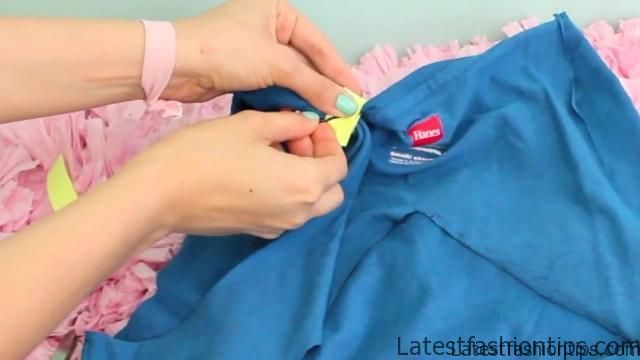
I do, and just kind of eyeballed it based on what. I saw when. I held the racer back up to my t-shirt then go ahead, and cut according to that line if you are using a pin or something permanent make sure that you line in sided we are going to cut. So you do not end up with any lines on your shirt then put the shirt over backwards, and now we are going to cut out a little bit more of the back now the is the part where my whole like racer back thing falls apart since this racer back has a bow but if you have a normal one it will actually help, and you can kind of see the line that that would make, and then you just follow that same line using either chalk or a pin or something like that to mark your outline once you have that mark to go ahead, and cut that out, and then at the top you want to make sure that you connect the two lines together here. So that you do not end up with any weird little corners sticking out then take the fabrics that you cut off of that sleep flip it over, and use that as your outline for the second sleeve now the easiest way to do this would be to go ahead, and outline with a pin but. I bobby pin it in place, and cut around the outside. I do not know why but it made sense in my head at the time, and again make sure you match up the two ends on top, and you have your racer back, and then if you are going to do more than one shirt what you can do is use the stuff that you cut off from your previous shirts to create the outline. So become kind of a pattern for your neck shirts shut up, and you can do that with the back as well, and now for the simple racer back this one is really easy what you are going to do is take the sleeve from the shirt that you cut off or you could take one from another shirt that’s in another color, and cut enough to go ahead, and wrap around the back of the shirt, and clip that off then gather the back of the shirt together, and wrap the little strip of fabric around it, and then before you place the second sign on top put a little dot of glue down, and secure that second side on top of the first side, and then you are going to want to pin that in place to dry, and of course.
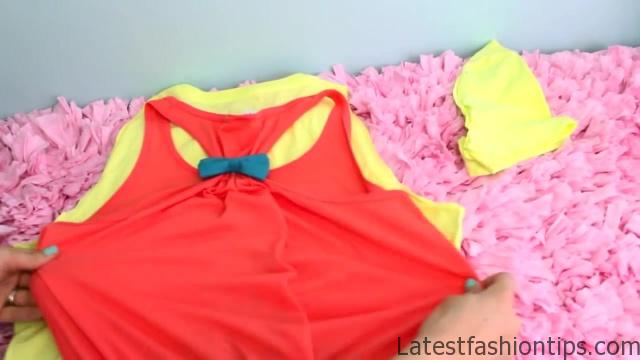
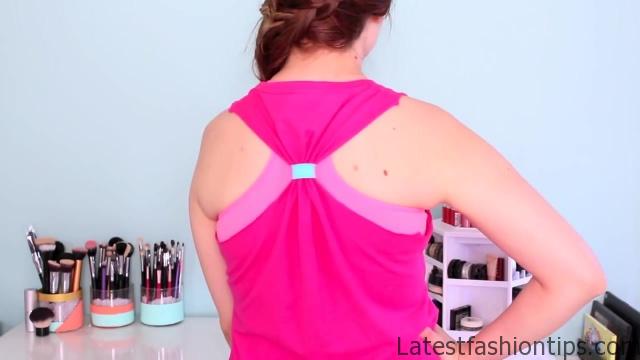
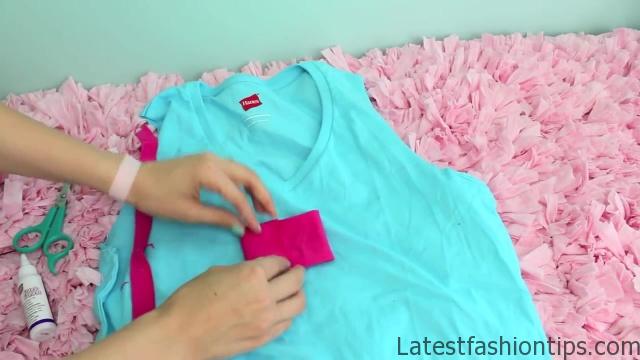
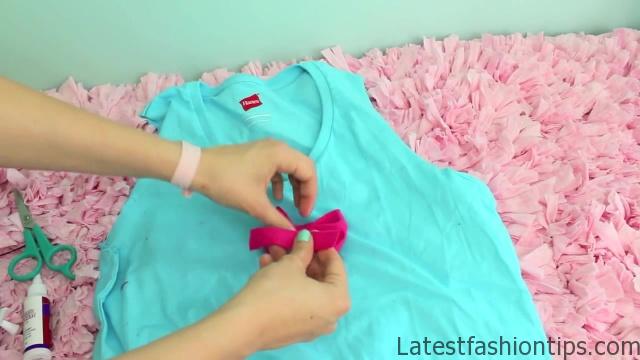
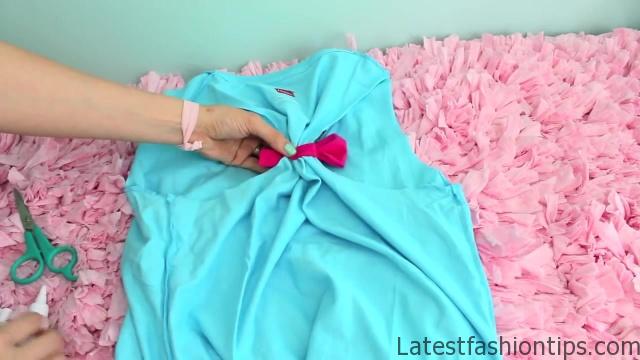
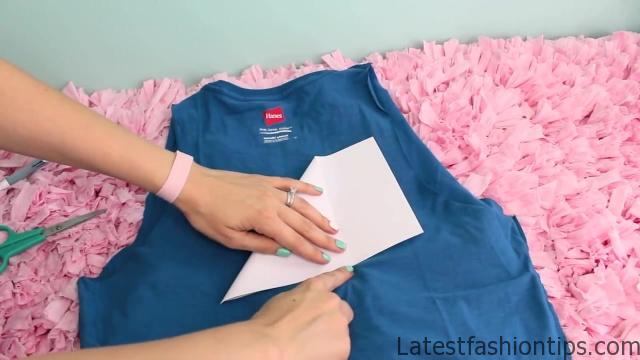
I used a bobby pin. Because, I will Bobby’s in everything after waiting about two hours the glue will harden, and you can see that it holds really well, and then you are going to wash, and take care of the shirt according to the directions on your fabric glue, and that is it for your little simple Razorback, and now for the bow which is my personal favorite you are going to go ahead, and cut the hem off of the sleeve, and then lay the sleeve out, and create the biggest rectangle that you can from that sleep basically you just want to use as much fabric as you can if you want a smaller bow you can always make the rectangle a little bit smaller then fold your edges in, and you are going to fold each side into the center, and then you are going to place a line of blue where those two sides intersect make sure to squeeze them together really well, and then go ahead, and punch together the middle of our little rectangle, and you have a bow then measure the hem around the bow to create a little strap to hold it together, and then you want one more piece of fabric that’s going to be about inches long place that against the back of the bow, and then wrap your Center fabric around that again placing a little dot on glue to hold that in place, and also pin it. So that it will dry holding together in place then bunched together the back of the shirt, and use that extra piece of fabric to wrap around the back of the shirt again playing that little dot, and flew down first, and then fade the second side on, and then in place, and let it harden for about two or three hours, and then once that’s done you can go ahead, and take off your bobby pins, and if you have any extra fabric you can go ahead, and trim that off, and that is it for this style of shirt, and finally we are going to finish off with this cutout workout shirt this one’s pretty easy you are going to start with your shirt inside out with the back facing up, and then you are going to create a triangle now what.
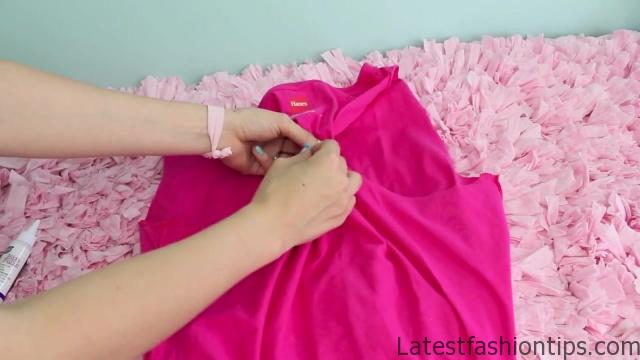
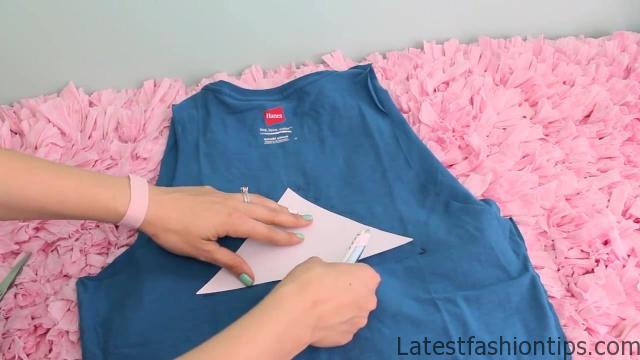
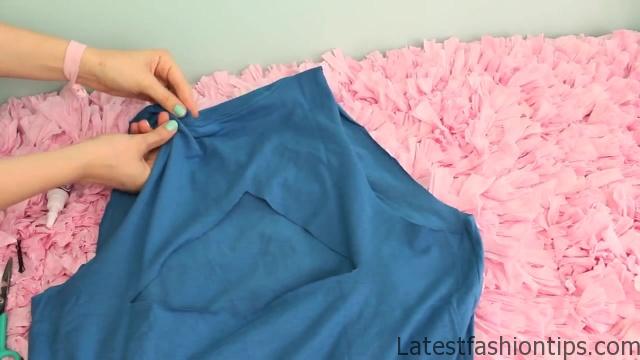
I did to get my triangle was to first fold this paper in half, and use that crease line to go as my guide for line to cut the paper in half then. I took the top left corner, and attached it to the bottom side, and folded that, and then did the same thing with the top right corner then that created a little triangle with the creases. And I cut that out. So that’s basically how. I made my triangle you guys can do whatever you want or whatever works for you can even eyeball it if you want then place that down in the center kind of in the back of your shirt where you want that cut out to be, and trace that right there you want to make sure that the bottom of the triangle the bottom corners are below where the arm holes are or else you end up with a really weird awkward mess, I will in a way to big cut out, and then once you have those lines in place you are going to go ahead, and use them as your guide, and cut out a little triangle in the back of the shirt once you have that done you are going to go ahead, and bunch up the top corners, and base you are going to take the hem from the sleeve or even the bottom of the shirt if you want, and wrap it around, and measure that, and then measure another piece at the exact same size then you are going to start up at one of the sleeves, and bunch it up, and then go ahead, and put one side over put the down of glue down, and in the second side, and then bobby pins, and then you are going to do the same thing on the other side once the fabric glue has dried you are done, and you have your new cutout t-shirt. So that’s it guys. I hope you enjoyed that make sure to check out my previous post which was a makeup tutorial, and be sure to come back later on in the week when. I will have a workout hair tutorial. I love you guys very much and, I will see you then Bye.
Maybe You Like Them Too
- Developing a Personal Style: A Guide to Fashion and Authenticity
- All The Rihanna Style Trends We’re Gonna See In 2022
- Sexy prom dress
- Cheap formal dresses
- Avel Bacudio Fashion Designer 2016