Hey guys happy spring does it feel like winter where you live because it sure does here but. I asked unders poll what kind of post you guys wanted to see and you guys voted for easy spring hairstyles, I’m feeling you guys would.. So I put together some unique and different hairstyles. I think you guys are going to love. So let’s go ahead and get started quickly.
EASY HAIRSTYLES FOR SPRING Perfect For Medium Hair and Long Hair Photo Gallery


I want to show you guys how I prepped and curled my hair but if you are not interested. I will put a timestamp down below. So you can just skip ahead to the tutorial it is totally okay. So just got this in the mail and, I was dying to use it, and it is t3s new a single pass curl and this is a thirty two millimeter barrel. So obviously this is my first time using it but. I did see the tutorial for it online and they use this like really simple technique that I have never tried.
So I thought that we would try it here together okay guys. I know it is just a hot tool but would you look at this this is absolutely beautiful. I think t3 has the best branding in the game and right off the bat. I noticed it is a super light weight which is a big bonus that your arms do not get tired. So this has five heat settings and you just twist this oh wow you guys. I love this you have no idea how many times when, I’m using a curling iron or curling wand.
I always end up pushing the buttons up here and like changing the temperature or turning it off. So this is super innovative. I like this. So, I’m going to do it exactly how they did it on the website, I’m just going to grab like a one-inch section of hair to start, I’m going to open the clamp, I’m going to slide it down the section, I’m almost at the ends and then, I’m just going to curl it in right the hair it is feeling pretty warms like for five seconds, I’m just going to open the clamp a little bit and pull this down oh that works. So well and on the website they said it just leave your curls to cool stuff. So this little piece fell out. If you have layers take that into consideration with this technique but it is really easy to just go back in and curl them.
So, I’m just going to again open up my clamp slide it on to my section slowly slide it down to heat it up and then start rolling inwards away from my face. I count down from five and then just open it a little bit and let out the curl all right let’s try again you guys this technique is way too simple. I think this is going to be my new go-to curling technique for my hair. I do not know how I never tried this before.. So I get to almost my ends wrap it up you guys, I’m convinced I have been curling my hair wrong all of these years this is way too simple, and it is actually making the whole curling process much quicker you guys this only took me a couple of minutes to do look how like nice and natural these curls are.
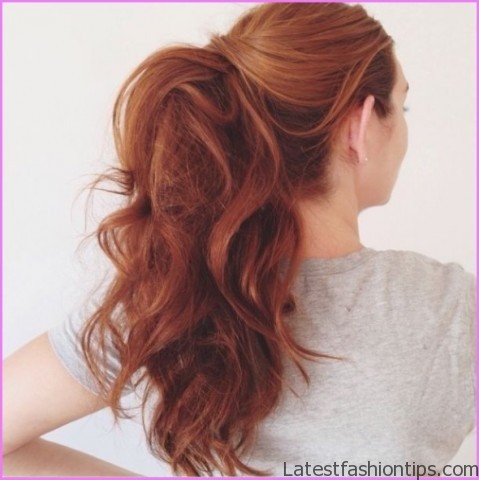
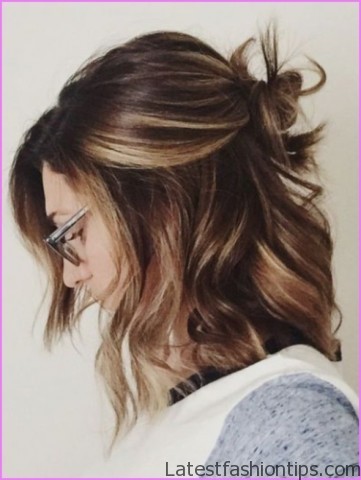
I love them this is my new technique. So, I’m just going to quickly go ahead and repeat the same thing on the other side. So on this side if you want your curls to go away from your face you just want your clamp to be on the underside of your section. So this is the final result you guys this only took me about 10 minutes to do, I’m super happy with the way the curls came out they are just really soft and natural and that’s the look that. I usually go for it every day yeah now that my hair is correct let’s go ahead and get started on the hair tutorial first up is a simple half of hair style. So first section off your hair at your temples and then just separate it from the rest now we want to tie the section into a knot. So just hold it in your left hand and then with your right hand wrap your hair up and around your fingers holding it in place now put your index finger and thumb through the center of that loop and pull your ends through the hole nice and tight this may sound confusing but all.
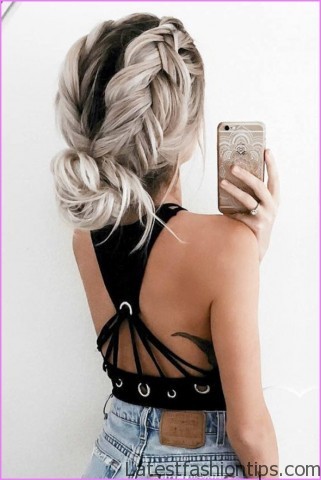
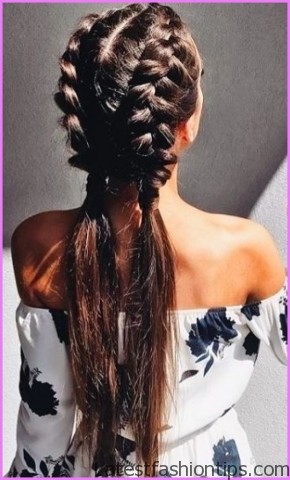
I did was tie the section around itself into a knot next secure your knot by tying a thin hair elastic around the bottom of it now feel free to tug on the sides of your knot just to help it stand out and that’s it an easy knotted hairstyle that’s perfect for spring you guys are going to love this one. So gather all the hair that’s at the crown of your head and then divide this section into three equal pieces now cross that right section under the middle section and then cross your left section under your middle section and this is the start of our Dutch braid next together about a one-inch section of hair from the top of your head and join it into the right section once joined in cross it underneath the middle and then you just want to repeat the same step on the left side next to gather all the hair that’s above your temple on the right side and then join it into that right section once it is joined in cross it underneath the middle and then repeat.
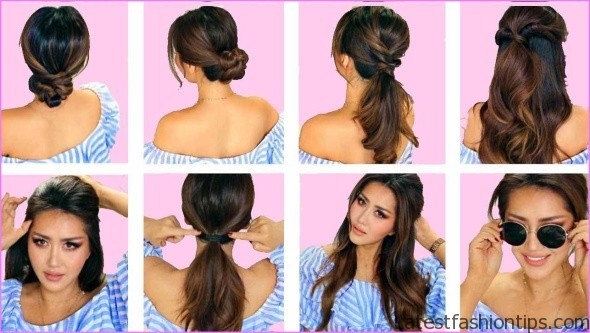
Dutch braiding until you reach about your ears once you have reached your ears gather all of your hair including the hair at the nape of your neck and secure it into a ponytail next to transform this hairstyle just pull on the sides of your braid this is going to help it appear larger and more voluminous and feel free to pull on your side sections as well just to help loosen them and help them stand out now to finish off the hairstyle grab a small piece of hair from the underside of your ponytail and you could break this piece also and just begin wrapping it around your hair elastic to conceal it once you have reached your ends just take a bobby pin slide it over your ends and then up and through the underside of your ponytail and there you have it a unique way to pull the hair up out of your face for the spring okay this is such a quick way to create a fun that looks like you spent forever on it gather all of your hair into a ponytail right.
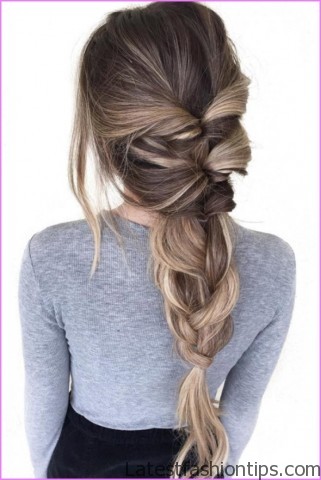
Where you want your bun to sit next simply three strand braid your hair by dividing your hair into three equal pieces and then crossing that right section over the middle and then the left section over the middle and then just repeat until you reach the very ends of your ponytail now the cool part grab a small piece of hair from the end of your braid it can be any piece you just want to make sure that it is nice and small now hold onto that piece with one hand and with your other hand just slide and push your braid upwards making sure that you are holding that small section the entire time once your braid is nice and squished like this just begin wrapping it clockwise around your ponytail until you have reached your ends once your braid is wrapped make sure your ends are bobby pinned first and then start pulling on different sections of the braid and bobby pin it into place and there you have it. I love this bun it looks. So intricate but now you know the secret.
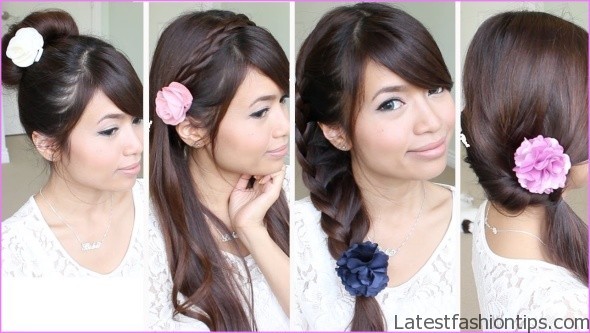
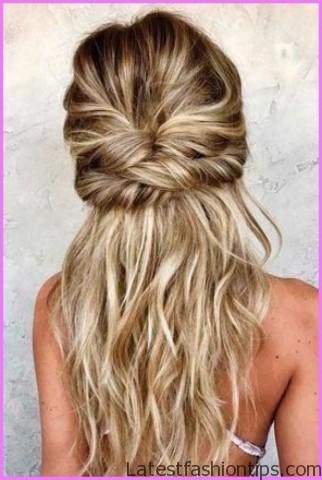
I love this hairstyle it just reminds me of sundresses and warmer weather first step gather a section of hair on the left side of your head and now divide the section into two equal pieces and put one in each hand now cross that bottom section up in front of the top section and then bring that top section down then repeat bringing that bottom section up in front of your top section and then bringing that top section down and then keep repeating these steps until you have reached the end of your section once you have reached the end just bring it across the back of your head and then begin pulling on the top sections of your twists to help them appear more detailed and larger once you are happy with your twists just bobby pin it into place just to the right of the center of your head now repeat the same steps on your right side twisting your two sections around one another and then bringing it across the back of your head and pulling on the tops to help it stand out now before we pin this into place pull your ends behind that first twist that we created once you are enter through just bobby pin them into place and this small step just helps to hide your bobby pin and then you are left with a really pretty and easy half of hairstyle that’s perfect for any spring occasion definitely hard to pick a favorite but. I think this half a path down twisted hairstyle is it it is just. So quick and easy it can gets really feminine and pretty and perfect for spring I’d love if you comment it down below and let me know which look was your favorite do you like half up half down hairstyles are you digging ponytails for spring I have loved in them but.
I really hope you found today’s post helpful if you did please give it a thumbs up and, I will link down below some more easy hair tutorials if you want to check those up but thank you guys. So much for reading and I will talk to you in my next post bye.
Maybe You Like Them Too
- Stephen A. Smith A Biography
- Steny Hoyer A Life in Public Service
- Sheryl Underwood A Life in Music and Comedy
- Scott Walker A Life in Song
- Sara Evans A Biography
