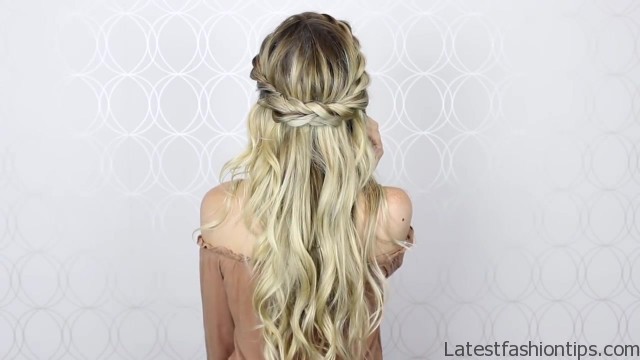
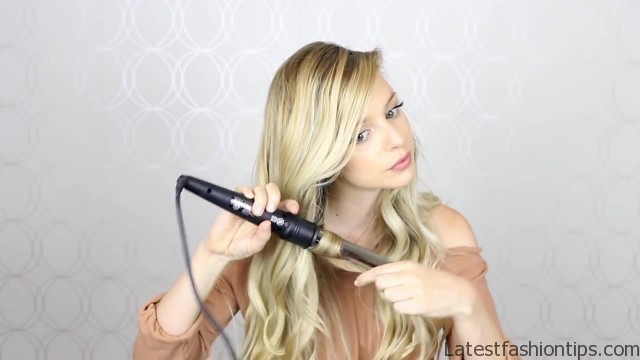
I want to share with you a really simple hair tutorial, and it is just double twisted crown braid. I’m love it just had that boho effortless vibe that is perfect for summer even though sadly summer is coming to an end before this tutorial you only need one thing and that is bobby pins. I personally use about eight of them for this hairstyle but you will need at least four before. I started. I went ahead and curled my hair with my nume thirty two millimeter wand and, I curled all the pieces around my face away and then it curled the other pieces in opposite directions. I wasn’t too particular about it and, I described different sizes to really give me that effortless look now the important part. I think a really deep side part really makes this look.
HOW TO Double Twist Crown Braid EASY SIMPLE Photo Gallery

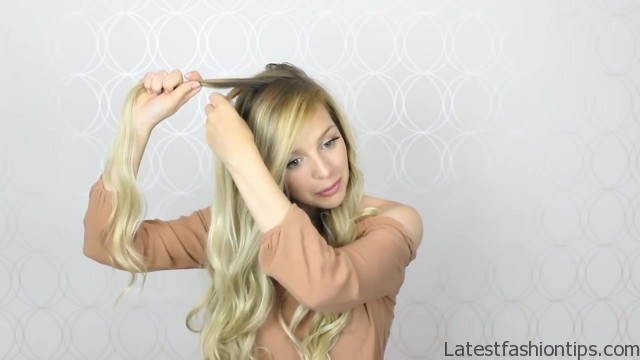
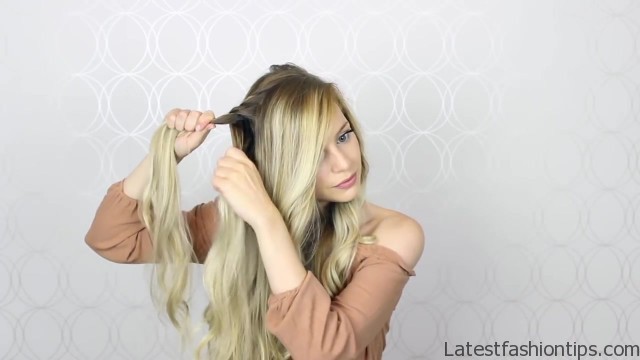
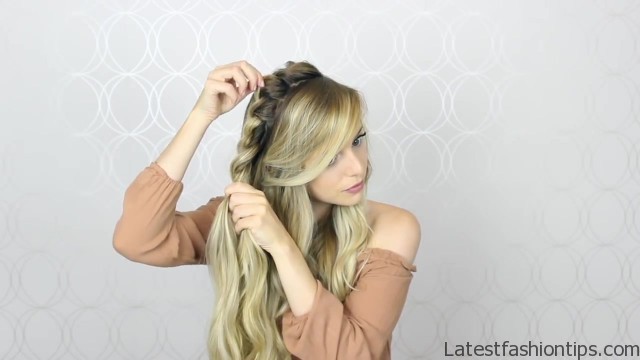

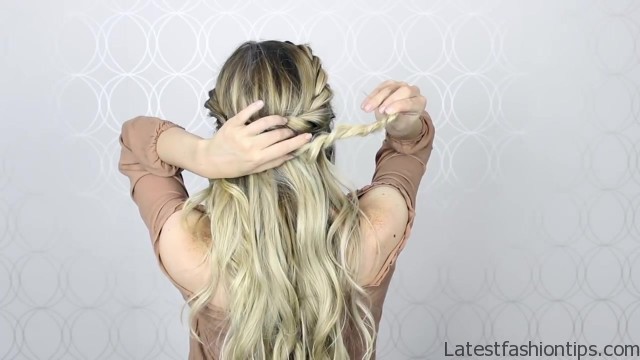

So I started right at the arch of my brow but feel free to part your hair as normal and we are going to be working with two sections. So for the first section you want to start halfway at your part and then grab almost all the way to the back of your head and you are going to want a section that is about one inch in size and then directly below this section you are going to want to grab our second section, and it is going to be roughly the same size and you do not have to be too particular with this. So now that we have our two sections what we are going to do is take the bottom one and you are going to want to pull it up in front of the top section and twist it around. So it looks like this. So now what was our top section is now at the bottom you are going to pick up another a one-inch size section of hair join it into that bottom section and just make sure that it is completely tangle free and then same thing that we did before cross that bottom section up and then that top section be at the bottom, I’m going to continue this halfway on my head stopping at just about my ear remembering to add hair to the bottom section as. I go and just twisting it up and in front of the top piece once.
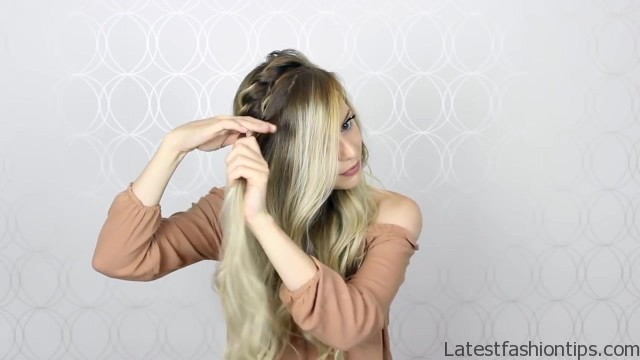
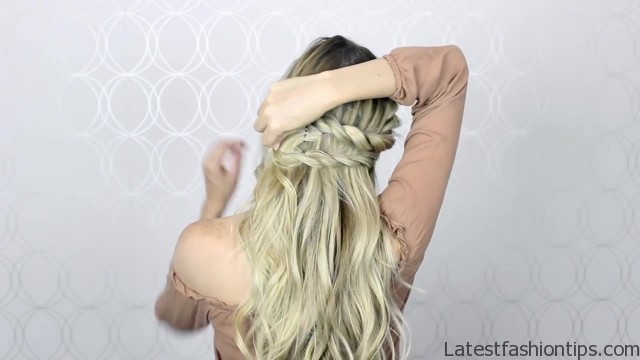
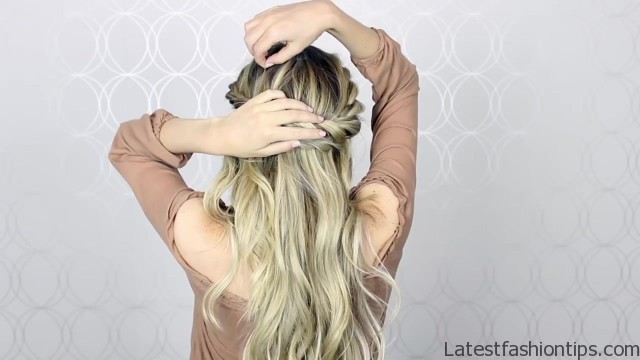
I reach the top of my ear, I’m just going to stop and now it is time for my favorite part pancaking the twist.. So I just use my index finger and thumb and, I’m just going to gently pull on the outside of the twist just to loosen them up and help them appear much larger and fuller and what you want to do is just start small and then work your way bigger beads is easier to make the twist larger than it is to try to go back undo them and make them smaller once you are happy with the twists you just want to go ahead and continue wrapping these two pieces of hair around each other all the way to the end of your hair and then go ahead and just pancake it some more known to be too particular at this point you can always go back in later and make any adjustment when it comes to pinning the twist into place you want to keep in mind a circular shape. So you will want it tightly across the twist just above the base of the crown then direct the ends upwards and pin them into place creating an X with the bobby pins the best that you can well once it is secure just untwist the left out end. So that they blend in now brother twist that. I just made, I’m going to create a second one doing the exact same steps working with one-inch sections and one doing these twists, I’m just going to leave you the first pieces out just to frame my face and give it that softer lip. I like to stop before my ear and and hair down just to cover it.
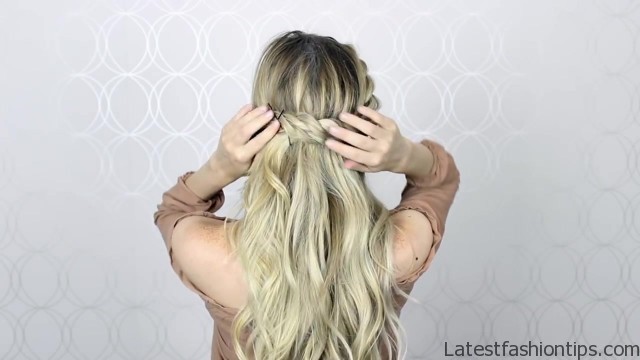
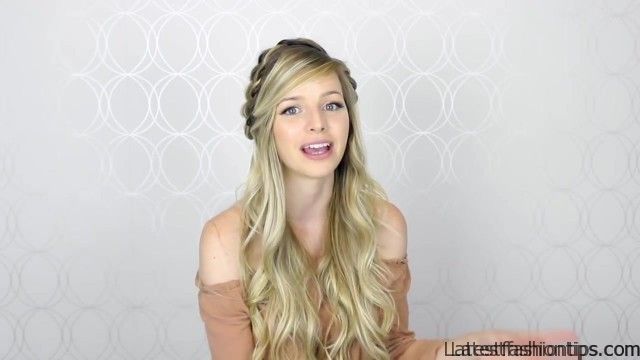
I find that it looks a little bit more flattering and then from here, I’m just going to pancake the brain with this nice and loose just continue twisting till the end pancake it and then we can pin it into place now to pin this twist into place same thing as before cross it at the base of your crowns below our previous twist and then bring the ends upwards to help create that circular shape and then pin them into place creating an X with those bobby pins for the other side and repeating the same steps except, I’m only going to create one twist. So that it comes out nice and full as, I’m creating the twist, I’m just making sure to leave out those front pieces to give it a softer appearance oh and of course do not forget to pull and pinch on the twist to help them appear nice and large now for pinning this one try your best to hide those previous bobby pins if they match your hair unlike mine it will be a lot easier pull it tightly across the base of the crown and in between those two previous twists then take the ends and tuck them underneath that bottom twist and pin it into place underneath once, I’m happy with it. I like to gently pull in small pieces of hair at the crown of my head just to give the illusion of some volume and add some extra detail they have you guys that is how you achieve this double twisted crown and trust me is really simple once you get into it. I love how it has the double twists only on the one side it just makes it really unique depending what side someone looks at you want it is like you have two hairstyles going on. I really hope you guys enjoyed it if you did do not forget to give it a thumbs up and comment down below let me know what you guys thought also, I’m really curious what you guys got up to this summer you have to let me know. I just got back from camping for the long weekend and it was the best way to end the summer if a chance where you live you are transitioning into the warm weather then you have to let me know what these plans that you have. So thank you guys.
So much for reading there are a ton of exciting things coming. So stay tuned and, I will catch you guys next post you.
Maybe You Like Them Too
- Stephen A. Smith A Biography
- Steny Hoyer A Life in Public Service
- Sheryl Underwood A Life in Music and Comedy
- Scott Walker A Life in Song
- Sara Evans A Biography

