Hey guys I thought I’d come for you a really awesome tutorial it is this half-up half-down pull through braided hairstyle. I think it’s.
So perfect for spring even though it is very foggy and cold outside, I’m trying to be optimistic and maybe if we all start wearing our spring hairstyles it’ll help speed up that warm weather now to achieve this hairstyle you are going to need the essentials you are going to need a bunch of these clear elastics you guys know. I have a love-hate relationship with these things but last move this hairstyle. I used about 13 of them just a heads up if you are using these you are going to have some hair casualties. So it’d just be really careful when you are applying using your hair. So that they do not pull out any of your hair next thing you will need are some bobby pins took me forever to find four of them. I have no idea where they all went and then you will also need a hair clip any clip will do just to clip out the sections other ways oh and lastly to finish off this hairstyle you are going to need a curling wand or a curling iron part a are you normally would and then we can begin. So we just want to create a small section at the top right where your part is and we will see why in just a minute but, I’m just going to section it off with my hair clip.
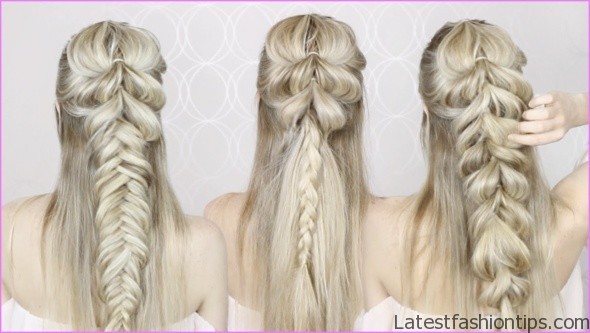
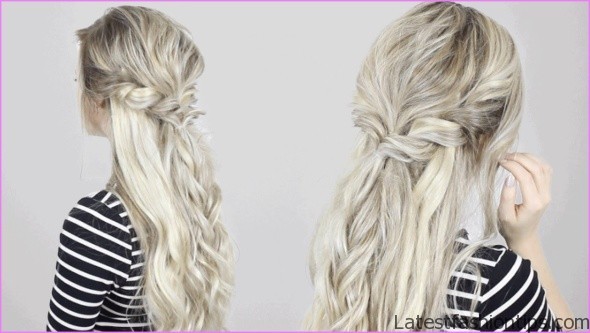
HOW TO Half-Up Half-Down Pull Through Braid Waves Tutorial EASY braid Photo Gallery
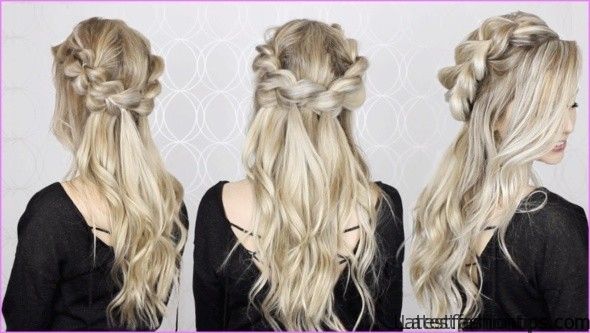
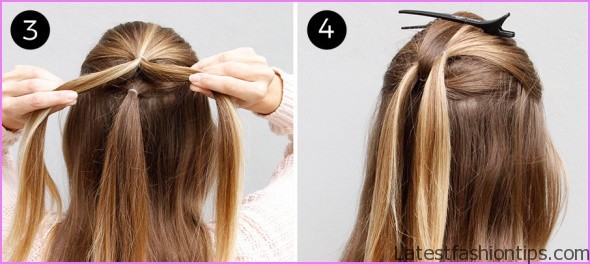
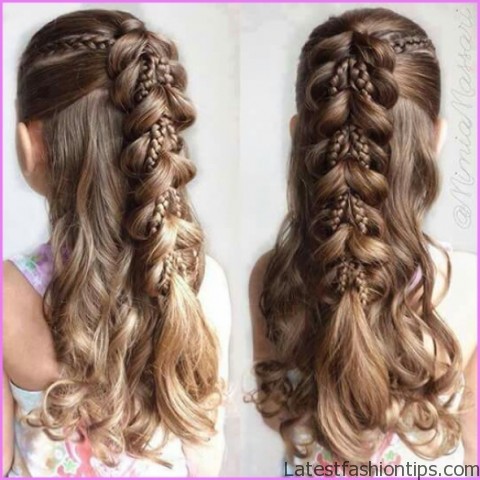
So you can see it is about an inch in size and then about two inches long. So, I’m leaving out all my friend pieces feel free to incorporate them with this hairstyle to your preference and just going to clip this out of the way for a quick second the next section you are going to grab you want it to be the same width in size and just a little bit thicker now with this section grab a hair elastic and you just want to tie it off right at the roots now you can go ahead and unclip that section that we made right at our part and you just want to divide it into two equal pieces and then what we are going to do with these pieces are just wrap them around that ponytail that we have just made. So now we have a ponytail and we have those two sections that we have now combined into one that we wrapped around it and you just want to pin the ponytail out of the way now before we create another ponytail just want to incorporate the same size section into these two pieces that we have here now taking that top ponytail again divide it into two equal sections wrap it around that new ponytail that we just made pin that out of the way and we are going to repeat the process again this is one of those hairstyles that. I promise comes together all at the end right now you might be looking at it wondering how we get from this to the final product but once we are done with all these finicky elastics it’ll really come together okay. So with that section unclip it divide it into two wrap it around that fresh ponytail that we just did take the ponytail flip it away and once you get to about the top to the middle of your ear this is probably going to be the last section that you are going to be grabbing additional hair from your head to join into it and then once you reach that point I will show you next what we are going to do. So you have reached the middle of your ear what we want to do now is just unclip that section divide it into two equal pieces put it behind the ponytail and just secure it with an elastic and then what we are going to do is repeat this almost all the way down the rest of this ponytail you and before we get to my favorite part of pulling the braid apart, I’m going to do the other side really quickly the exact same way that we did this now that we have done both sides and you still have a ton of hair left at the bottom we can go ahead and start pulling apart the braid. So to do this.
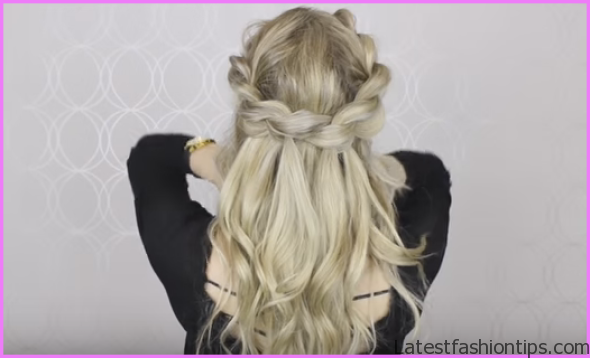
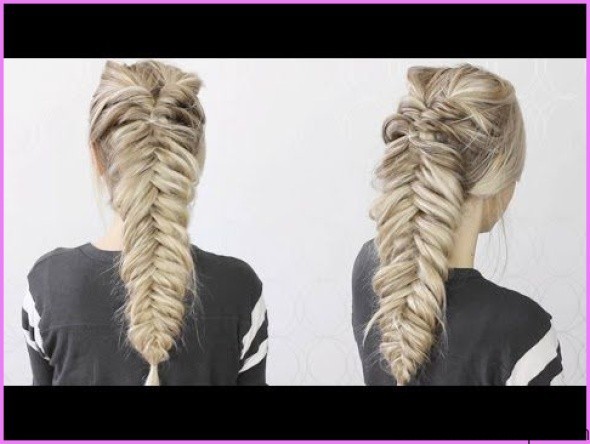
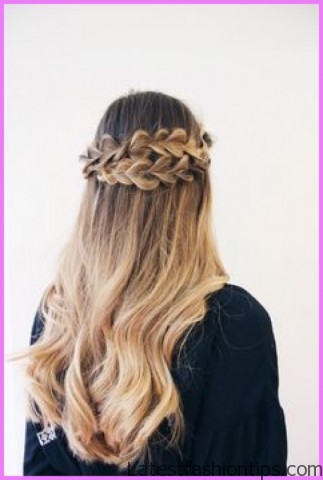
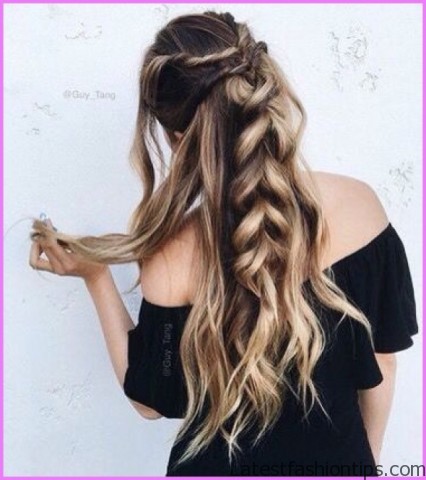
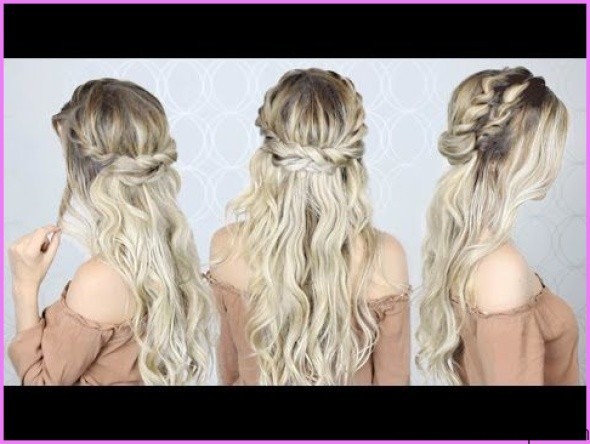
I use my index finger and my thumb and, I just grab the outside of the loops here and you just pull you feel the elastic sliding down the hair that’s a good thing. So just go to each little pull through and pull them apart once you get closer to the top you want to pull them apart a little less but near the bottom make them as big as you want now. I can understand it looks a little bit crazy right now but, I’m going to turn around we are going to pin it into place and curling the hair is really going to bring the whole look together for the back. I’m starting with my right braid and, I’m grabbing the section that is secured with the hair elastic because this is the one that I will be pinning while the other section just hangs down and, I’m tightly pulling the section across the back of my head and securing it with two bobby pins by creating an X right where our left braid stops behind our ear now with the left braid, I’m grabbing the section again secured with the elastic and, I’m trying my best to cover up those bobby pins really helps if they match your hair color and in order to hide the bobby pins for this braid we are going to be putting this one slightly above our first one and then pulling the whole braid underneath it once it is through. I’m securing it by creating another X with my bobby pins trying my best to hide them, I’m going to be using my nume a thirty two millimeter wand this is from the Titan three set we are going to be curling all the hair that’s framing our face away and then the rest of it in all different directions.. So I just hold it in my dominant hand and, I pointed downwards.
So what you want to do is just wrap it around the wand going away from your face and, I just hold it there for a couple seconds. I just show you how quickly this curls your hair. So, I’m only going to wrap it around four four three two one second and look at that it curls. So quick this is going to save me. So much time but you just want to keep going all the way around your head and just going to alternate directions sizes you want to get bigger pieces smaller pieces because you really wanted to come out kind of natural pretty and slowly looking of all the hair tools not just new me the titan-3 is my favorite and that’s saying a lot it is because it has three different interchangeable barrels that you are actually going to use and most importantly it has temperature control which is a must because everyone’s hair is different and if you want to try it. I got you guys a coupon code and that’ll be listed down below. I noticed on some of the curls my ends came out kind of straight just that’s just a forced to have it leaving my ends out.
So what. I like to do is just take the curling wand very carefully just wrap the ends around and just for a couple of seconds it is all they need and then it’ll give you a much softer look. So once you are done with it just run your fingers through it really softly and if your hair has a hard time holding a curl just throw in some hairspray as well then here’s the final look. I hope you guys love this hair tutorial as much as. I do and it helped put you in the spring spirit if you guys did like it do not forget to give it a thumbs up and if you recreate any of my looks or have a really cool hairstyle that you want to share with me please do not forget to tag me. I love seeing your recreations yeah. I love you guys.
So much comment down below let me know what you are most looking forward to for summer let’s kick these winter blues because.. I’m so over winter time to go shopping and get out of these black clothes yeah. I love you guys and thank you. So much for reading psyphon here with the pain there’s a reason. I we got some mornings wishing that. I could just shave my hat to make it as big chunky or as little as.
Maybe You Like Them Too
- Stephen A. Smith A Biography
- Steny Hoyer A Life in Public Service
- Sheryl Underwood A Life in Music and Comedy
- Scott Walker A Life in Song
- Sara Evans A Biography
