Hey guys today’s post is this very simple textured and effortless low bun you guys are not going to believe how easy this hairstyle is to achieve. I just love that casual effortless appearance. I think this hairstyle would be. So great for work yet it is elegant enough that you could wear it somewhere formal. So let’s go ahead and get started since. I had just washed my hair. I didn’t wanted to be too soft.
How To Simple BUN Tutorial Photo Gallery
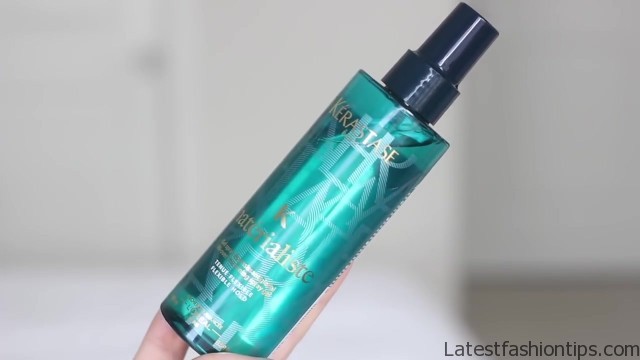
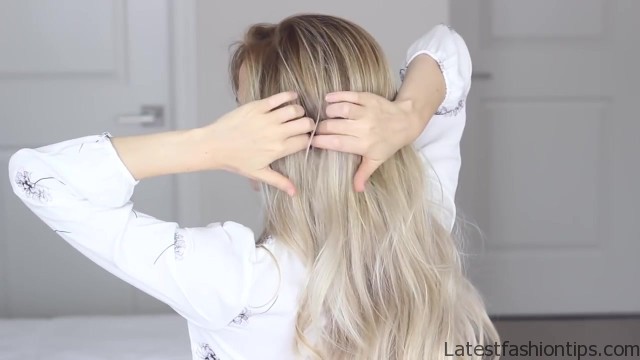
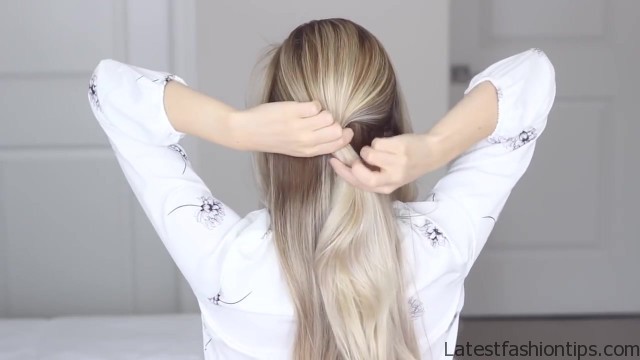
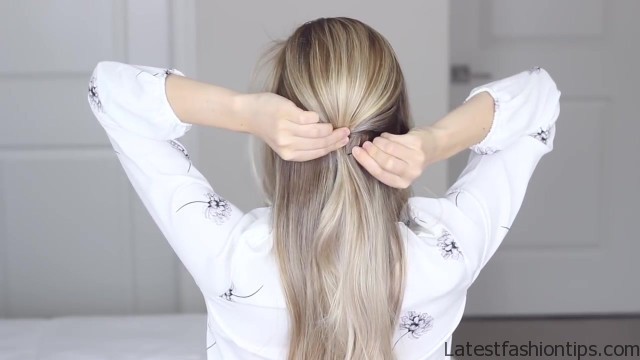
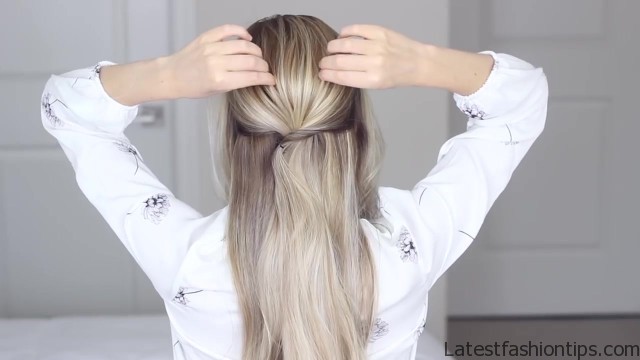
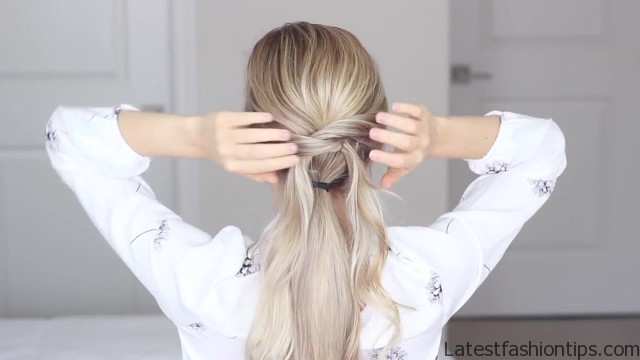
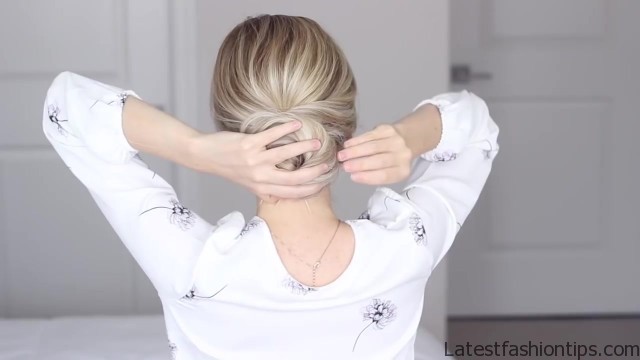
So I added some of this Kerastase gel spray with a flexible hold. I focused this mostly around the crown of my head just to help add some texture and grit into my hair. So throw all of your hair behind your shoulders and you just want to mess it up a little bit. So it has a more effortless appearance next separate the sides. So draw a line down from your part to the back of your ears and then just toss that hair out of the way for now then repeat the same steps on the other side with these side sections out of the way just place your index fingers of the sides of your neck and you just want to section off the top layer of your hair you want to leave out all the hair that’s underneath for now and do not worry about it being too perfect just try to grab that top layer with this top section you want to tightly bobby pin it just above the nape of your neck right in the middle of your head. I like to grab part of the right side of my section with my bobby pin and just bring it over and across and then secure my bobby pin to the underside.
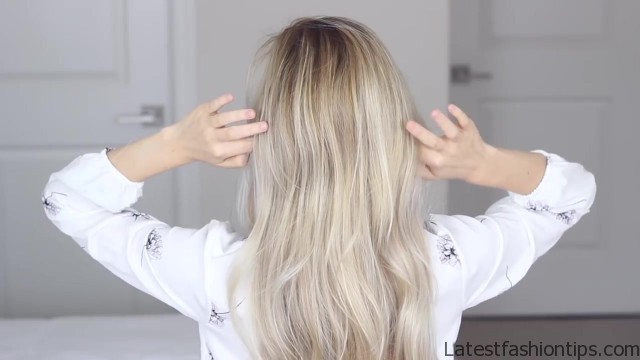
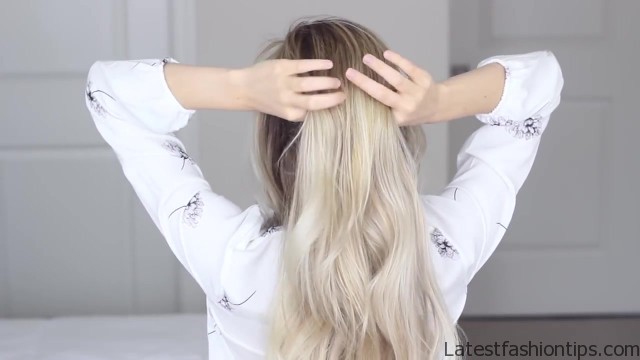
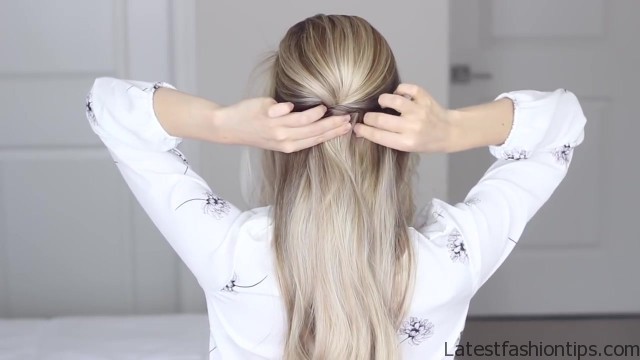
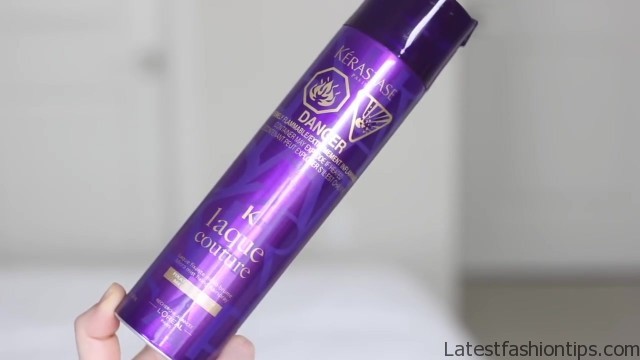
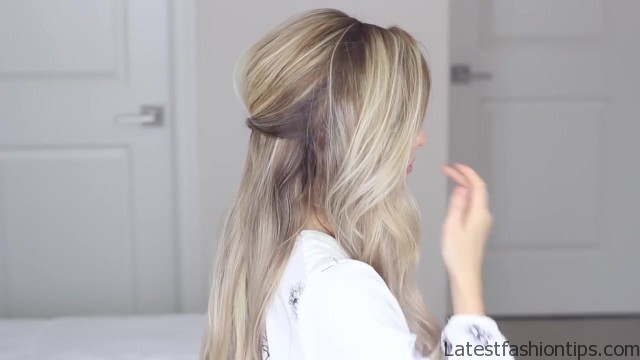
I find this helps hold everything in place and then. I added about four more bobby pins from both sides just to ensure that all of the hair was secure now to add some volume into our hairstyle. I used some of this Kerastase Laque Couture hair spray and medium hold and, I generously sprayed it to the top section of my head my poor laptop got entirely covered but. I use this to help add some hold to my hair and then with my index finger some. I just gently pulled up on small sections of hair around the crown of my head to help add that volume and lift. I also rub these sections in between my fingers just to help give them some more texture. I love this step because it creates such natural volume without having to tease and damage your hair next step super easy create a low ponytail.
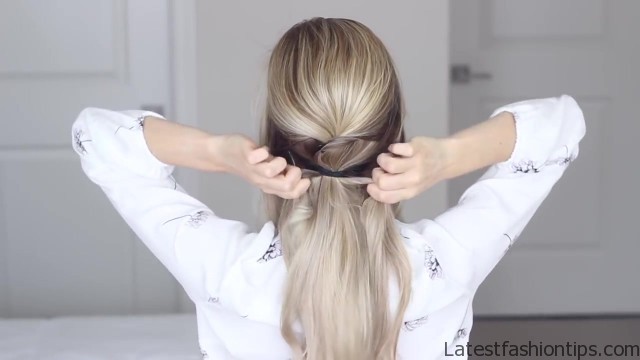
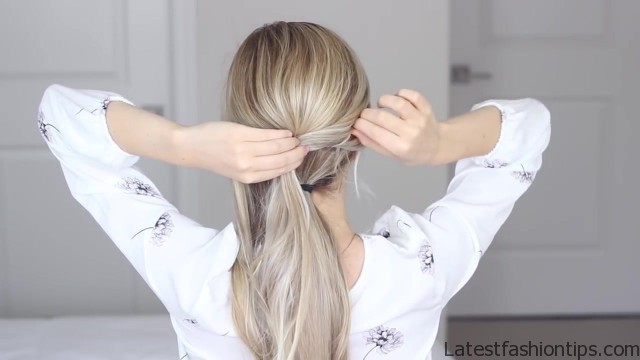
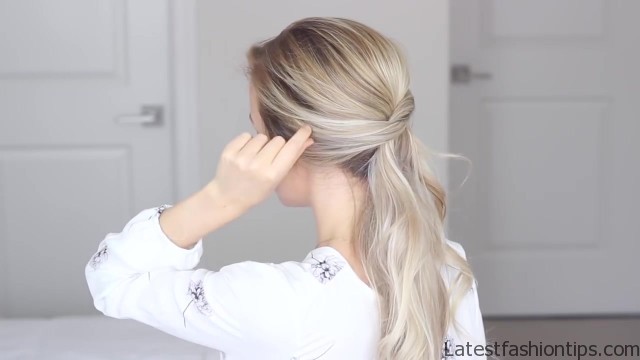
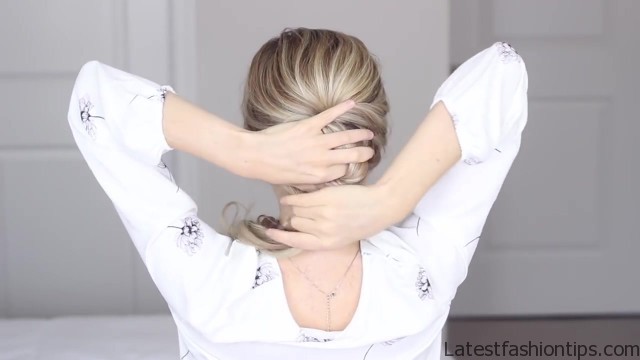
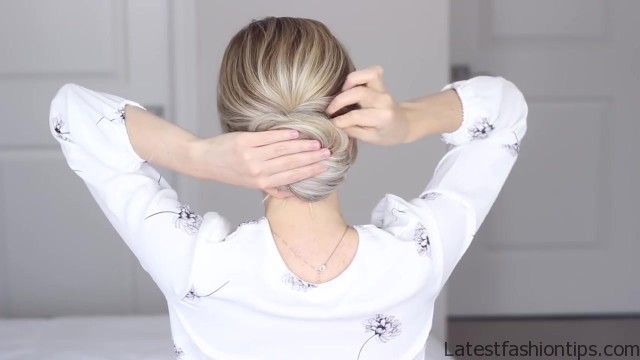
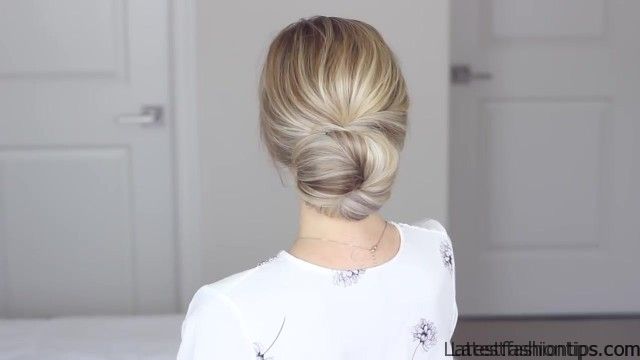
I like to use a comb just to ensure that all of my neck hairs are incorporated also you want your ponytail to sit below your bobby pins. So try your best to not get them tangled into your ponytail but it is okay if you do once you have your ponytail take your right side section and give it a little twist away from your face you could also braid the section if you like now with this you want it to drape over your ear and then just pull it across those bobby pins from earlier to hide them then bobby pin this section to the left of the middle. So that the bobby pins are covered and once you have bobby pins it into place grab your left section and repeat the same step give this section a slight twist away from your face drape it over your ear and then you just want to secure it to the right of the middle of your head now your two sections should be crossed over one another. I think this adds a really nice detail and, I think it looks really pretty when your hair is swooped over your ears now you just want to create a large fluffy bun if your hair is on the thinner side you can always add in a hair donut to help but my favorite way to make a bun is take my ponytail and, I give it a slight twist and then. I wrap it loosely counterclockwise around my hair elastic once I have wrapped my hair all the way around my hair elastic. I then like to pull the remaining hair through the middle of the bun just a little bit. I do not want my ends to come through and, I find this helps to secure my hair because it is almost as if you are tying a knot and then any remaining hair that’s sticking out.
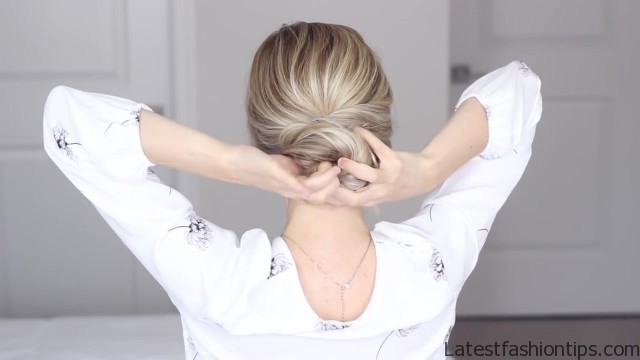
I just like to slide it underneath my bun. So it is hidden and you can also continue wrapping your hair all the way around your bun until you reach the end well once you have created your bun and your ends are hidden secure it down with some bobby pins. I like to bobby pin my ends first just to ensure they are secure and that they do not pop out later on and, I like to take my bobby pins and pin the underside of my bun and, I slide them towards the center of my bun. So they are hidden underneath once my bun is pinned into place. I gently pulled on the outsides to make it even larger and more textured there we have it that’s how easy it is to create this textured and elegant updo I will put link my updo playlist down below in case you want to check that out for some more inspiration. I love this hairstyle, I’m really into like textured effortless hairstyles lately and last night. I did like a rough draft of this hairstyle that my boyfriend was like wow that looks.
So good like sometimes ladies at the office will wear the hair like that and you think it looks. So nice. I was like you know what. I was imagining this as more as a formal hairstyle but it would be perfect for work as well but. I really hope that you enjoyed this tutorial and found it helpful if you did do not forget give it a thumbs up and if you use this as inspiration or you recreate this hairstyle do not forget to share with me on social media but thank you again. So much for reading you guys and for all of your continuous support and I will talk to you guys in my next post bye.
Maybe You Like Them Too
- Stephen A. Smith A Biography
- Steny Hoyer A Life in Public Service
- Sheryl Underwood A Life in Music and Comedy
- Scott Walker A Life in Song
- Sara Evans A Biography

