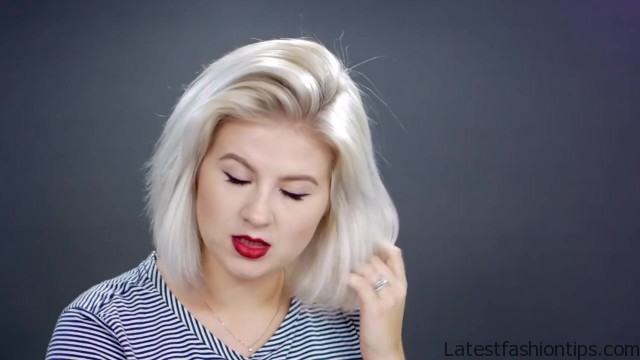
Oh my god did you see her hair it is. So thick, I can’t even eyes there’s like, I can’t, I can’t I’m just kidding you guys Hey all, Welcome back we are talking all about fake or faux braids on this blog today and of course we are doing a whole collection of ten different styles on my fake hair just kidding it is actually real.
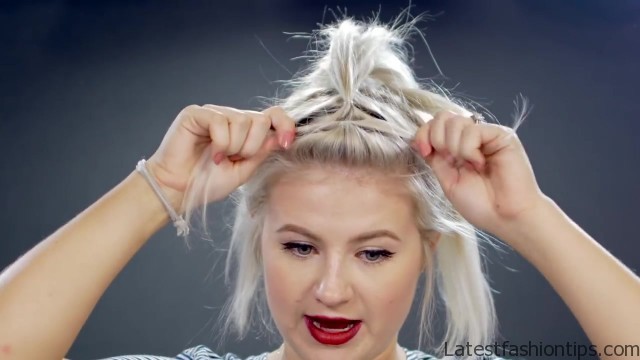
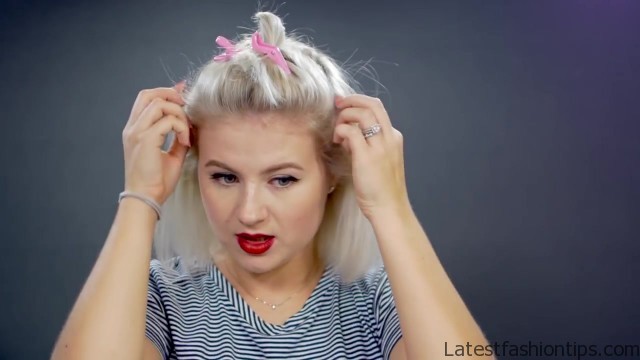
But the color is fake I’m bringing you the pullthru faux braid ten different ways they are awesome alright. So products that you will need to create these hairstyles first and foremost clear elastics bobby pins rat tail comb and some type of hair clip and then optional. If you want texture new here you need some kind of dry texturing spray or dry shampoo those give me some grits and texture hairstyle number one is going to be a halo Fabray that’s going to go all around your head and this one’s gonna be super easy and, I know halo braids is extremely hard to create even, I have trouble doing them. So faking my way through it is the way to go let’s do this first thing you have to do is find the crown of your head. So I’m gonna take a comb or a brush and just brush my hair forward to the side towards the back just like. So, I can see and, I really can’t alright let’s make a little peephole take your rat tail comb we are gonna start creating our first section starting from the crown in the center bringing it forward alright. So we are going to take this section make sure there’s no any crazy bumps on the sides take your tiny little clear elastic and we are going to tie it off about like half an inch to an inch away from the forehead just like that.
10 FAUX BRAIDED SHORT HAIRSTYLES TUTORİAL Photo Gallery

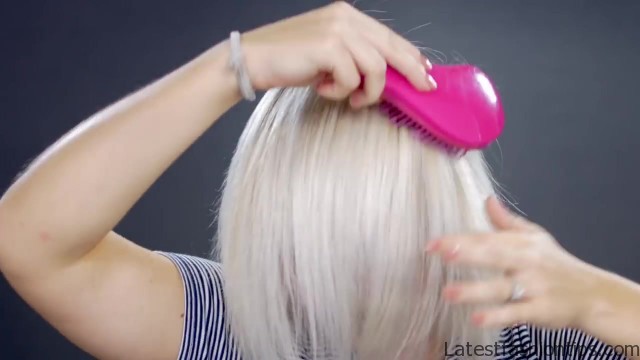
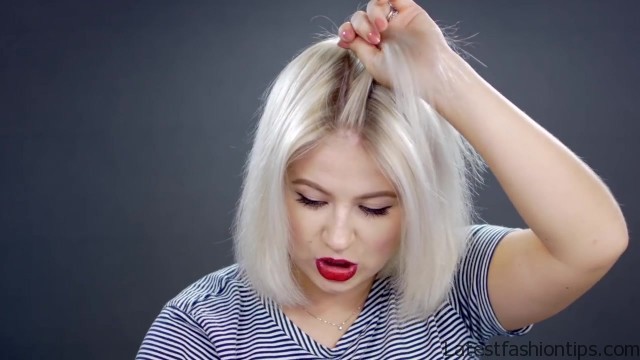

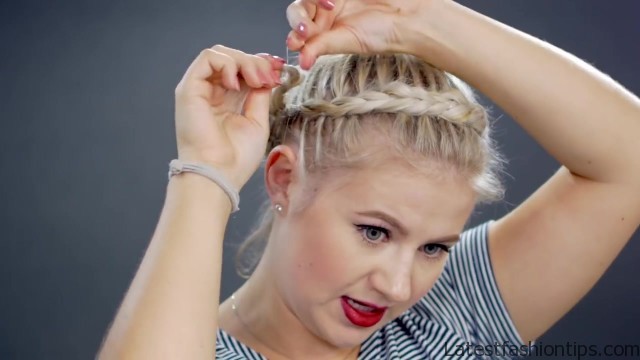
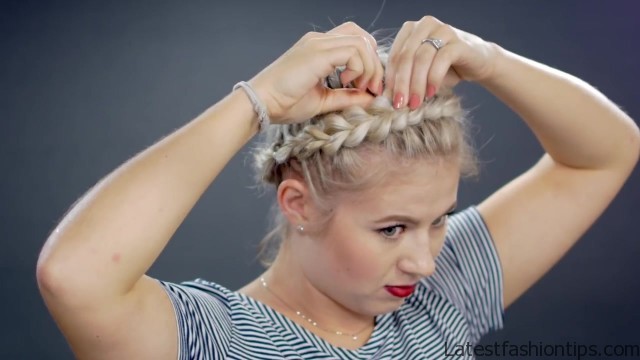
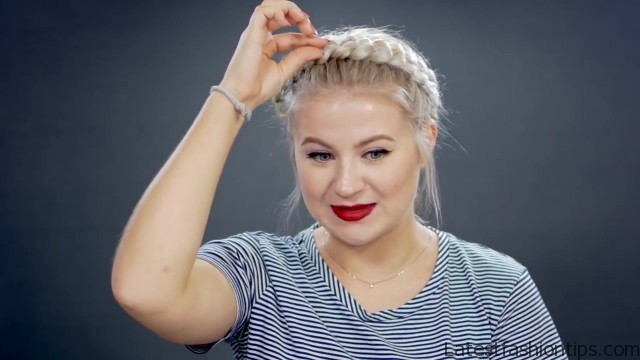
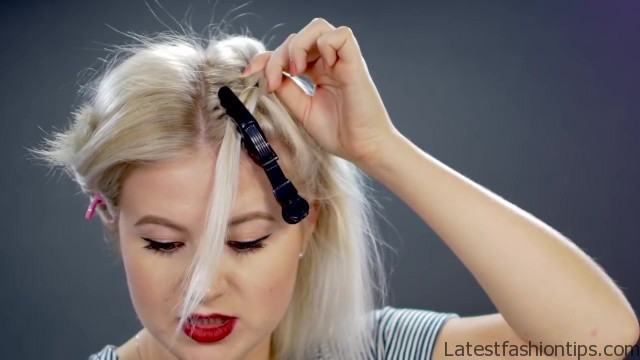

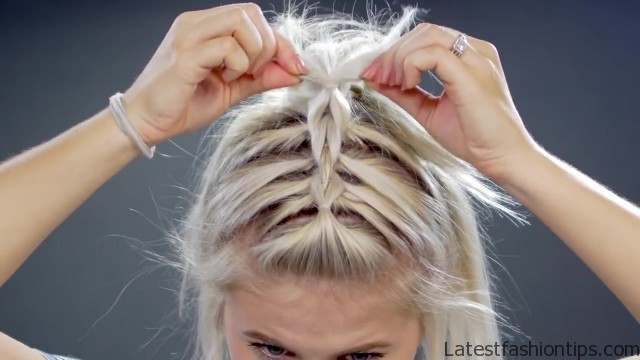

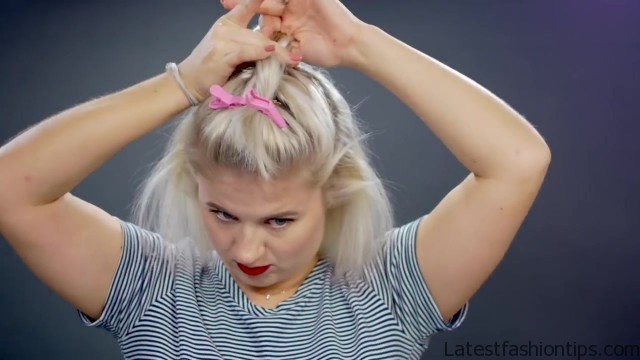
So then, I have a first section let’s do the sections all the way around my head and I’m taking smaller thin sections just. Because, I want more of an emphasis on the full braid you can obviously take bigger chunkier voluminous sections. But that’s just your preference there you have it you look like I’m up does not it it looks like a mop. So we are going to take this section that’s right on top of the ear we are going to split it right in half just like that and then you see a section it is going to fall right on top of it through the middle like. So take your PIN, I just do this just to help myself we are going to fold it back. So, I do not touch it. So that we have this one we are going to pin these two together with another clear elastic let’s go split this right in half and this is going to fall through creating that section.
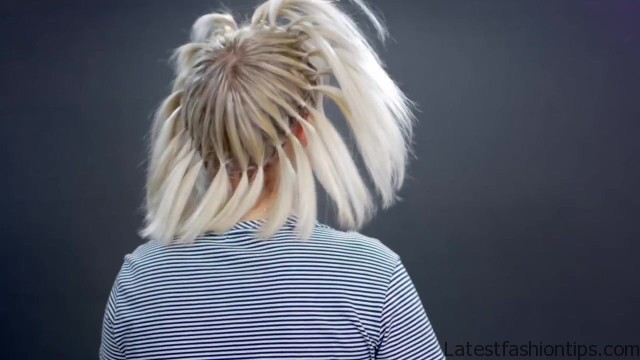
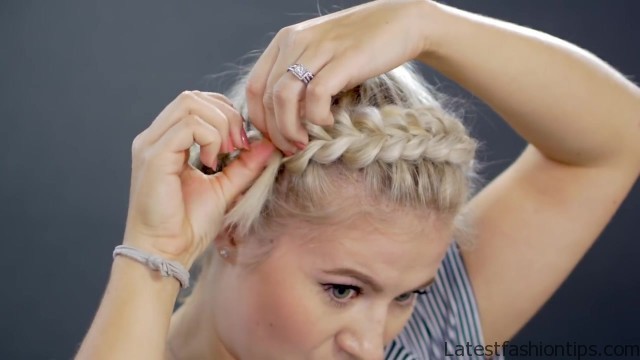
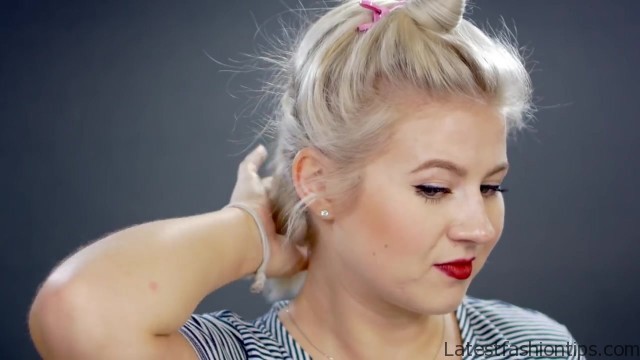
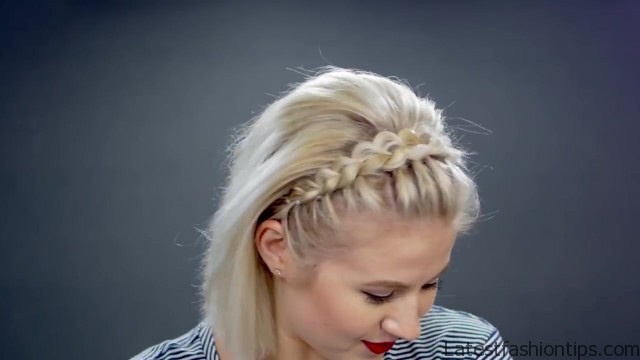
So we are going to take this section that we split in half towards the back and we are bringing this one through creating this big section like. So let this go split this one in front of it in half just like this and we are going to bring this forward to the new section in front of it and tie these two sections together to create a big one. So you see how it is creating that little braid it looks like a braid. But it is not this is. So easy you guys it is so much fun are you for real, I’m for real that’s not ready nope cuz that looks like a right it really does Andra is making fun of me alright let’s finish this off the best part about these pull through full braids everything is tied off. So you can’t really lose your braids which is awesome. So now that we have no more hair left to add we are going to create this full braid using this hair that we have left.
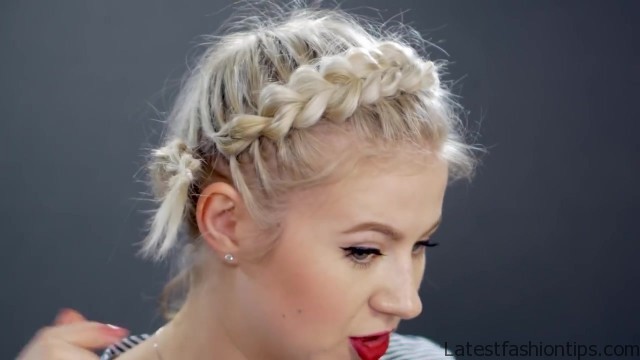
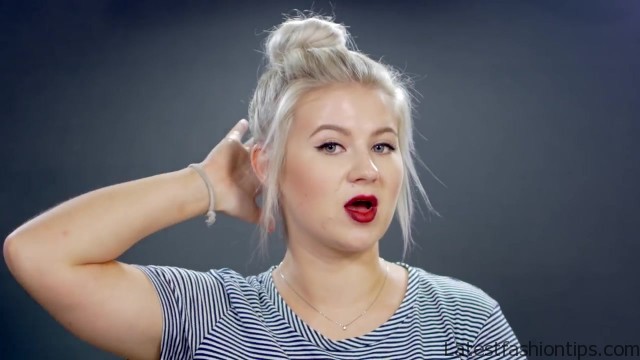
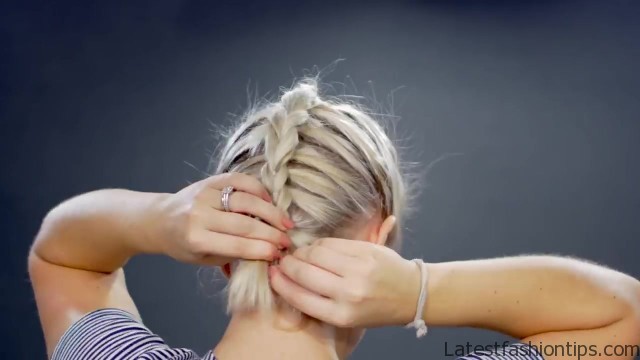
So, I have the two sections like before split it right in half we are going to bring this section forward we are going to tie this section together split it in half when we care forward. So you just continue in the that full break I’m gonna tie that off the last pieces of hair just very gently start pulling this braid apart alright. So let me show you a quick trick on how to hide this section right here. So you see this actually we first started with it does not have a little middle like everything else does you see that. So we are going to take this or right in half and take this right through there then we are going to bring it on the other side the entire section I’m going to take this right underneath all of them take a mini bobby pin and secure it in the back now to finish this off completely I’m going to take some hairspray and call my hair down with all these flyaways this reminds me it kind of gives me inspiration from the new crown show from Netflix you guys watch that it is about Queen Elizabeth the second you guys think of this one’s. So fun alright let’s move to hairstyle and number two so much work when is this hairstyle to take it apart makes me. So sad what happens when you take it apart alright hairstyle number two is going to be the double boxer full braids.
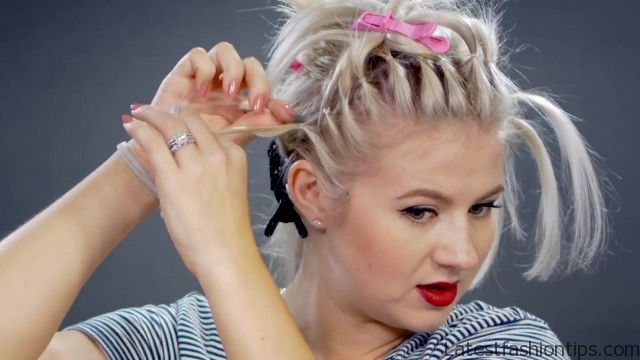
So I’m going to take my rat tail and split it right down the middle from the front to the back of my hi take one of the sections and pin it away. So these sections are going to be slightly bigger grab a section from the front and we are going to tie it off not close to the scalp just tie it off with a clear elastic about an inch away or. So just like that alright we are going to bring it forward and now we are going to grab a section right behind it to start this full braid start always in the middle and then make your way diagonally to the other side grab this section I’m going to tie it right behind it and this is exact same technique taking this first section split it right in half and then take in this section that’s right behind it towards the front take your clip if, I can find it where’s my black one and we are going to bring it back take your rat tail comb again I’m gonna create a new section, I grab the section right here alongside creating that one big section. So like the first one you know how we tied everything off from the beginning this one we are going to tie along as we go before we let this go we are going to split this section that we just tied off in half let go bring this section towards the back and bring this section we just split half towards the front two pin back and let’s continue doing this now let’s go to the other side and give this boxer braids a partner exactly the same thing alright. So there you have it for both sides let me quickly show you what the now I’m going to go and I’m going to pull this braid braid apart starting from the top you telling me this is not right either nope you know it is so cute it kind of creates some heart and then we have it for hairstyle number two and like, I did say in the beginning you can grab smaller or even bigger sections of hair it all depends on you what you like and what type of hair you have. But this is what, I came up with, I love it. So pretty for hairstyle number three three we are getting really creative you guys I’m kidding we are really not alright for this one we are doing a reverse full braid with the top nut.
So first what I’m doing is I’m grabbing a section for my top knot take this top section and we are just gonna pin it back. So for this technique we are going to go back to the first hairstyle and we are gonna create our sections first and tie them all off right now just. Because, I do not flip my head towel alright I’m starting from the top I’m going to grab bigger sections this time just why not I’m gonna just connect them in the middle you look like a booster show to me try to divert chicken. So. Because it is a reverse full braid we are going to start with the lower sections. So we need two sections one tool then the rest we are going to pin them back just like the very first one the very first section you split it in half take the section that’s above it bring it down and then bring the section the split in half to the top take a clear elastic and title two sections together create one big section whether we came to the last section we are going to put them two together. So tie it as far as high as you can let go of the one that we pulled back and then you see how it is split in half we are going to take it to the top and tie this off first and then we are going to tie these two together take the rest of the hair that’s on the top and create it into a messy bun or whatever you prefer next you just want to pin it down with some bobby pins and you are done now that, I have my messy bun complete I’m going to go back to the back and pull apart the full braid just give it more emphasis and there you have it for hairstyle and number three this one’s.
So cute you guys love it. So here still number far it is gonna be. So yeah, I can’t even sell Kia for this hairstyle do not take out the braid that we did in the back reverse one. Because we are gonna add a fauxhawk going like. So from the front and we are going to have a messy bun right here as well connecting the two we are gonna flip our kale. So, I have to take this one out grab a section of hair clear elastic and tie it off there we go and then let’s grab a section right behind it split it in half bring this one forward bring this back take your clip. So it is not in your way and pin it back then section that’s split in half bring it with this section right here take a clear elastic and tie them together to create one big section.
So I’m coming to the last section the one that we split in half tie it off to create one section bring it down closer then see you have one two the hair right here and then this little section from the braid in the back. So we are going to combine all of this together can use your fingers to kind of comb down the sides I’m going to pin this away into just a ponytail for now. So there we have a ponytail and I’m going to pull this top braid apart first. So now you have to one of the front in one of the back you can actually leave it as a ponytail. If your hair is longer or you do not have crazy layers like, I do, I think it is super cute. But I think I’m gonna put up in a messy bun just to show you guys what it looks like let’s move on to hairstyle and number five my hair is going insane alright hairstyle number five is going to be you guys remember that hairstyle that, I said not that long ago the double, I think it was Dutch braided the reverse double dutch braided into two top knots that was. So cute I’m going to show you guys with the full braids.
So I’m grabbing a section of hair for the top nuts and I’m going to bring it up to the crown am, I going to bring a to low. So once this top section is pin back I’m going to take my rat tail comb and I’m going to split the bottom section right in half for the two bow breaks. So like we did with hairstyle three we added the sections first and then we braided them Fabray to them that’s what I’m gonna do first I’m going to take the sections and just start I’m at a diagonal on the very top and tie them all off I’m just going to continue doing this grabbing section from side to side until, I have no more hair left to add. So now that, I have both of the sides sectioned off, I have six sections on each side and we are going to do slightly something different I’m kidding it is literally the same thing as the reverse one it is the same method start from the bottom make your way up. So that’s exactly what I’m going to do. But I’m going to speed it up. Because I’m repeating the same exact steps after the two fig braids are complete I’m going to create the two messy buns that go right on top of them you can either do it two pigtails you can either braid this you can get creative I’m just doing a little twisty loop around, I do messy buns a lot of different variations, I just play around I’m going to take a clear elastic and just secure it down.
So now that both buns are on top I’m going to go back in we are going to loosen them up and secure them with bobby pins now just pull those two fake braid apart to your desired shape and size hairstyle number five complete, I love this one. So cute you guys this takes a lot quicker to accomplish than braiding especially we have to flip your head down you do not cut the time do this it is. So cute hairstyle six is probably Andres favorite he calls it the runway rocker look. So first I’m going to create a faux hawk with this section that’s going from the top to the back you have guessed it we are going to start creating sections for the fake break. So I’m going to grab a section just like this just tied it off grabbing a section right behind it tying it off I’m going to bring it a little bit higher the second one. Because, I want to follow that curvature of the faux hawk. So I’m just following the curvature of the party line with the sections that I have just created.
So we have seven sections on each side that are going down on the party lines and we are going to do exactly the same steps split it in half bring it forward and create that full bolt or braid. So now that both of those sites complete I’m going to go back up and loosen them to give them more texture like I have been doing. So you see how both braids they are kind of sticking out not laying flat close to the head I’m going to take bobby pins and then just secure them as close as possible to my scalp I’m going to take this hair down this is where you can get creative you can either curl it you can straighten it first I’m going to tease the top section to give it more volume and texture. So it stays in place and then like, I said just slick it back you can wear a straight you can curl it I’m just going to slick it back with hairspray once I have teased it on the sides make sure the full braids are exposed super easy super retro and very runaway inspired. So let’s say you like the concept of this two braids on the side. But you you do not want to keep your hair just falling back let’s put it together I’m going to create a big braid down the middle. But using the full pull-through braid method grab a section in the front and we are going to create a pompadour all right we are going to grab a section right behind the pompadour and tie that off split it down the middle and bring the first section through, I think you guys want the chilled line now I’m going to pull this middle one apart as much as, I can.
Because, I want the middle one to stand apart from these side too. So that I’m done fluffing up the rest of this big braid we have three little sections left on the back and I’m just going to take them roll them up tuck the and hide them away and then we have a fried hairstyle number seven you know you guys, I could not just not give you a Viking hairstyle, I do not know myself and burries and Viking match made in heaven. So hairstyle number eight is gonna be the hardest one you guys a lot of technique involved we are keeping the middle full braid and, I let go of the two side ones take these two sections towards the back combine all three sections go to the outside with the braid and tie it off in a low ponytail to polish off the entire look grab some hair from underneath the ponytail wrap it around the clear elastic to give a more elegant look and there we have it for hairstyle number eight it is super simple. But yeah it looks very different retro and polished and Andre calls this one the full braid that’s on steroids say face cream my scalp is on fire hairstyle number nine is going to be a headband, I love headbands they’re. So simple they’re. So fast. But yet they still make an impact on my everyday hairstyle what we are gonna do take your finger or your rat tail comb and we are going to create that section for the headband.
So just like how we were doing it for the crown the halo braid I’m going to start grabbing sections first around and then we are going to connect them I’m just grabbing sections from the party line that we created to the front of the head and I’m taking a smaller section just. Because, I want the braid the headband to be more textured looks familiar right I’m going to start behind my ear going up and around to the other side of the year starting with the first one same technique put it right down the middle bring it up and bring this one down you slide down the one that’s on top of it to create one big section just finish it off at the very end. So now that I have pulled apart the braid I’m going to let the rest of the hair go and I’m going to take this braid right here I’m just going to bobby pin it into my hair and there you have it for hairstyle number nine the beautiful faux braided headband last. But not least hairstyle number ten is my favorite way to wear this full braid it is in a faux hawk. But I’m taking all of my hair towards the back I’m going to create a pompadour first in the front just to have that volume and I’m going to secure it with a bobby pin – I’m going to grab a section starting from the front of my head going behind the pompadour to clear elastic and tie it off I’m going to take this first section pin it to the front to just get out of the way and then I’m going to grab a section right below it and tied it off as well split the first section right in half like. So put it down and bring the second section forward we are going to pin this away once we have this split section towards the back we are going to make it into one section and then grab a new section and I’m combining that split section with the new section and tie it off I’m going to continue doing the same thing click I have been showing you from the very beginning all the way down until, I have no more hair left to add and now let’s pull every section apart to create a very very big fake braid. So after I’m done pulling apart the braid I’m going to take this little section at the very bottom roll it and tuck it underneath and secure it with a bobby pin and there you have it for hairstyle and number 10 this is probably one of my top ten hairstyles and, I love to wear any time of the year and we have finally faked our way through ten fake or foe braids for short hair, I brought you ten different ways how to use a pull-through braid which requires no braiding is just very little technique super easy once you get the hang of it and there’s.
So many different written dishes to do it, I hope you guys enjoyed them let me know which one was your favorite and, I will see you guys in the next one very soon, I love you all very much.
Maybe You Like Them Too
- Tamar Braxton A Life in Music
- Sunny Hostin A Biography
- Steve Coogan A Life in Comedy
- Sterling K Brown A Biography
- Stephen A. Smith A Biography


