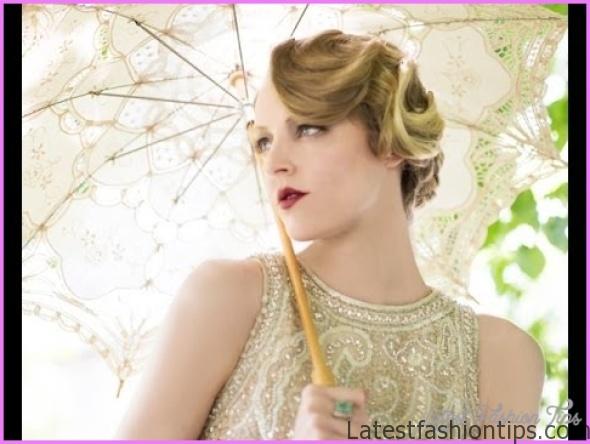
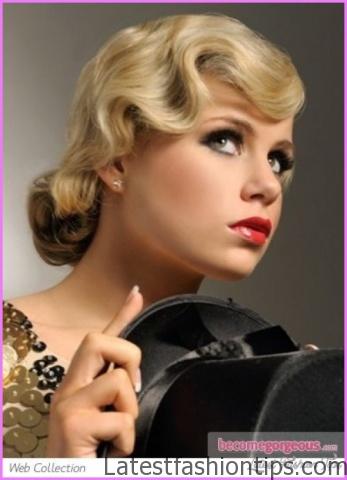
This beautiful finger waves updo a lot of you requesting hairstyles from the s for things like Downton Abbey or flapper costumes and I wanted to show you how I did this it is beautiful it is a little technical but I just love this up too and I think you will too so let’s get started we are gonna start by hiding half the hair so that you do not have to finger wave all of your hair and the way we are gonna do that is first I’m making a side part and then you are going to make kind of a circle around your part about inches out just make a circle around it and then clip that hair up we are gonna use that for finger waving later but the rest of the hair.
We’re just going to put in two pigtails and that way we can have it completely out of the way you do not have to deal with it and this will eventually become the bun at the end of the hairstyle so it makes it a lot easier than it could have been and then I’m just gonna put some quick little curls into the hair this way the hair all kind of flows together at the end of the hairstyle because everything else is gonna be curls you do not want to leave these straight but I’m just gonna pop in some really quick curls these all have to be perfect or anything just get them a little bit wavy or curly and you are good to go.
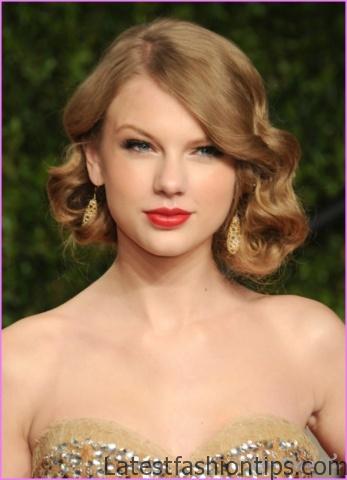
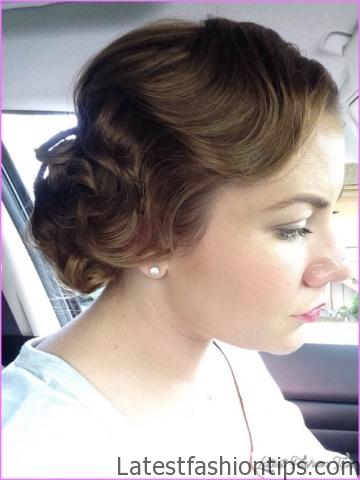
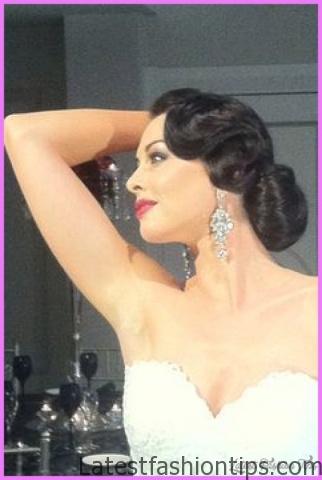
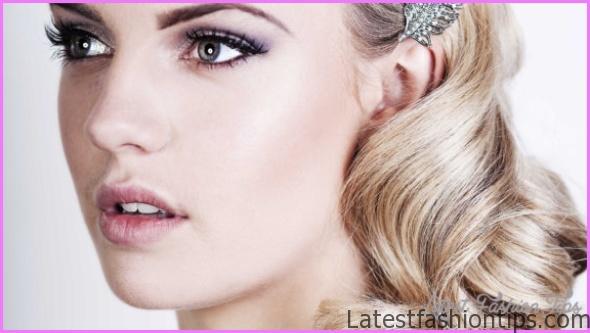
1920’s Finger Wave Updo! Photo Gallery
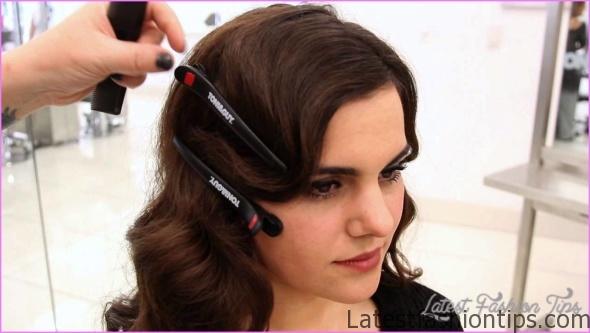


And now let’s talk about setting the curls because this is the most important part of the whole hairstyle I’m going to be using my nume octa wand and it has eight interchangeable attachments but I’m going to use the millimeter attachment this is actually the size that they used in the s so it is super accurate but it also makes beautiful tight consistent curls which is perfect for finger waving if you want to go a little bit looser you could also use the three quarter inch attachment this was used closer to the s for a looser finger wave.
So if you want something that looks a little bit more modern you could use the three quarter inch attachment and now that you have picked your barrel you can go ahead and let your hair down and we are gonna start by curling the top half of the hair that we have so I’m gonna go ahead and separate that around my part and because we are curling the top half I’m going to actually clip the bottom half so that it does not get in the way because you know hair likes to kind of like hang on and get in the way when you really do not want it to so using these little clips is going to make everything a lot cleaner then I’m going to use the pumice you will hot off the press pray for some extra hold and heat protection and now we can start curling.
So I’m going to take a small section of hair about the width of my finger and take a good look at this section because you want every single section after it to look exactly the same then pull the hair straight up and grab your iron we are going to curl counterclockwise which is toward our base on this side my left side of the part you are gonna wrap the hair around keeping it flat on the barrel of the entire time then once the hair is thoroughly heated up you can go ahead and take the iron out and we are going to scrunch the curl up and pin it in place to cool you want to get that extra a little bit of set because we are going to be brushing these curls a lot and now you are gonna do the same thing over and over and over yet and you want to make these curls identical because the more alike these curls are the better wave you get in the more consistent way you get so you need to take the same size sections every time and you need to curl it the same way every time this iron is a really good pick for this hairstyle because it has consistent and steady heat so you know that you are getting the exact amount of heat on every single curl which again makes it even more uniform now that we are to the back of the part.
I want you to pretend like it is sunbeams radiating from the Sun so you are just gonna kind of radiate around the back of the part as you work on the back of your hair and then you will find yourself on the other side of your part now we are still curling counterclockwise and on the first side of your part that meant that you were curling it toward your face but now you are going to be curling away from your face because you are curling the exact same way all the way around now if that sounds super confusing and I totally just lost you do not worry just curl one side of your part going toward your face on one side going away from your face that’s all you need to know just do that so I’m gonna keep curling until all the hair from this top section is done and pins up and now you are going to do the exact same thing on the second half of your hair.
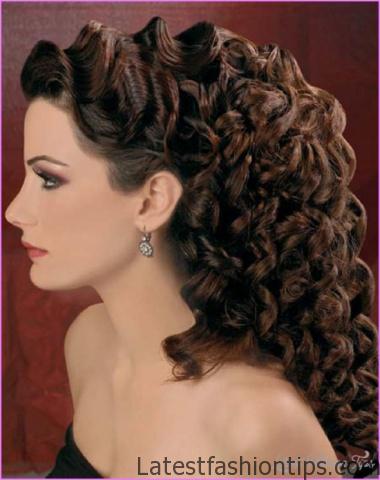
So you are gonna add in your heat protectant and then curl counterclockwise pinning it up all the way around again you want to make this the exact same kind of curl that you already did it might seem like a lot but we are really only curling the top section of your hair and this is the most important part of the hairstyle so it is worth taking the time on so now that everything is pinned up you gotta let it cool that is very important if you do not let it cool all the work you put into this point not worth it so once everything is totally cool then you can take all the bobby pins out and let these curls down and you can see we have some curls I mean if you wanted to know how to do Shirley Temple curls there you go and now we are ready to move on to making the first wave now the first thing you need to do is break up these curls so use your fingers to go through them and break them up a little bit you might notice they kind of poof up a little bit that’s totally normal you are gonna use your hair brush to kind of brush through and smooth everything back down now it is time to start shaping the curls so because the curl went away from your face.
You’re going to brush away from your face and you can see that that wave shows right up and that comes from having a really good set so I’m gonna brush all that out and get it nice and smooth but then I’m gonna take a comb and just direct it a little bit more just to get it perfect and then I’m going to use some little pin curl clips to hold all of that in place you can use any kind of clip you have that is flat and that will hold it in place so that we can keep doing the rest of the waves without disturbing it now I’m gonna do the same thing on the other side just breaking it up and brushing it through but on this side we curled toward the face so you are going to brush the hair toward the face until you see the wave pop up I use my comb to brush the hair forward and then you can see this little wave kind of starting right around my finger.
And I just went ahead and clips to keep that in place I actually ended up moving the clips to be underneath my finger later anyway for the back all you have to do is brush your hair straight back and let whatever wave happen happen that way you do not have to stress about it too much but if you do see a nice wave popping up as you brush through just go ahead and push up and add some clips and again if you do not see it too much like do not stress about the back just brush it and let the waves be what they are because the back does not matter that much then I realized that I needed to pin the bottom of the wave on the front so I just combed everything to make sure that it was nice and smooth you can see that I kind of pinned the top of the wave but I didn’t pin the bottom so once everything was nice and smooth I went ahead and pushed up and then I pinned everything in place to keep it there and that’s it for our first wave and we are only making two so you are doing great you are halfway there and now we are onto that second wave.
So I’m gonna go back to that first side of our hair and we are gonna brush away from the face again and I’m basically just gonna go through and just kind of finesse this so that it is a little bit more polished but as I brush through you are gonna see that wave pop up and that’s really the key to making this as easy as possible is letting the hair show you where the wave is so just brush until you see the wave and then clip the hair in place there if you do not see it simply by brushing try brushing the hair down and then pushing up that will usually show you where the wave is and then just hold your comb or brush in place and pin underneath it and that should help you be able to find the wave a lot more quickly and easily this site is a good example of that I was having a hard time fighting the wave.
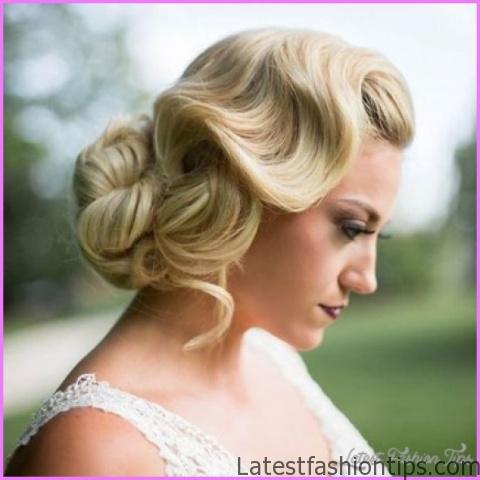
So what I did was just to brush my comb through until I pushed up and then I could find the wave really easily because I was right there over my comb so I put the comb against my head and clip everything in place underneath the comb but then once I let it away I actually had this funny bubbling effect if you get a bubbling effect like that all you have to do is push in on it and you can see that there’s that nice little wave that forms right when I did that that happened just because I missed one of the ways that I should have cuts before but this was a nice easy way of finding it without stressing me out and that’s actually it for the second wave so now I’m going to make the knots in the back the first thing that we have to do is to kind of smooth out everything that we have left after we made the waves it might look a little hairy and out of place but once you go through it with your brush everything should smooth nicely if you need you can add a little bit of smoothing serum into your ends just to help with that and then what we are gonna do is sweep this hair back and over the pigtail on the side that we are working on then just go ahead and pin it in place right there.
So that it is all ready to go into our little knots so we are literally going to tie and knot with our hair so I’m going to loop it around my hand so that it makes a little donut shape and then I’m just going to pull the end through that loop so like your standard basic knot this was actually a really popular thing to do in the s and you can really see it when you look back at their hairstyles so then you are just going to take this knot and you are gonna place it right on top of the holder from your pigtail and then you are just gonna pin it in place and once you are done with that we are ready to move on to the second side on this side you are gonna do the exact same thing you are just going to smooth everything with your brush sweep it over your pigtail and then pin it in place the new points make a knot the same way as before and you are just going to loop it around and pull the ends through that loop if your ends are extra long like mine are you can actually kind of tuck them around behind the knot that way they are not going to show up and then you just have to kind of push this one up really close to the first one so it looks like it is all one big bun or shenyang and pin it in place once that is done you have finished and I was really excited about that I’m going to add in some straw hold hairspray to make sure everything stays and also then add in a little bit of shine spray just to enhance the shine and the hairstyle once you have got all that in you can go ahead and carefully start taking the clips out and this will be the last step in our hairstyle this hairstyle just takes me back it makes me so happy because it really does imbibe the s and the glamour and the style of the era it makes me so so happy and I hope you guys like it too if you are interested in the iron I used today you can use code let’s make it up to get it for a hundred and twenty eight dollars plus a free serum or you can use code love Kayleigh to get any one for $ plus free shipping I hope that you guys love this hairstyle send me pictures if you try it out and I will see you in my next post.
Maybe You Like Them Too
- Celebrating Natural Black Women’s Hair: A Guide to Gorgeous Hairstyles
- Short Hairstyles For Women Over 60
- 20 Thrilling Twist Braids Style to Try This Season
- The Top 10 Asymmetric Hairstyles
- 10 Gorgeous Shaggy Bob Hairstyles To Get You Out Of A Style Rut