Hey everybody! If you are new here, my name is Abby, and my blog is over at Twist Me Pretty. I upload a new tutorial here on CGH every other Thursday, and today’s post we are doing three ways to Double Dutch. I hope you guys enjoy it. Make sure to comment below if you have not already, and let’s get started. Gather a small section of hair on the heavier side of your part, and I’m actually gonna leave a few bangs down, but you can pull it all back if you’d like. And then we are just gonna do a regular Dutch French braid. So split the hair into three sections, and take the top section under the middle, and then take the bottom section under the middle. And this is your first stitch.
3-in-1 Double Dutch Braids Build-able Hairstyles Photo Gallery


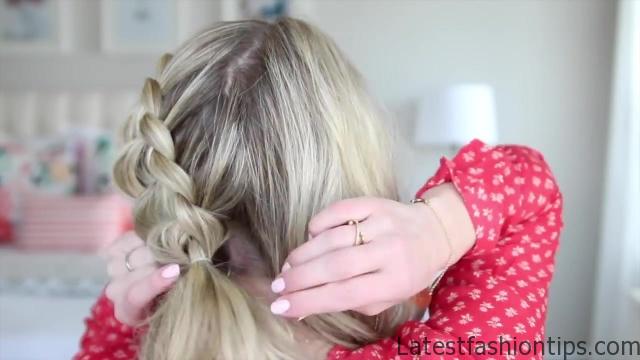
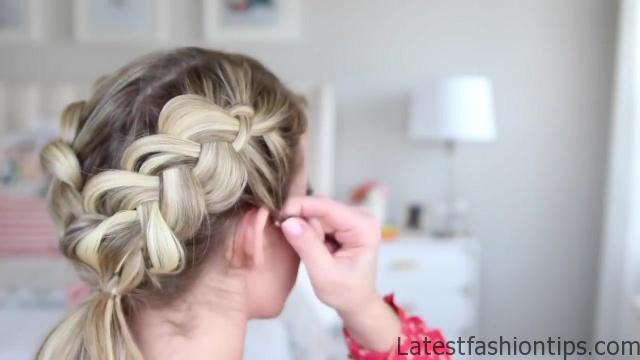
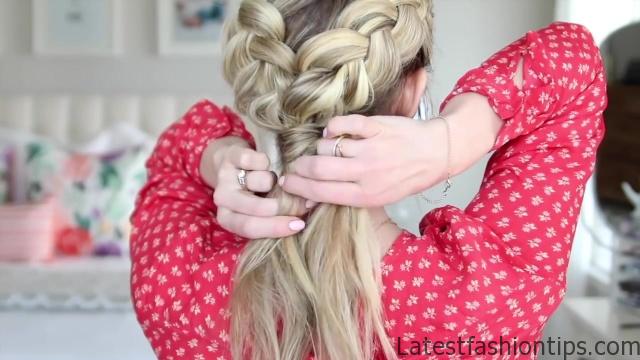

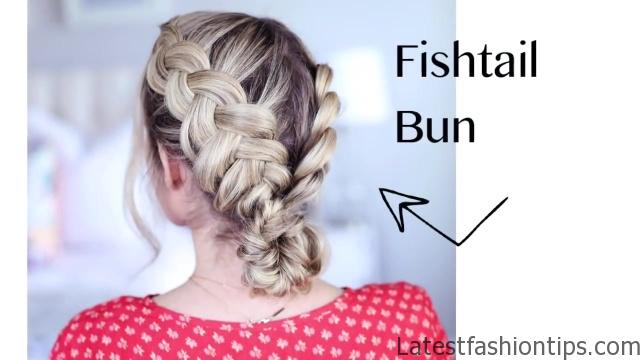
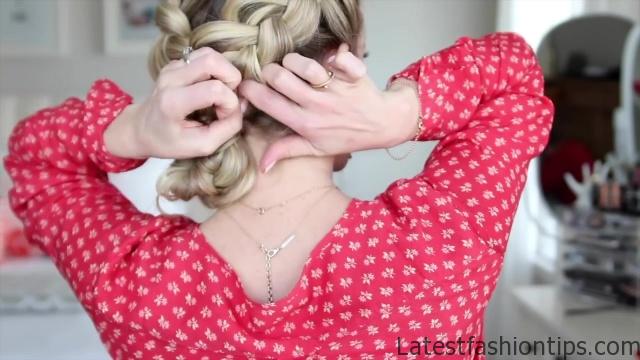

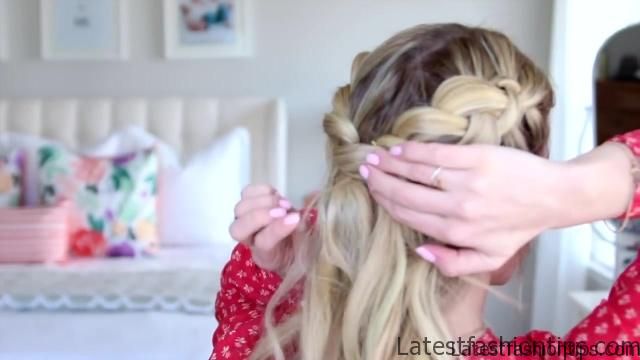
Now all we are gonna do is add in new sections of hair to each side. So add a section of hair to that top piece, braid it under the middle, and then add in a new section of hair to the bottom piece and braid it under the middle. And then we are just gonna continue these steps all the way down. (bouncy quirky music) When you reach the nape of your neck, secure the braid with a clear elastic, and then just fluff it out to make it look more full and voluminous. This is always my favorite part. And then we are just gonna repeat this on the other side. (bouncy quirky music) When you are ready to secure the second braid, go ahead and gather the first braid and just tie them both together. To finish off style number one, take a thin section of hair from underneath the ponytail and wrap it around the elastic band, and then just secure it in place with a bobby pin. And there you have it! Hairstyle number one. This is the Double Dutch braided ponytail. For style number two, we are gonna turn the ponytail into a fishtail braid.
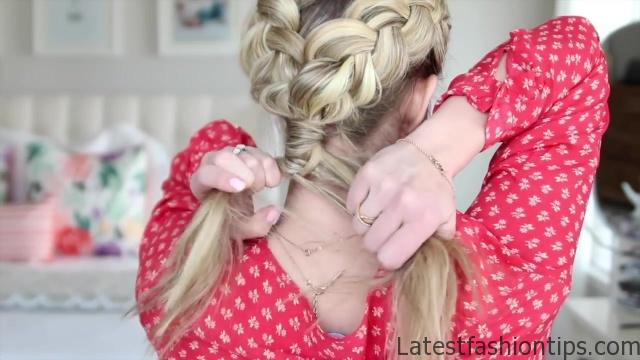
So split the section in two. Take a thin section of hair from one side and pass it over to the other. And then take a thin section from the other side and pass it on over. So we are just swapping these little sections of hair to the opposite side. (drum beats) (bouncy quirky music) When your arms can’t reach any further, go ahead and pull the braid over your front shoulder and now you are just gonna pass the sections of hair under its own section before combining it with the other side. (bouncy quirky music) When you reach the bottom, go ahead and tie off with a clear elastic, and then if you like the look, you can stretch the fishtail braid out to make it look even more full. (bouncy xylophone) And it is as easy as that! Style number two. This is a really pretty mixed fishtail braid. I hope you love it. For the third style, we are just gonna wrap this braid up into a bun. So take the bottom of the braid and twist it under, and then pull it up, and we are just gonna push the tail right above the ponytail elastic. So take your finger and find the tails, and then you are just gonna secure it with bobby pins. I get my bobby pins from Sally’s, and they are super strong, so they can hold a lot of hair. I will get all of this bun tied up with just one bobby pin. And then once it feels secure, go ahead and fluff the braid out a little more to finish it off. And you are done. Let me know in the comments below what style was your favorite, one, two, or three. I hope you guys enjoyed these three ways to wear it. Make sure to give this post a thumbs up if you did. And I have so many posts like this over on my blog. So make sure to come check me out. It’s Twist Me Pretty, and I will leave the link in the description box below. Please come over and say hello. I would love to hear from you. And you can find my latest post right here. And I will see you guys in a couple weeks for a new tutorial. Bye! (kiss smack) And for those who stuck around, I have a really fast bonus style for you. This is a braided crown, and all you are gonna do is combine the two Dutch braids and secure them with a couple bobby pins. And voila!.
Maybe You Like Them Too
- Celebrating Natural Black Women’s Hair: A Guide to Gorgeous Hairstyles
- Short Hairstyles For Women Over 60
- 20 Thrilling Twist Braids Style to Try This Season
- The Top 10 Asymmetric Hairstyles
- 10 Gorgeous Shaggy Bob Hairstyles To Get You Out Of A Style Rut


