Hey everyone. I’m Abby from LA, and I have a surprise for you today. Now many of you know that recently we had a Skype tutorial with Linda Flowers, who’s the head hairstylist on the “Hunger Games.” And we were able to Skype with her, and she showed us lots and lots of really neat tips and tricks for all the different hairstyles or many of the different hairstyles in the “Hunger Games.” And we have a surprise for you guys now, too. Hi, everyone. My name is Linda Flowers. I’m the hair designer and the hair department head on the “Hunger Games.” I’m so excited to find that Cute Girls Hairstyle tutorial on the Katniss braid, so I decided to reach out to Abby and all the people from LA and give her a tutorial on exactly how I did the Katniss braid. So she is able to now share that with you guys. I used a tool, a styling tool, called the TopStyler by InStyler, and it is a wonderful tool that allows you to do so many different things to the hair. You can do spins, figure eights, finger waves, and I also used it on Scarlett Johansson on “Iron Man ” for her Black Widow look. But again, Hairstyles, thank you so much for doing the tutorial on the Katniss braid, and I hope you will continue to do more for me.
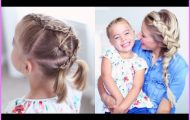
Authentic Katniss Braid Hunger Games Hairstyles Photo Gallery
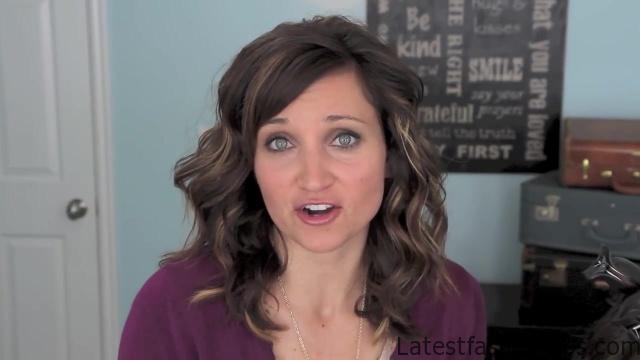
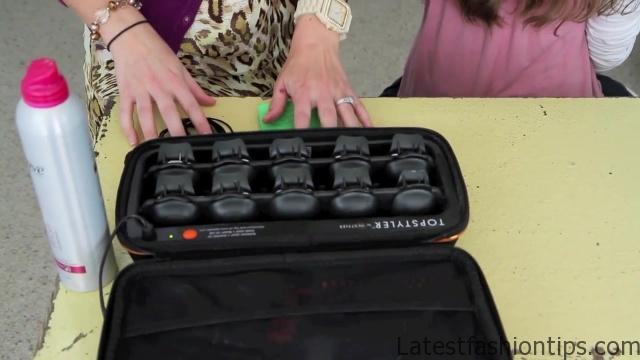
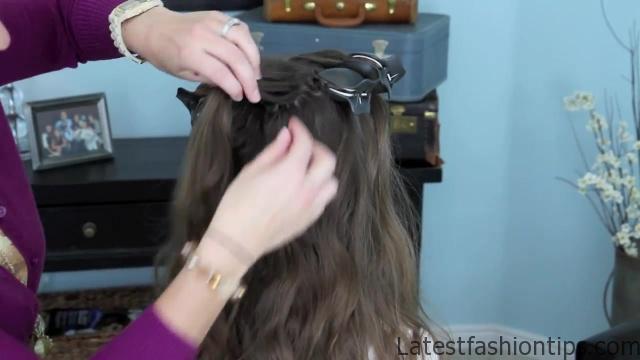
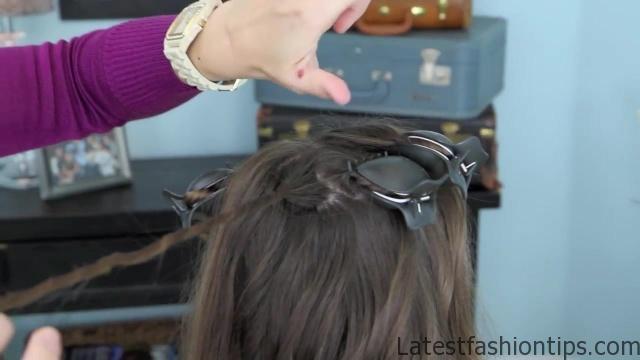
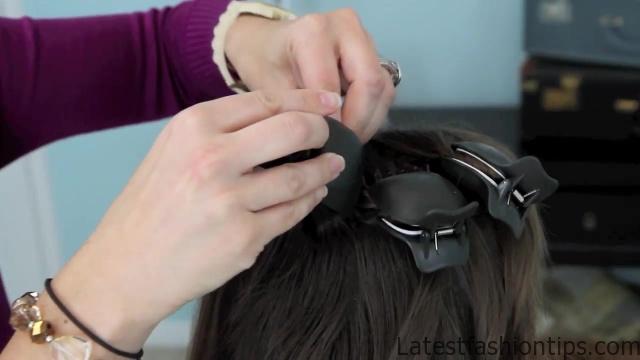
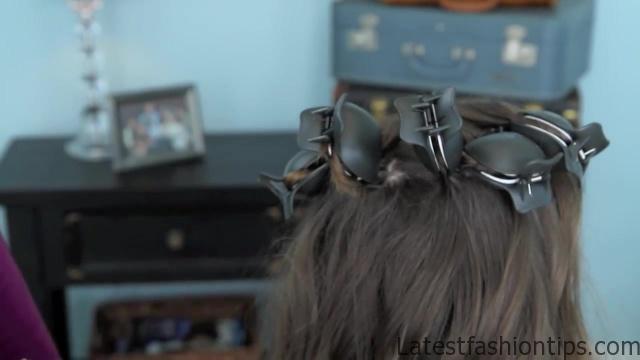
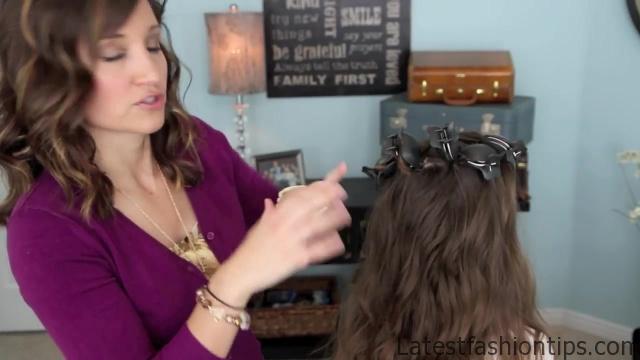
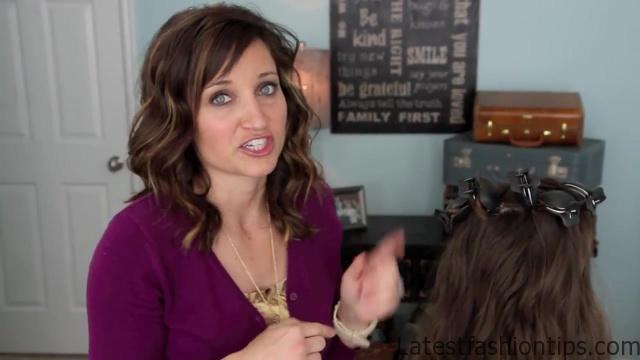
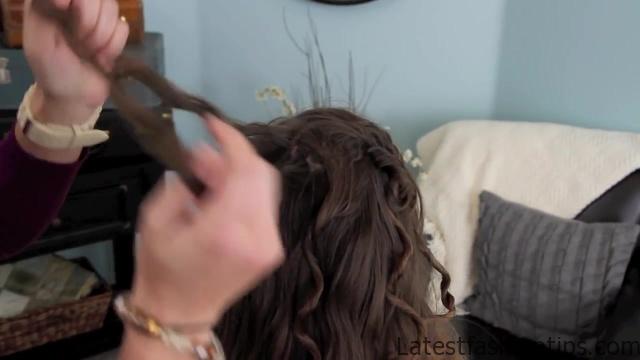

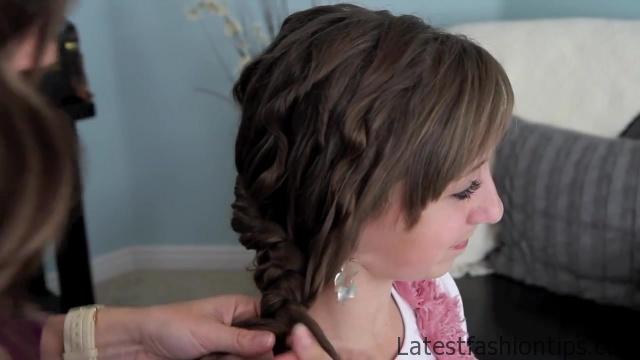
I really appreciate it. I’m so honored that you took the time to even show everybody and that you had such great response. And I’m excited to start designing the hair for the second “Hunger Games,” and I will try to post what I can and keep you up to date on what’s going on. Thanks. Thanks, Linda. So I’m going to show you now how to do the exact Katniss braid. So you have already seen my version of it that we put up before the movie came out, but the one thing we were missing was the texture and the volume in the top of the hair. So according to Linda, brown hair especially, it is hard to show up that texture and volume in hair on a movie screen, and so she has to add a lot of texture. So she used the TopStyler, and this is what it looks like when it is opened up, and this is what it looks like when it is closed. And one of the things I like is that it has like a little self-contained compartment for all the extra little clippies and such. And I have already got it heated up. You can see it is like these little c-clamp shells like this. These are full ceramic on the inside, and so they are really, they are not as damaging on your hair. And they get all hot. So what Linda showed me she did I have already done a few on the top of Jennifer’s hair was she took a section, and she sprayed it with hairspray, and then she did a hard twist. So twist the strand up like so. And then she took her fingers in the shape of an L you can see my sore from shoveling wood chips the other day so an L, and she wrapped the hair back and forth and back and forth like so. And then pinched the hair pinchy-pinch. Then she just slid those coils off into a little ball, took one of the TopStyler c-clamps clam shells and pinched it on. So one of the nice things about these sea shells, or c-clamps, are that the hair all fits inside of it, and they allow a lot of volume in the root to where like, a hot roller puts most of the volume in the ends of your hair. And it is also an indirect heat, so it is not going to get as hot. She told me that the hottest that the TopStyler gets is , which is not hot enough to burn your hair.
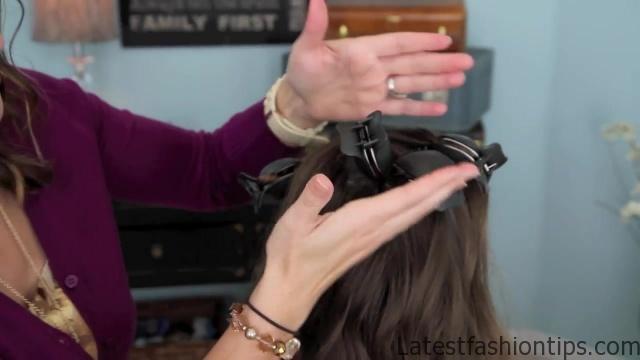
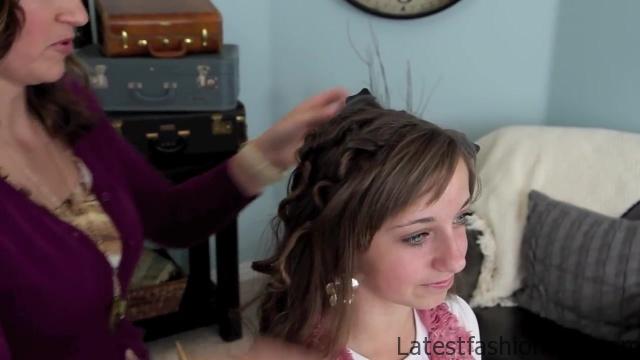
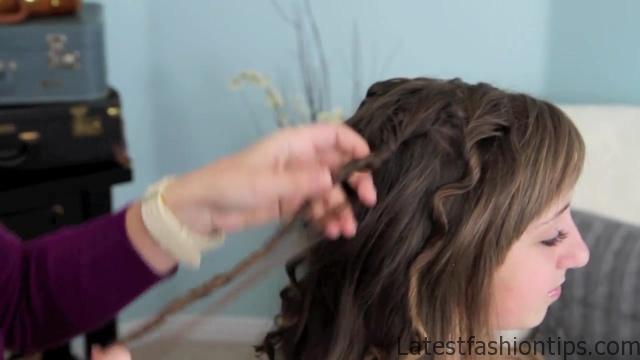
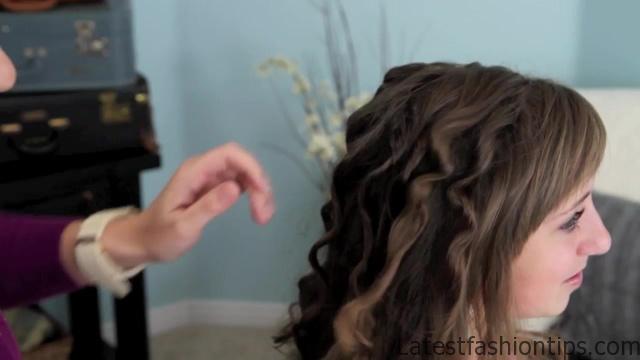
So that’s a really good thing for those of us who have delicate hair, or where you do not want to be dealing with really super hot styling products. So again, I’m going to show you a little bit of hairspray, twist the hair this is just one of the many, many things you can do with the TopStyler. So I’m going to go around the finger, thumb, finger, thumb, pinch the extra hair, slide it off, and then grab a clamp and put it on. Now when I got my TopStyler, it came with a booklet that had about, I bet, different techniques that you can use. One of the differences between the TopStyler and a regular set of hot rollers is the hot roller you know, they are just the round shape and they determine the shape of the hair when you roll it up. Where this one, you can do finger coils, or like I was doing using two fingers or three fingers. There’s so many different things you can do that change the texture and the shape and the pattern of the hair. And I will even give you a little tip. Many of you have asked about Katniss’s hair, the soft hair that she has that’s just really almost looks like finger curls when she’s talking to Peeta the night before. And that is actually a TopStyle wave too, that’s very different than the one I’m doing today. So it is a lot of fun. So we are going let these sit for like , minutes, and then I’m going to come back and undo them. It’s simple. Turn. See the really pretty curls. So what Linda told me was, her inspiration was dreadlocks. She wanted the curl to sort of look like a dreadlock effect because she wanted a really urban feel to Jennifer’s hair. So once she got to this point, she took and separated them, like so, into about two pieces. So we are just going to kind of separate, and like, if they start coming undone, you can re-twist a little bit. Because she wanted the twisted look, obviously. You can see how much texture that gives to the hair, just doing that. OK. And another little thing she told me that I thought was fun was that when Jennifer sat with the curlers in her hair, the c-clamps, she would text or go eat or whatever while she waited for her hair to be done.
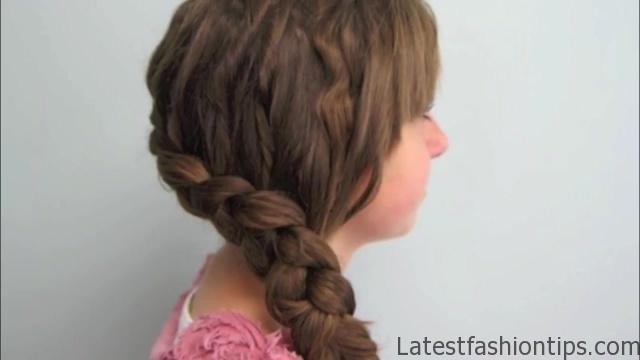
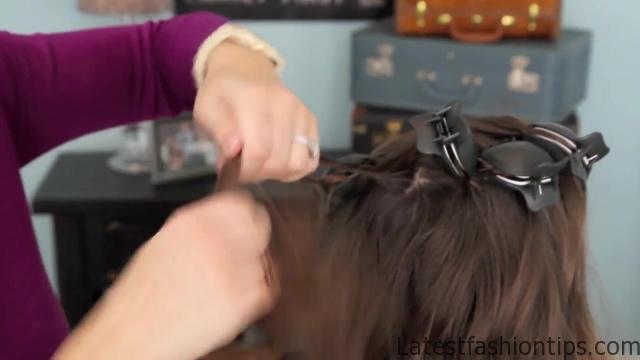
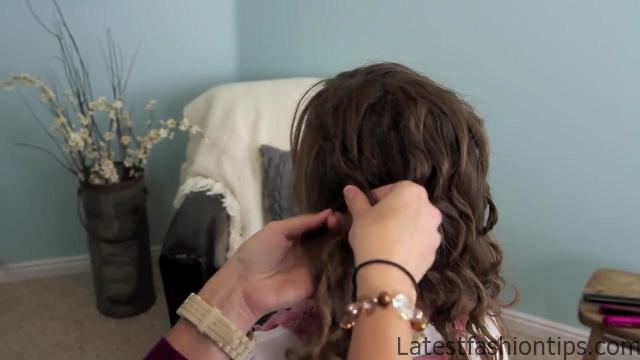
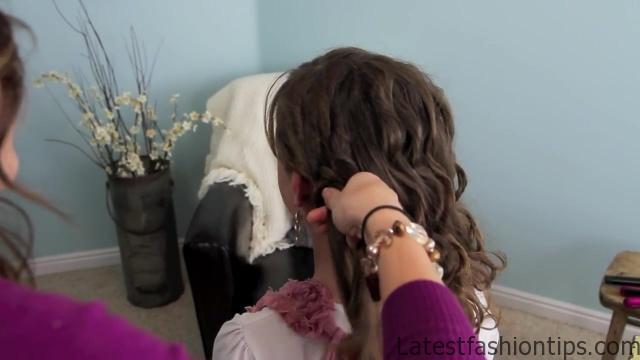
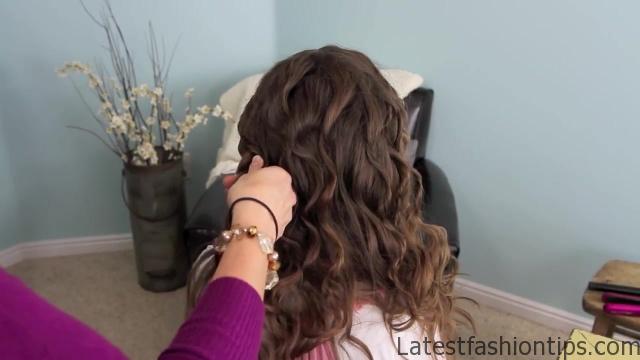
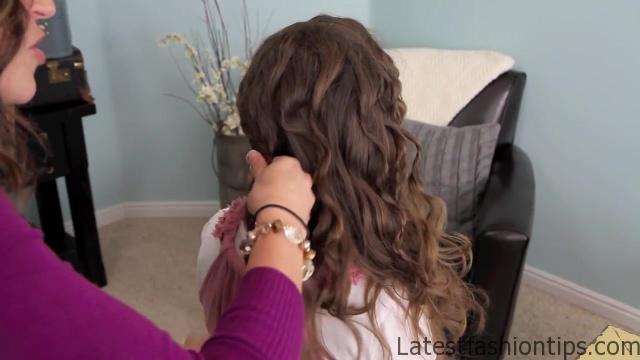
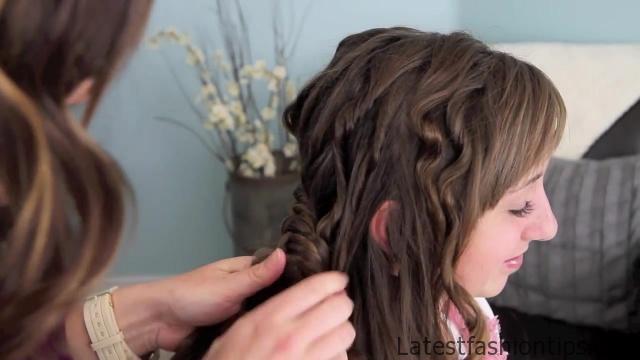
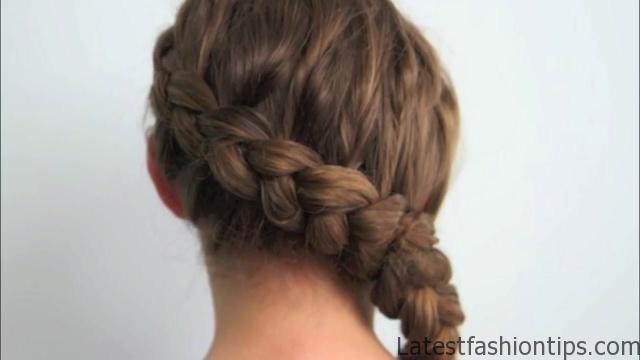
OK. So at this point we have some nice volume added to the hair, and we are going to come over here behind her left ear and we are going to just start our braid. And I’m going to just grab some hair. And she said she started it right behind the ear on the left side. And she did the outtie braid, so a Dutch braid. And then as she was going and adding hair into the braid, what she would do is just pick up one of those little twist pieces and pull it in as she went along. Sorry. And then what she did was she said she followed the nape of her neck, the hairline, all the way around the head. And she did this because which I thought this was one of my favorite things she said that I had never thought of but she said that she had to keep it low on her neck line, right at the nape of her neck. Because in the movie, obviously Katniss is pulling out arrows out of her, you know, what do they call it, quiver? And so if she was pulling arrows out and her hair has, you know, her braid was here, the arrows would have gotten caught in her hair. So she was pulling them out and putting them in, and so her braid had to be really low on her neckline. Which I thought, wow, I had not thought of that. So she just continued to do the braid, and add in hair. And I know some people were speculating, I have been reading and some people were speculating that the braids changed throughout the movie, that it wasn’t the same braid all the way through. And that is not the case. The braid was the same all the way through the movie. The only difference was just whether they had just done the braid, or it had been all day filming, and so the hair obviously loosens over time and looks more messy then other times. And we are almost done. So you can pull those in as tight or as loose as you want them. Just to leave the texture to the hair. And I’m not going to do detailed directions on the braiding, because you can check out my other post for that. And then secure the end with a rubberband. And that’s how she created the fun texture that she had at the top of Jennifer’s hair that we missed the first time around in my braid. So you can see it adds a lot of dimension and looks a little more, you know, like a girl’s hair would if she’d been running through woods and playing in the arena. So there you go. I hope you enjoy, and we will see you for our next tutorial. Oh, I almost forgot one important quick note. We are actually going to upload a second post today, because we are doing a giveaway. And we are going to be giving away one of these awesome TopStylers the same thing I’m using and all of the directions and instructions on how to enter the giveaway will be in the other post. So do not forget to check that out and make sure that you enter for the TopStyler, because it is amazing and I have loved it. See you later.
Maybe You Like Them Too
- Celebrating Natural Black Women’s Hair: A Guide to Gorgeous Hairstyles
- Short Hairstyles For Women Over 60
- 20 Thrilling Twist Braids Style to Try This Season
- The Top 10 Asymmetric Hairstyles
- 10 Gorgeous Shaggy Bob Hairstyles To Get You Out Of A Style Rut
