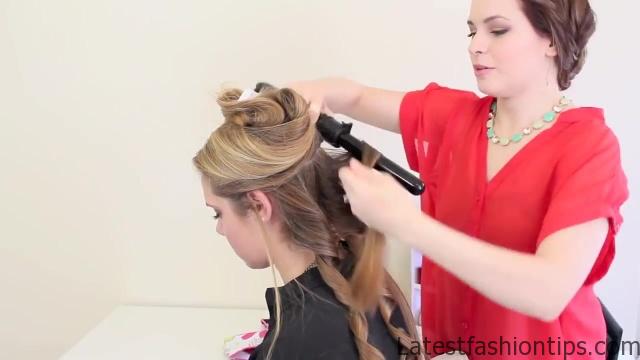
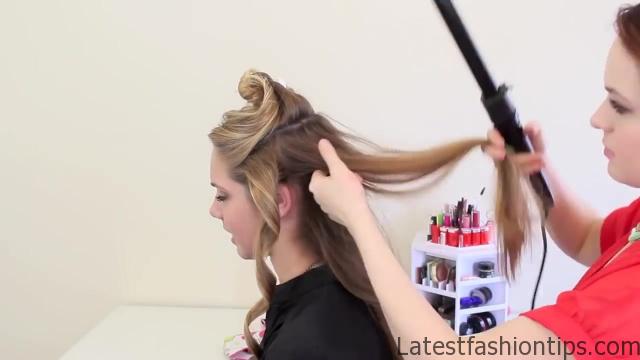
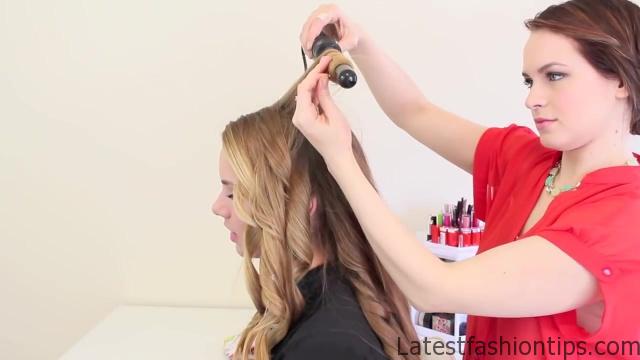
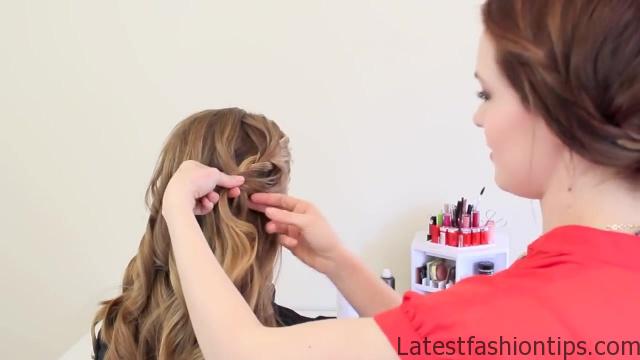
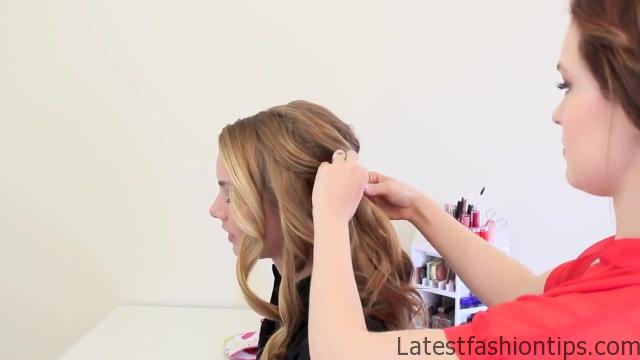
Today. I have a braided prom updo. So I figured a lot of you guys would like that. Because a lot of you like me our fans of braids is actually a bit easier than it looks. So let’s get started first of all you are going to curl the hair. I use the one-inch curling iron. And I did three sections starting with the bottom nape section, and curling around, and basically what you want to do is to create little ring Liddy looking curls now if your hair is hard to curl you are going to want to wind it back up, and pin it in place like. I do in basically every curling tutorial once you have that bottom nape section done section the hair at the temples up, and then continue to curl around now if you want this to look more bohemian, and a little bit messy go with a smaller curling iron but definitely if you can do not go in these long cleanly larger than a one-inch curling iron then for the top take little one-inch sections for each of the curls. Because we are going to be using these for the braids do you want these to be a little bit littler than what you did on the rest. So try to take one to two inch sections for the top section of hair, and then try not to disturb these curls but do not run your fingers through them you want them to stay rather ring lid die for this little portion now we are going to create the French braid you are going to start on the hair decided the heads it has the least amount of hair, and grab that little corner section to make sure that it drapes back nicely then you are going to spy it into three, and begin your French braid make sure that you are making this braid very loose you do not want this to look tight, and really rigid at all.
Braided Formal Updo Photo Gallery

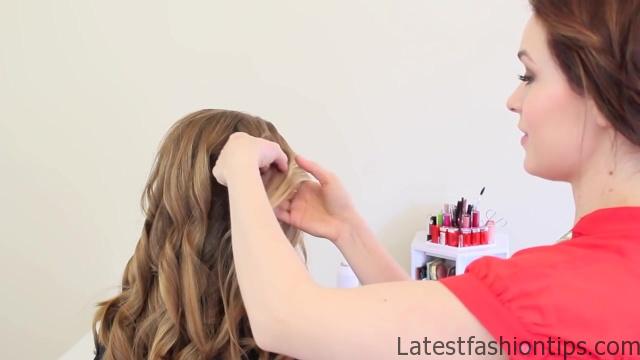
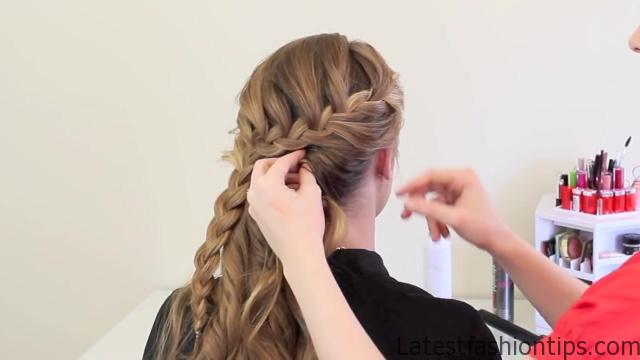
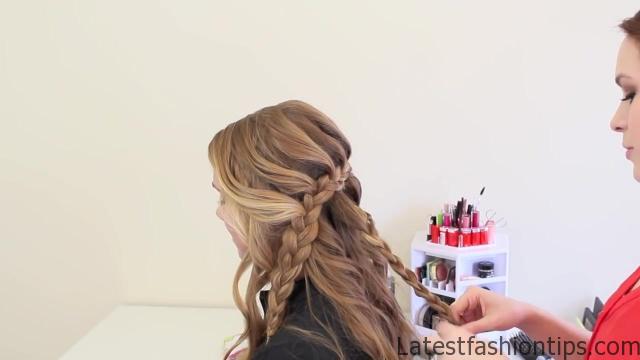

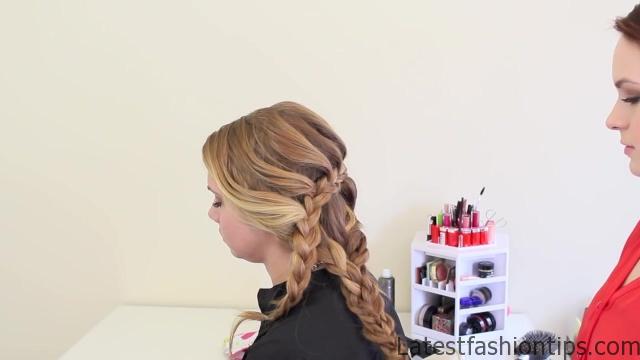
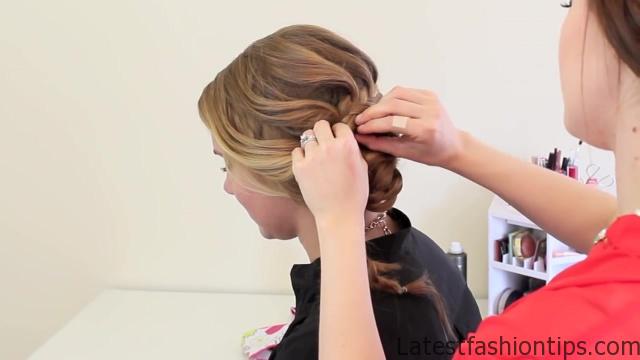
So. I went through. And I rated it. And I kept making it looser you are going to see me like pulling it apart as. I go. So you have got these three little steps, and then as you add in hair only grab the ringlets that you made with the curling iron do not split them up. Because that makes this really pretty PC looking thing, and it also keeps the shape of the curl in. So I added hair from both sides until you have incorporated hair all the way from behind the ear, and then only incorporate hair from the top, and basically just continue doing that, and CMU is really loosely and, I will not pulling those back tightly at all, and especially make sure with this piece that you really like how that drinks back into the braid have the brain Grease is you want to make sure it looks good then braid the rest normally, and secure it with a small band step three is to twist we are going to deal with that hair just kind of on the right side of the head to take a little two-inch section, and curl it, and drape it right underneath that braid, and pin it in place, and then repeat with another two-inch section if that seems a little bit difficult for you can actually with your French braid just incorporate hair from both sides. I just wanted to add a little bit of difference into the style. So that one’s optional now we are going to braid some more basically with the remaining hair that you have left you are going to braid three braids. So, I have got the one in the center, and then, I will going to do the two on the side you want to make sure that these are as loose as you can get them. Because you want that brain to be nice, and full, and you want the bun that you make these to be nice, and full.
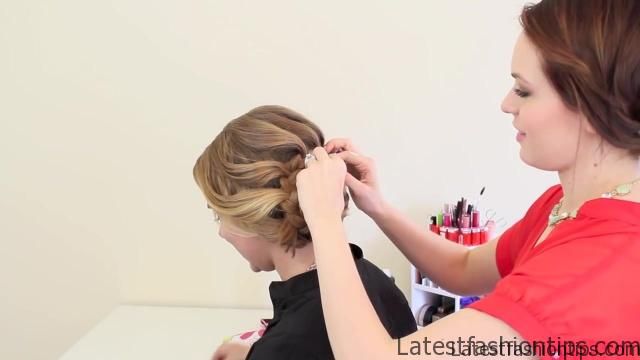
Definitely keep them as loose as you can, and if you want to keep any flyaway away go ahead, and miss them with hairspray before you start to braid them, and that will keep them as neat as possible, and again secure all of them with little tiny bands once you have been any now we are going to create like a number braid by braiding all three of those braids together again keeping it as loose as you possibly can, and then secure the end with the band, and now we are going to create a bun with that braid. So basically you are going to twist it around it is the shape of a bun make sure that the ends of that hair are hidden. So that you do not have the ends of the braid sticking out anywhere, and then pin it into place now you can either wrap the end of the braid that’s left around the bun or if you want to you can kind of go through the loop of the bun like. I did right here, and then kind of place it over, and pin it in place underneath the other side of the bun it just kind of adds a cool dimension. Because you look at it, and you are like. I do not know how somebody did that it just kind of creates a really cool shape either way it’ll look fine you can just wrap it around or you can pull it through whichever is going to be easiest for you do not stress just do whatever works for you, and that is it for your braided hairstyle again you can make these little curls tighter you can make it Messier if you want a more bohemian look but. I went with a little bit of a pretty sleek look for prom. I hope you guys liked it be sure to check out my previous prompt tutorial and, I will be back later with more posts. I love you guys very much, I will see you then Wow hi you.
Maybe You Like Them Too
- Celebrating Natural Black Women’s Hair: A Guide to Gorgeous Hairstyles
- Short Hairstyles For Women Over 60
- 20 Thrilling Twist Braids Style to Try This Season
- The Top 10 Asymmetric Hairstyles
- 10 Gorgeous Shaggy Bob Hairstyles To Get You Out Of A Style Rut

