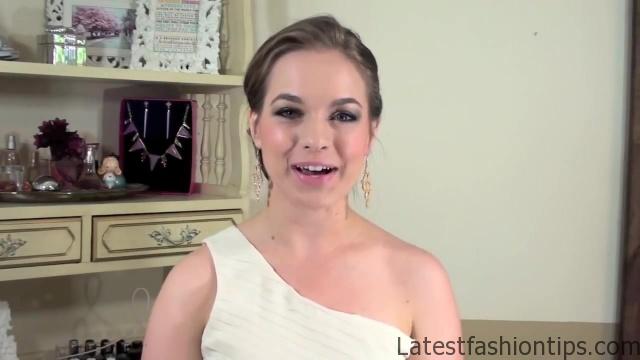
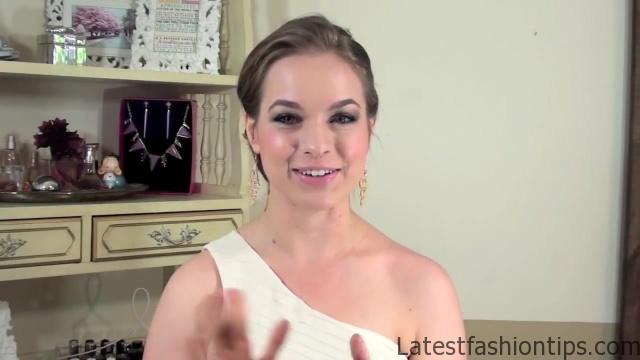
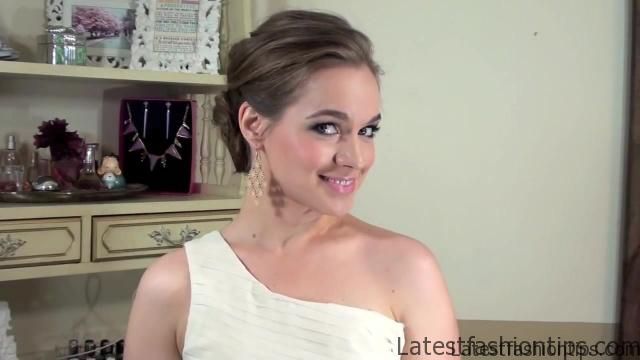
I have some little homecoming posts for you guys before. I launch into my Halloween tutorials which, I will super excited to film but. I decided to do this week, and then next week doing some homecoming hairstyles. So that’s really fun. And I decided to organize some of my older posts into a homecoming hairstyles playlist that way you have a lot of inspiration to come to draw from. Because. I mean. I understand that. I have a lot of from viewers with a lot of different dresses, and tastes and. So hopefully this will kind of hit everybody, and you guys said, I will find some inspiration from that, and this hairstyle in particular was from the in dashy Oh show. I actually wore it for that one of the hair stylists did it on me. Because. I had like a hair fail which is like the worst time to have the hair fail is when you are going to your first runway show ever but it happened, and you know. I didn’t. I it was okay when. I got to the show but then we were in the basement, and it was hot, and it was sweaty, and people kept running into my hair. And I was just like, I will taking it out and, I will redoing it, and one of the girls was like oh just come here, I will do it for you.
Classic Side Updo – What I Wore to the Indashio Show Photo Gallery
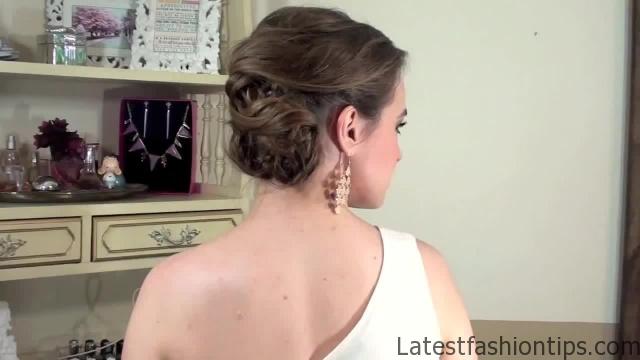
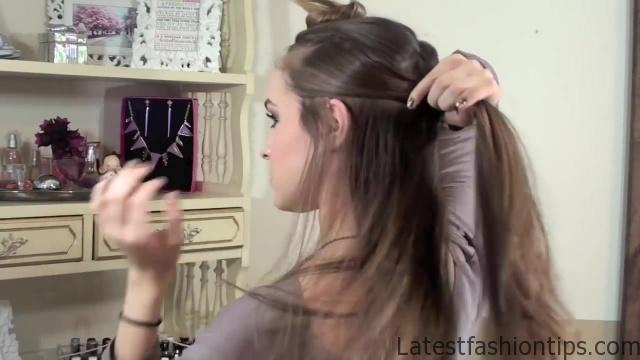
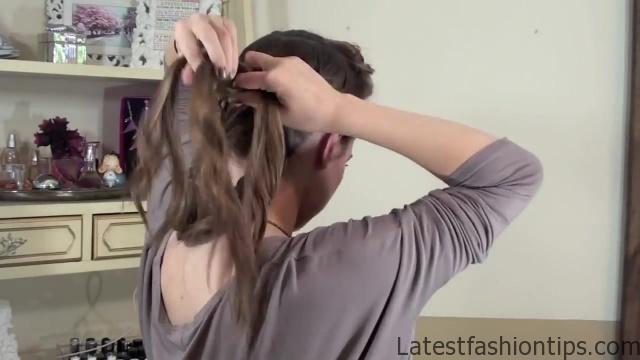


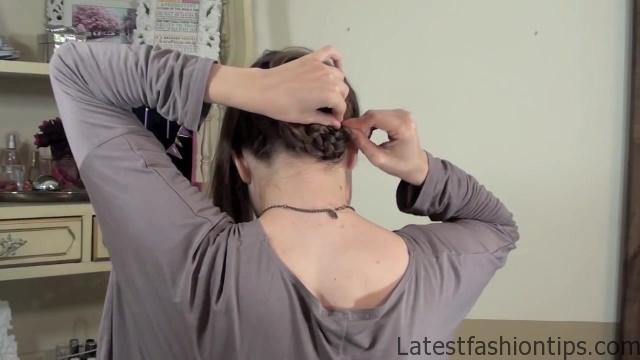
So she did this hairstyle on me. And I really liked it. So I was trying really hard to pay attention to what she was doing. I didn’t have a mirror or anything to see what she was doing. So I tried really hard. And I think. I recreated it pretty closely. So I hope you guys like this. And I will see you guys in my next post la bye first you are going to start by separating your hair from the temples to the crown of your head, and kind of a horseshoe shape, and securing that out of the way then behind your right ear you are going to go ahead, and take all the hair that’s just behind that ear forward, and separate that out of the way, and then the remaining here you are going to split in half horizontally, and then go ahead, and secure the top half out of the way. Because we are going to work with the bottom half first we are basically going to French braid all three of those bottom sections. So you are going to start on this left side braiding through the right, and basically go ahead, and French braid all of the hair until you have all the hair incorporated, and then you are just going to braid normally for about six inches if you can just depending on how much hair you have, and once you get that all done you can secure out with the clip a bobby pin, and a band whatever you want to do there then let down the top, and do the exact same thing just braiding along until you have the hair incorporated now. I only French braid it for a couple inches on this side, and then.
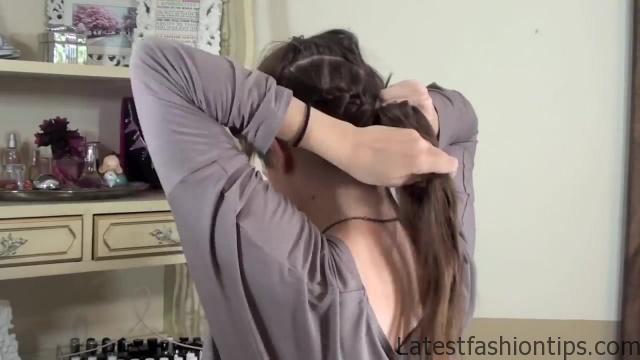
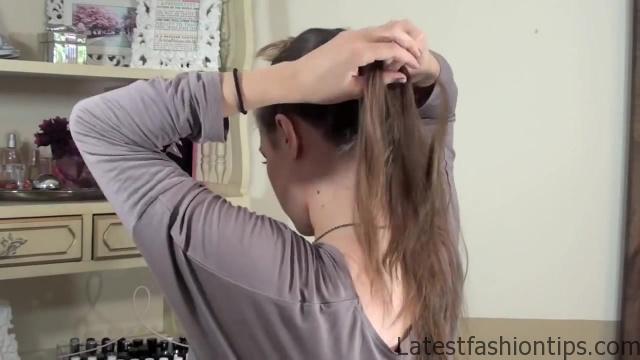
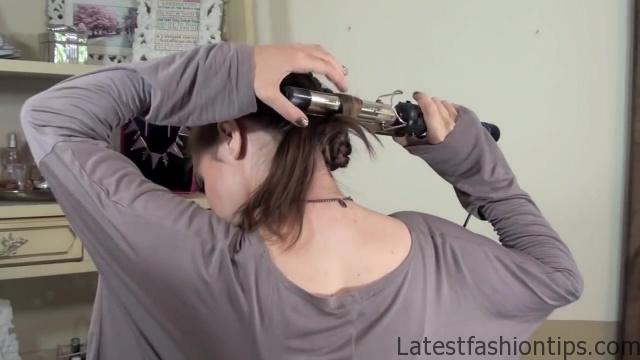
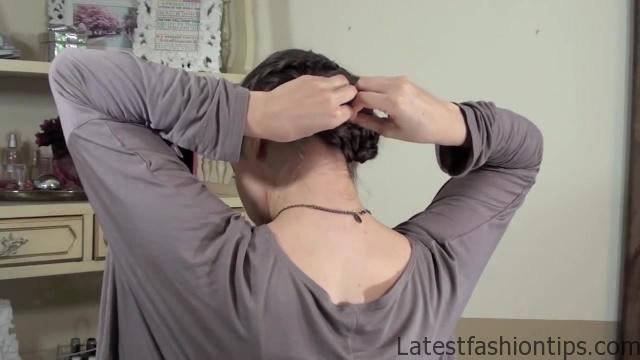
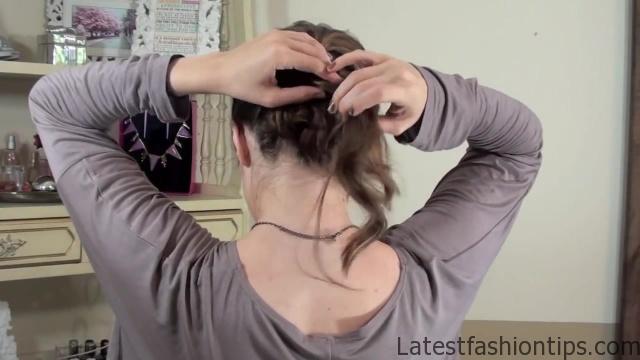
I just braided normally that was just a decision that. I made you can pretty much do whatever you want there either way you are just going to make sure that you braided a couple inches normally, and then see here it, and then let that other section down on the right, and you are going to braid back toward the sections that we already did incorporating all of the hair that we have left, and then go ahead, and braid a couple of inches normally once you have all that hair incorporated all those French braiding makes a really nice base for everything that we are going to do. Because when you have the hair secured into something it is a lot easier to pin into it now you are going to take those three sections, and braid them together for just a couple inches basically until you reach the end of where you have normally braided the hair. So you can see there. I got about maybe four or five inches of braiding, and they are going to arrange it in kind of a semicircle shape. So that it looks like the side of a bun it is basically the best way. I can explain it you can kind of see it right there, and then you are just going to go ahead, and pin that into place right there, and you want to make sure that when you are pinning it you go ahead, and pin the ends of those braids like this right here, and that way you can go ahead, and let your clips out, and the rest of the hair just fall on the braid won’t unravel then take your curling iron, and curl a little bit of the hair left over if you have any just depending on your hair length, and kind of pin it up finishing out the shape of the bun with hair that is not braided just like.
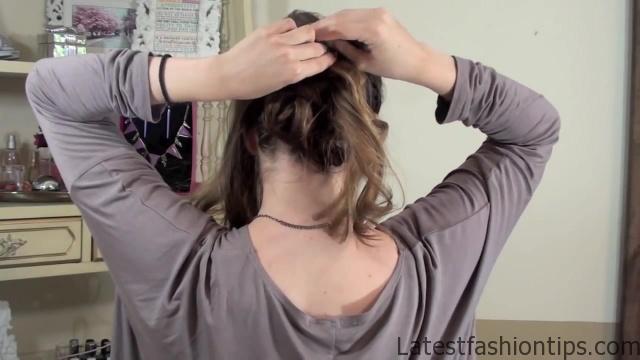
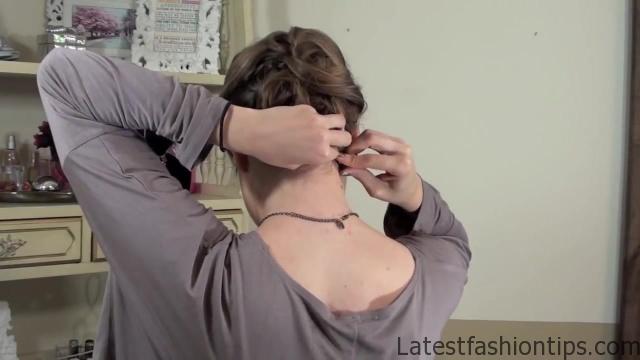
So, and if you do not have any more hair left just kind of work with what you have it is going to take a little bit of being creative there if your hair’s a little shorter then let the top down, and go ahead, and spy it where you want your part to be then on the side that has the most hair you are going to go ahead, and curl your hair with the iron pointing directly upward, and then what you are going to do is take the hair spy it in three you are going to braid for about two inches this is just going to create a little bit of interest in the way that the hair falls back, and it gives you a little bit more control in our next steps what we are going to do is create an S in the back. So you are going to do is take that little braided section, and turn it under like. So, and this creates the top of the S, and you can see. I left the long clip in here just. So you can see. I took it very slowly, and carefully turned it under like that to make the top of the S shape, and then just pin it down in place, and then you are going to take the remaining hair, and curve it around. So you create the bottom of the S shape, and once you have got it there you are going to pin it into place, and then if you have any hair left over you can either do a pin curl with it like. I do right here or you can just tuck it underneath that braid, and put it in place depending on how long the hair is then we are going to go ahead, and work with the hair on the shallow side. So you’re going to be silly comb it back in a way that you feel is flattering to your face shape, and then hold it right underneath the top of that s, and pin it in place, and then you are going to take the remaining hair, and curve it along, and follow the bottom shape of that s though you have already done, and you are going to pin it in place right on the outside of the bun. And I left this clip in right here. So that you can see how. I pinned it in all in the very outside of the bun to pin it in place, and then again you can either tuck the hair under or do a pin curl with it to go ahead, and finish it off, and you can see, I will pinning it in at the top, and the bottom. Because. I feel that’s the easiest way to pin a pin curl into place, and that’s it is a lot different than. I usually do as far as just techniques that you use but. I do feel like it is really pretty. And I think it could be fun, and if you can’t do it on yourself maybe you could do it on a friend’s just you know to give each other’s hair for homecoming or whatever that you have coming up hope you guys liked it and, I will see you my next post bye.
Maybe You Like Them Too
- Celebrating Natural Black Women’s Hair: A Guide to Gorgeous Hairstyles
- Short Hairstyles For Women Over 60
- 20 Thrilling Twist Braids Style to Try This Season
- The Top 10 Asymmetric Hairstyles
- 10 Gorgeous Shaggy Bob Hairstyles To Get You Out Of A Style Rut


