Hey guys! Thank you for coming over to our blog. If you’re new, click right here to comment. And if you’re old, welcome back! Halloween is fast approaching so this week I’m trying five DIY Halloween costume ideas that I found on Pinterest. None of the costumes that you’re about to see in this post were my original ideas. I just wanted to test out how easy or how hard DIY internet costumes really are. Today’s costume was a DIY bag of jellybeans. Woo! I also brought along some special Halloween edition Jelly Belly candy to really get into the spirit.
DIY Costumes Photo Gallery
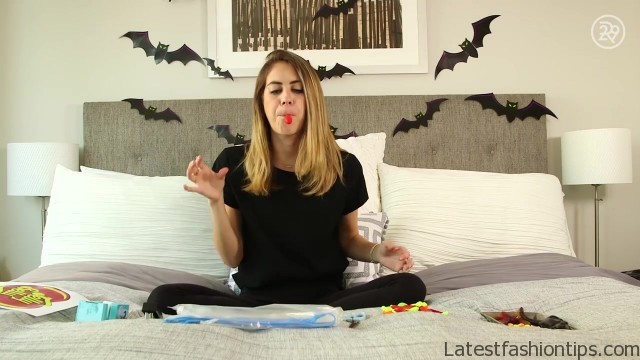
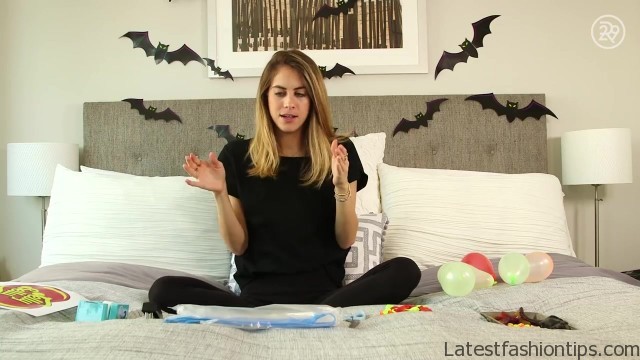
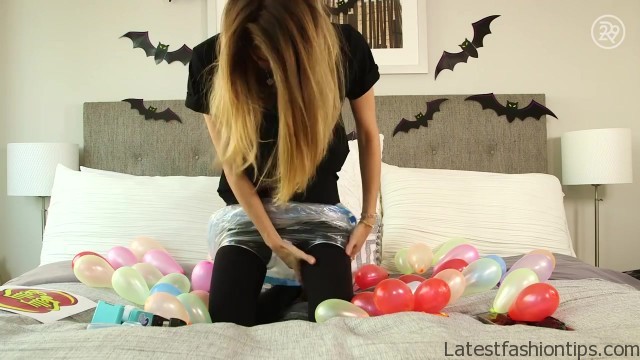
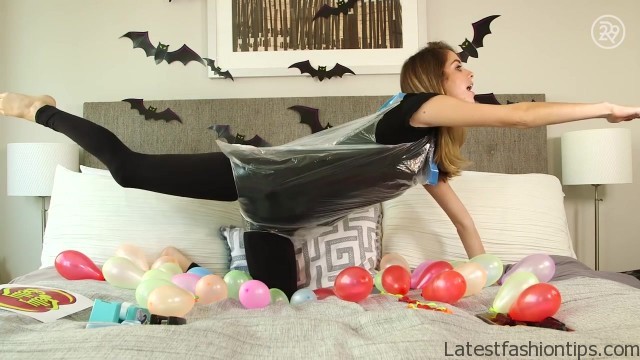
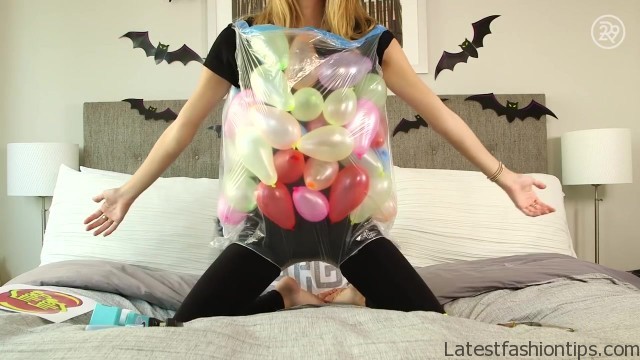
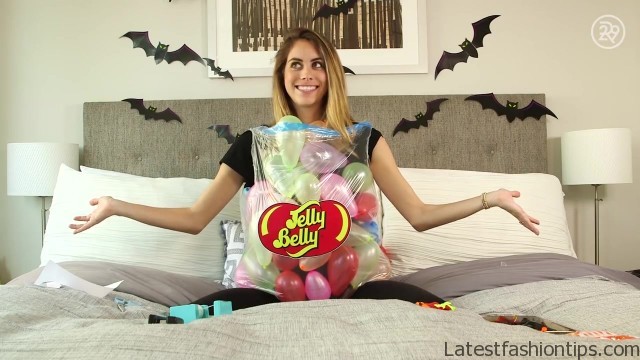


I wore all black as the base for this costume, but you can wear anything you want. Props needed for this costume: balloons, scissors, a 13-gallon or bigger clear trash bag, a stapler, tape, and a printout of the Jelly Belly logo. First, I blew up the balloons. That was pretty good. Some flew away from me. Some balloons popped. But once I had enough balloons inflated, I cut small holes in the base of the garbage bag for my legs. And I intentionally made these slits really tiny so that once I put my legs in, my legs would stretch the trash bag and then it would be the perfect size hugging my thigh. I stepped into the bag and then I pulled it up over my shoulders. And we’re in! Ugh. No! And then I filled up the bag with balloons. Lastly, I cut out the Jelly Belly logo, stuck tape onto the back of it, and popped it right onto the belly of the bag. Now you’re a bag of jellybeans. At the very end, some balloons were coming out of my armholes. So that’s when I took the stapler and I staple the bag beneath my armpits to keep all the balloons in place. And just like that, I was a bag of jellybeans.
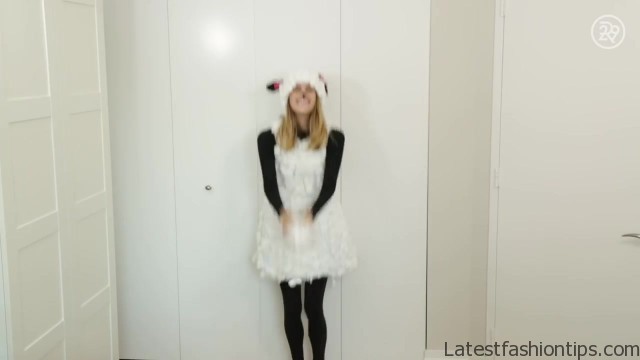
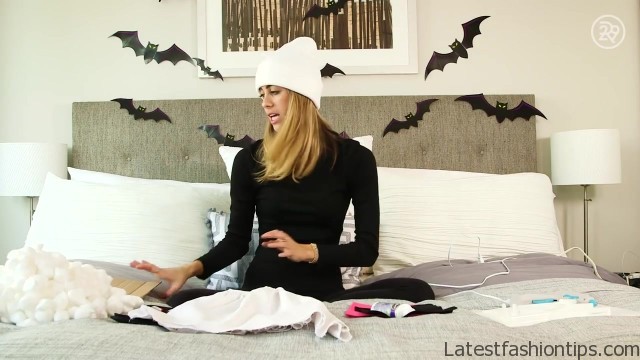
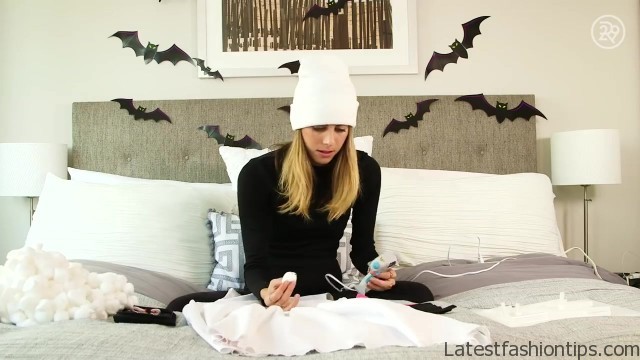
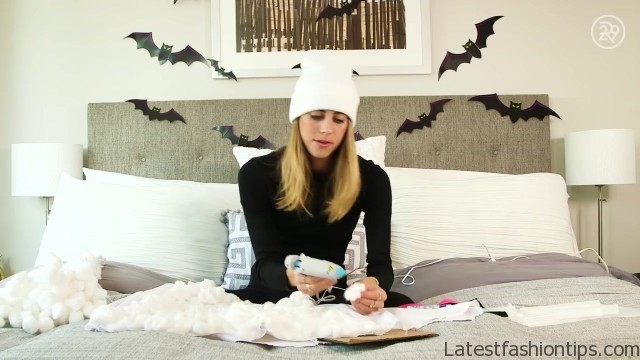
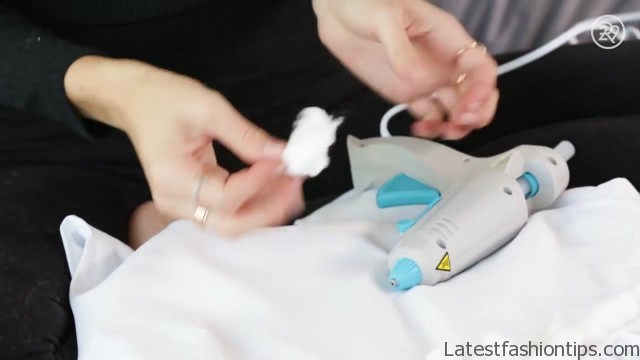
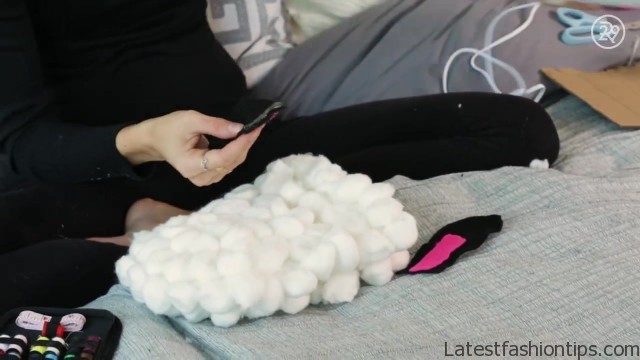
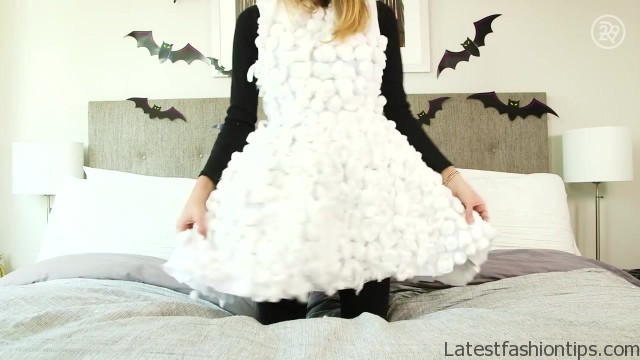
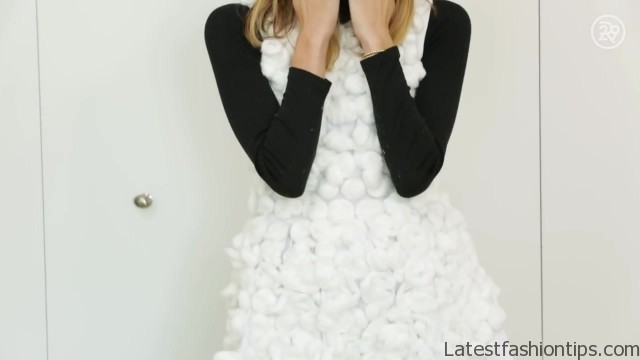
Fast, easy, and fun. Would highly recommend. Today I followed the directions for a DIY sheep costume. Props needed for this one: cotton balls. I wound up using about 400 total cotton balls for this project. So make sure you have enough handy before you start. A mini sewing kit. A white dress. A white beanie. Black and pink felt. Fabric glue. And a hot glue gun with a ton of extra glue sticks. Perhaps most importantly, I have this stray piece of cardboard that I’m going to use under the dress. So that I don’t hot glue gun the two sides of the dress to one another. The first step is to hot glue gun the cotton balls all over the entire surface area of your dress. I’m talking the front, the back, the sides.
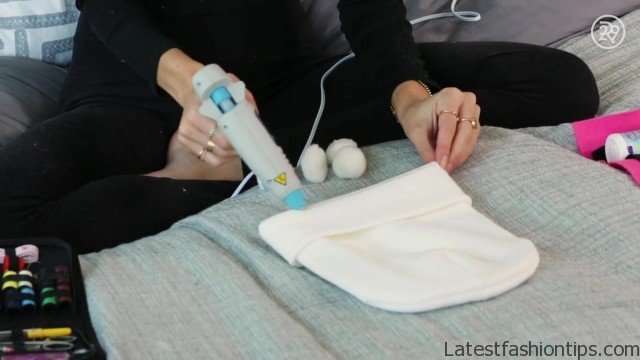
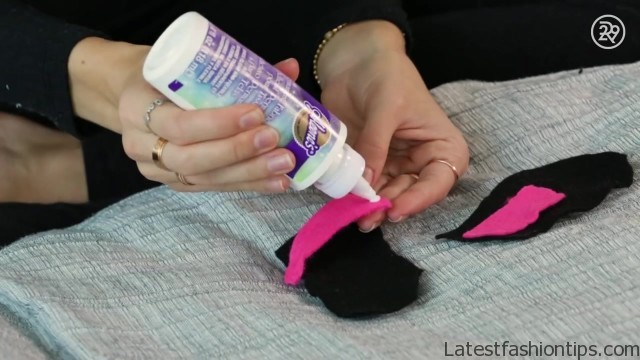
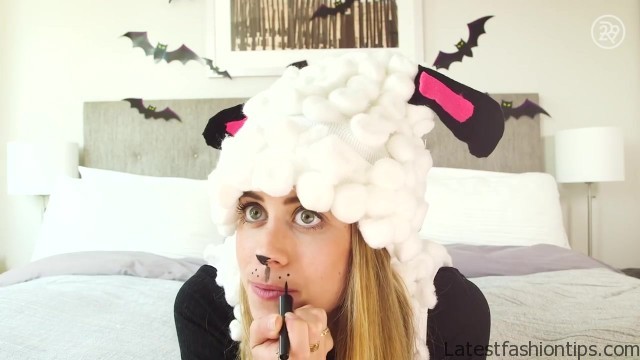
Anywhere there’s dress fabric, there’s cotton balls. So much more to go. If you pull on the cotton balls a little bit to spread them out and make them puffier, they come out looking a little bit more fluffy on your dress. And then that why each cotton ball takes up more space on the dress, which saves you a lot of time. PSA! Even though I made the cotton balls bigger, this process still took a very long time like over one hour to get the cotton balls onto the dress. So have patience and definitely do not try to make this costume on your way out through the door. Next I did the hat. And by this point, I had developed a really nice time-saving hot glue gun technique whereby you just draw a line of hot glue on the hat. And then stick the cotton balls on it in a line. Very fast. Very efficient. I cut out two sheep ears in black felt and then a little bit smaller versions in pink felt. And then using the fabric glue, I layered the pink on the black. Then I was supposed to sew the ears onto the hat and I even had a mini sewing kit handy. But truthfully, sewing is not my specialty and the rest of this DIY project already took way longer than anticipated. So I decided to speed things along and just hot glue gun the ears onto the hat.
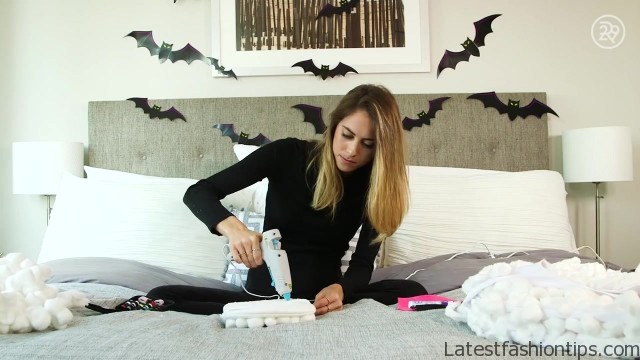
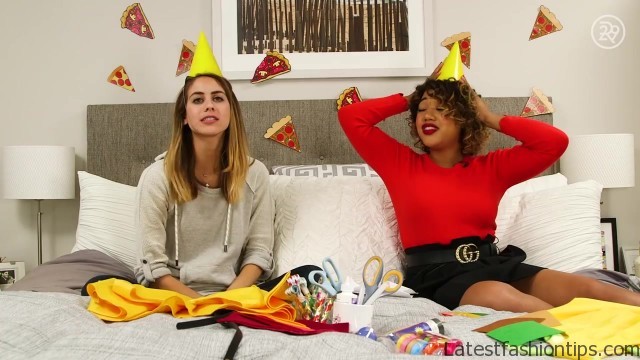
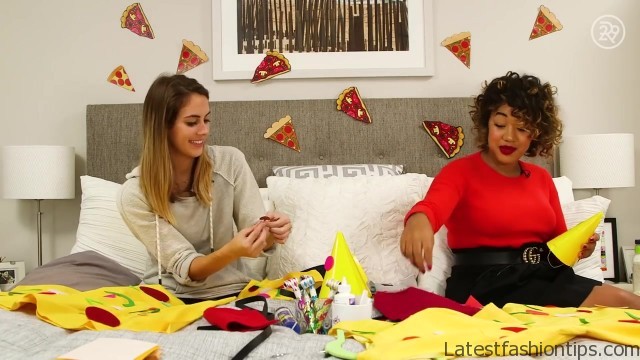
At the end, I filled in any missing gaps with some extra cotton balls and then I drew on a sheep nose. Using my liquid eyeliner, I filled in my nose black. Then I drew a line from my nose down to my upper lip and added freckles. Ha! When it was done, I had to pull off some dangly cotton balls from the bottom. But overall, this dress looked really great and was so soft. This is a costume for all those people out there who like to be warm and cozy on Halloween night. For my midweek DIY costume idea, I decided to ditch the internet. And instead, invite over one of my all time favorite Instagrammers, Color Me Courtney. I listed out for her a few things that I love. I gave her a little bit of inspiration. And then from that, she pulled together an original DIY costume idea that really suits me. Take one guess of what I told Courtney that I love that she then turned into an original idea. Pizza! Duh! We had a pizza party. Oh my gosh. You look just like pizza. You too.
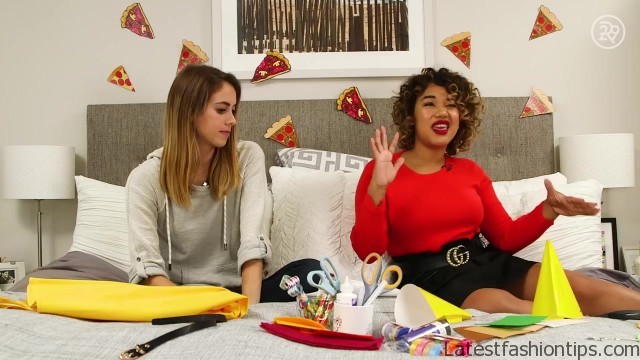
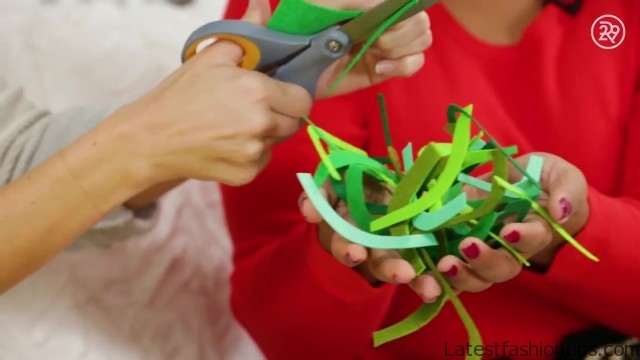
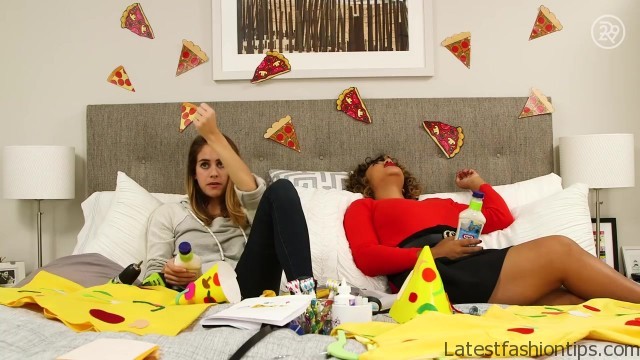
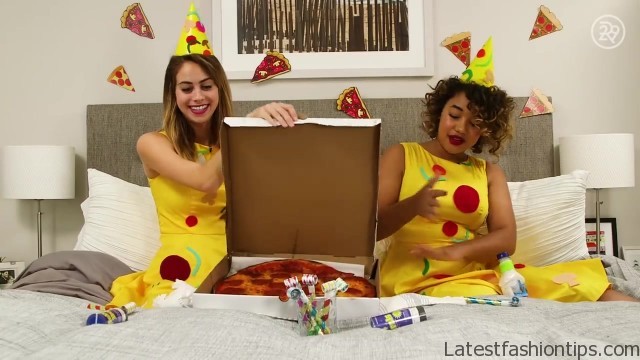
Thanks. Especially with the red. You got the tomato sauce on you already. That’s the nicest thing anyone’s ever said to me. I’m a mozzarella slice. I’m a mozzarella… well, yes. Exactly. Well… yeah. Instead of just making a normal pizza costume, we gotta be more fun to give it a fun party twist. So we are going to start with these twinning yellow dresses. We cut out the different pizza toppings from felt. Here are our lovely pepperoni. We made some pink ones, some orange ones. Because that’s way more fun. Then we hot glued them onto our dress and our party hats. Grabbed our ranch dressing clutch purses.
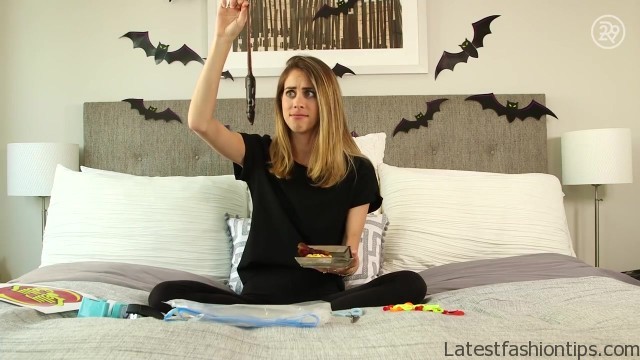
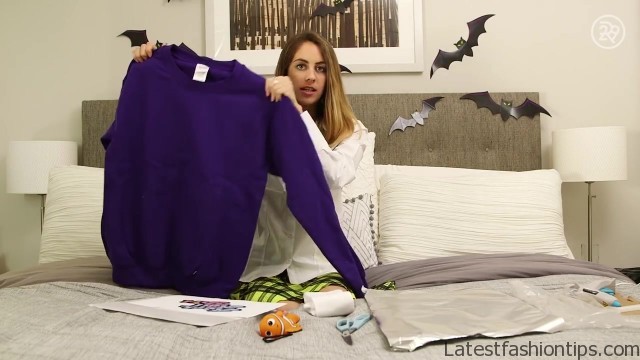
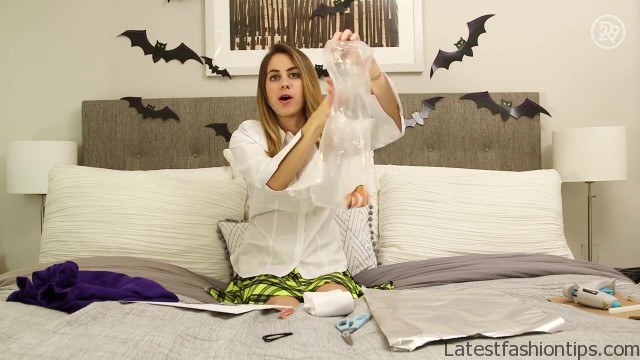
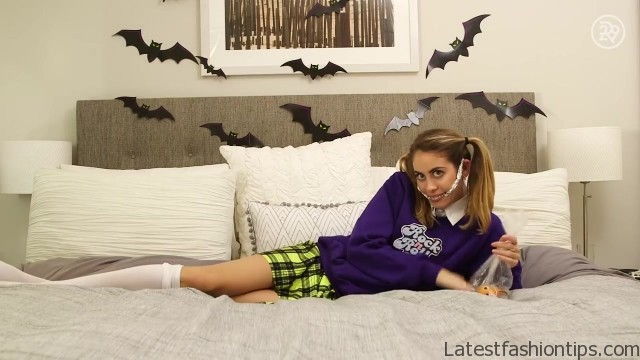
Ranch cheers. Cheers! Ding. Then we went waited for our pizza to arrive. Where is the pizza? I don’t even have a read on. It’s here! Pizza! Ah! Yum. Our pizza has arrived. These costumes were so easy. They came out looking so good. And it’s also the perfect excuse to carry around a pizza pie on Halloween night. For my fourth costume of the week, I became one of my favorite movie characters of all time: Darla from “Finding Nemo.” You know, the little girl in the dentist’s office that shakes Nemo in the bag and asks, “Why are you sleeping? Wake up, fishy!” For this look I started out in a white collared shirt and a yellow plaid shirt that I ordered on Amazon Prime. I have this purple long-sleeved crewneck sweatshirt. So I’ve printed out the exact print that’s on her shirt. This incredible set of fake braces. I’ve got this little fishy. And of course we’re going to fill it up with water and shake it.
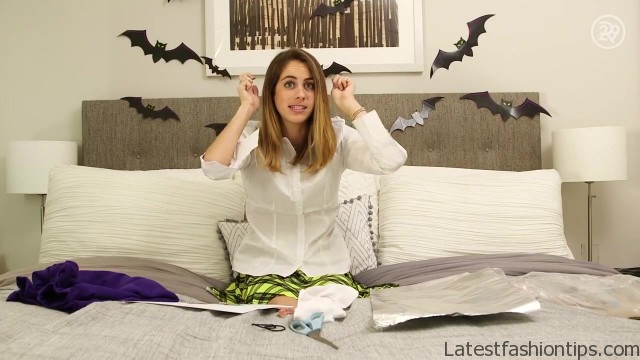
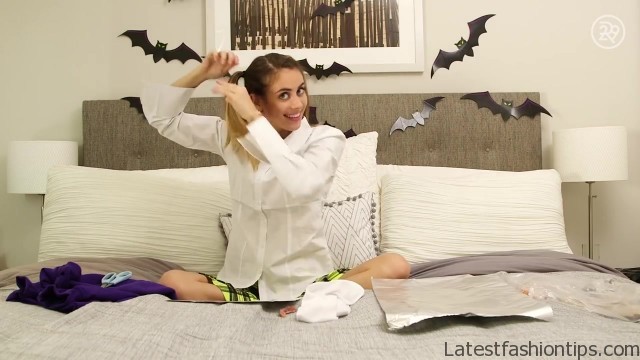
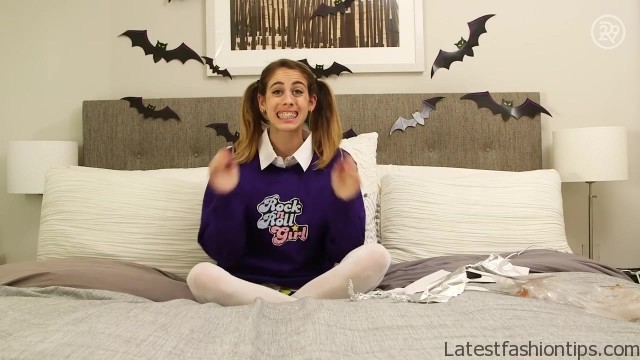
Two hair ties because I’m going with pigtails. High socks. Scissors. Tin foil, which I’m going to roll up and use to make a head brace. Hot glue gun. I started by cutting the Rock ‘n Roll Girl logo out and then mounting it onto a piece of really thin cardboard using the clear school glue. While I let that dry, I put my hair up in pigtails. Next, I cut out the print on top of the cardboard and then mounted that onto the sweatshirt using the hot glue gun. I rolled up the tin foil into two lines to make a headgear retainer type contraction that extended from behind my ears to my mouth. Then I put on the sweatshirt, pulled up the knee socks, popped my fake teeth in, and filled up the Nemo bag with water. You really have to get into character for this costume. And honestly, once all the pieces of the puzzle are there and you have the fake teeth in and the pigtails and the fish in the bag, it’s really not that hard. Hello! Hello! Nice fishy. For my final costume of the week, I searched Pinterest until I found a costume idea that was very punny because I love puns. So today I became a cereal killer. Get it? I killed cereal.
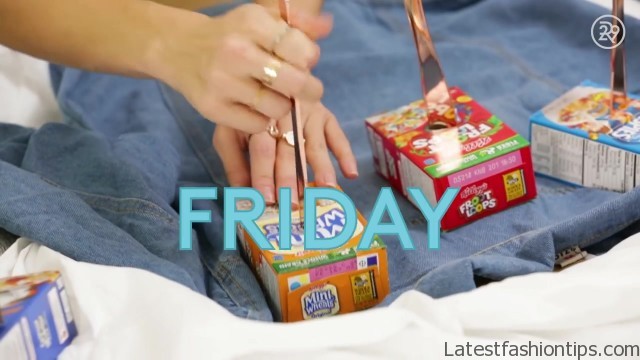
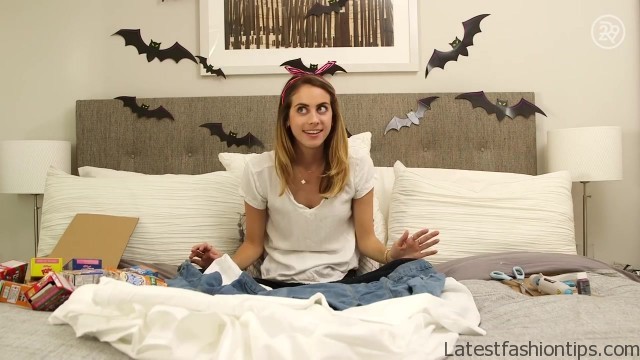
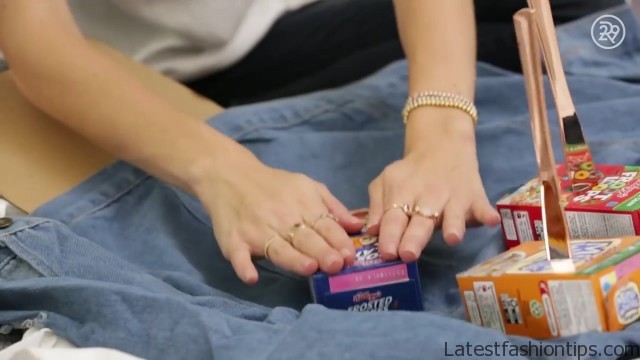
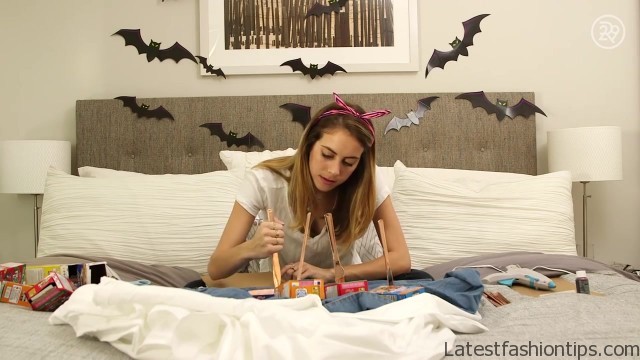
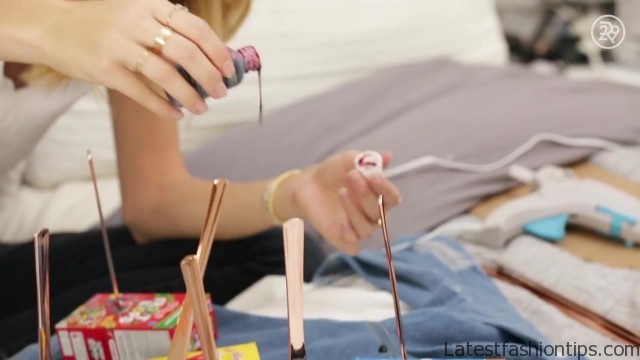
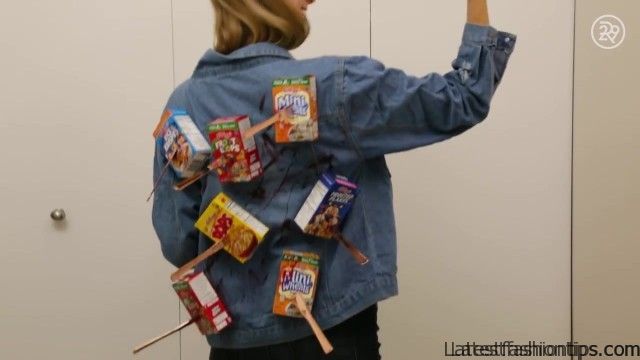
Because this DIY can get a little bit messy and I was doing it on my bed, I started out by putting a white sheet underneath everything for protection. Off to the side I had a bunch of empty cereal boxes, a denim jacket, a hot glue gun, scissors, this headband, and plastic knives. I glued each cereal box closed. Poked a hole in each with scissors. And then one by one, glued them to the back of the jacket. Then once they dried, and this is the fun part, I rammed my plastic knives right into the boxes, killing the cereal. And then I introduced the fake blood. That doesn’t smell good. I drizzled the fake blood all around and then using a knife, I spread it. Truthfully, if I hadn’t been sitting on my bed, I probably would have used more fake blood. And I might have gotten my hands into it and gotten a whole lot messier. At the end, I picked up a jug of milk and a real sharp knife. Do not try this at home kids. Safety first! This was a fun costume that was very affordable, very easy to make, and it will definitely get a laugh from your friends when you tell them what you are. And those are five DIY Halloween costumes ideas from Pinterest that I made my own this week. I would love some more costume suggestions so please comment below and let us know what you’re going to be for Halloween this year.
And then in the meantime, let me know which one of these was your absolute favorite. Mine was Darla. See ya next time! Hey guys! Thanks for reading our DIY costume post. click on comment button for another post on our blog. Here to comment to us on . And right here for my personal blog.
Maybe You Like Them Too
- Stephen A. Smith A Biography
- Steny Hoyer A Life in Public Service
- Sheryl Underwood A Life in Music and Comedy
- Scott Walker A Life in Song
- Sara Evans A Biography


