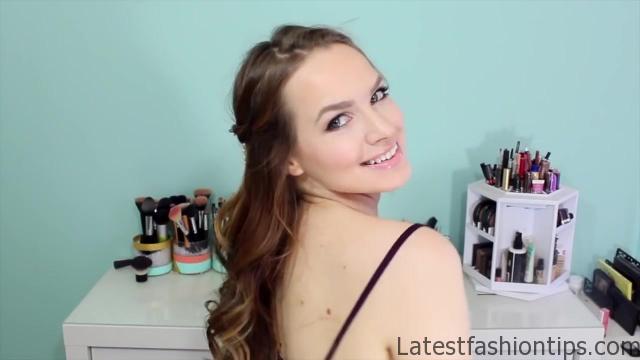
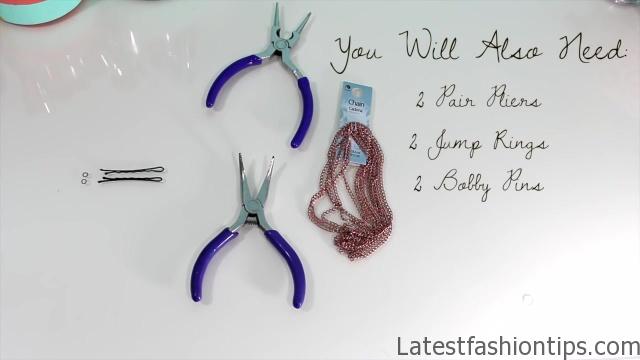
To show you how to make this great hair accessory. I was actually styled with this accessory at the style sexy hair launch. And I loved it and, I will waiting till spring, and summer. So I could wear it. And I thought. I would show you guys how to make one for yourself. Because it is really easy. So let’s go ahead, and get started first of all you are going to need a chain that’s at least six inches long or you could take a multi strand necklace, and use the different strands from that to create your hair chain alternatively you could also go to a craft store, and pick out a couple of different chains that you really like. I recommend finding one that works really well with your hair color. I think the gold hair chain that. I have actually works the best with my hair color then you will also need two smaller pliers like needle nose pliers two bobby pins, and two jump rings. So that’s it let’s go ahead, and get started with the plain chain version of this hair accessory. So you are going to start off by measuring your first chain. And I do this inches long you could either measure this to me exactly inches or you could just hold it up against your head, and eyeball it to decide your ideal length the is going to be our shortest chain and, I will going to cut it by using the wire cutters that are all my pliers just to cut one of the links of the chain you can either use that or wire cutters that you have or, I will show you another method in just a second once you have got that go ahead, and lay it out, and then we are going to keep cutting more strands, and we are going to go one more inch long with each one. So this one is inches long.
DIY Hair Chain Sunday Fun Day Photo Gallery

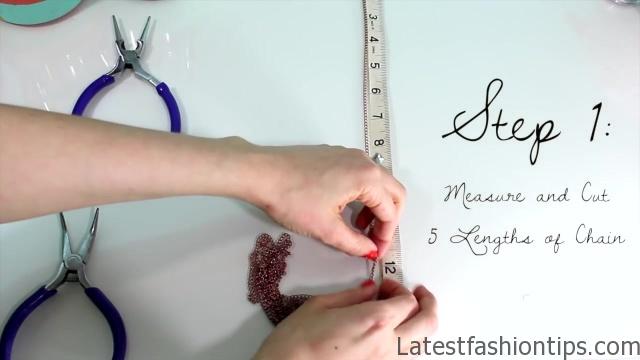
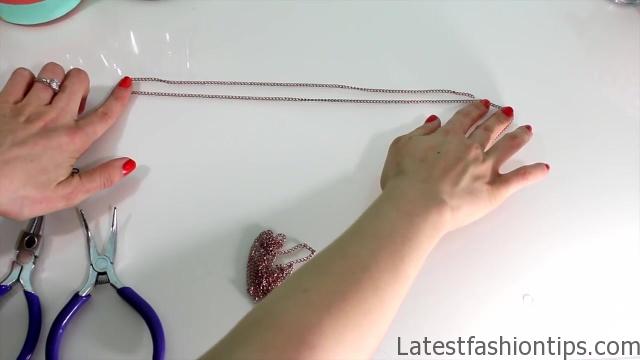
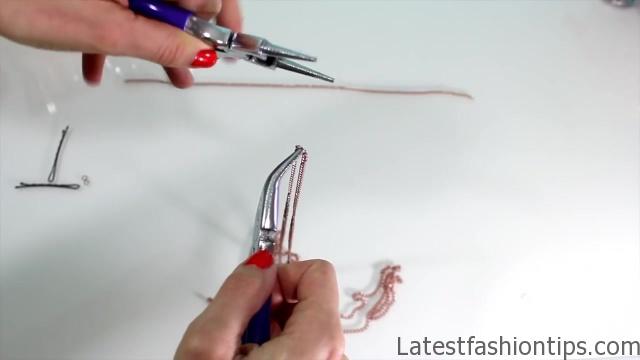
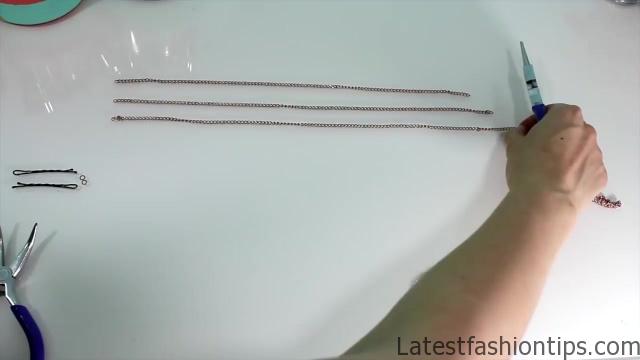

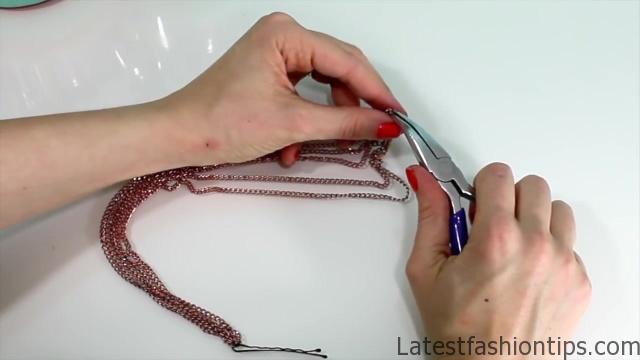

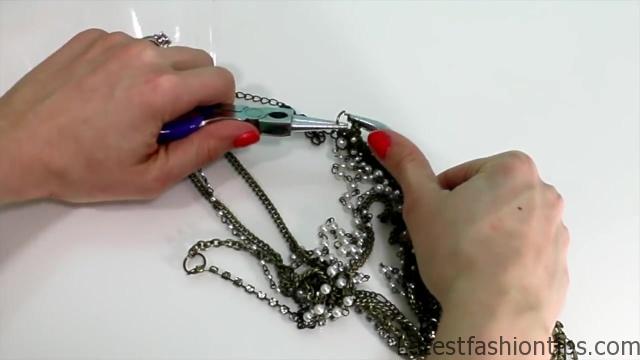
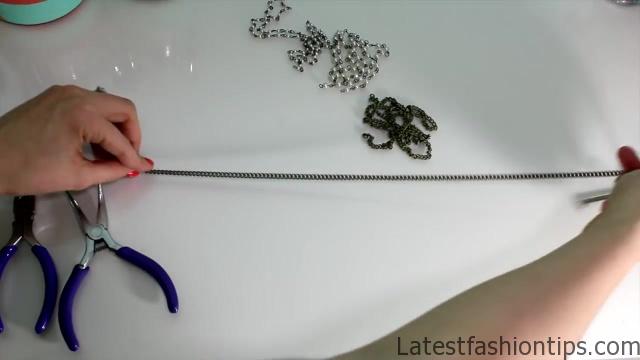

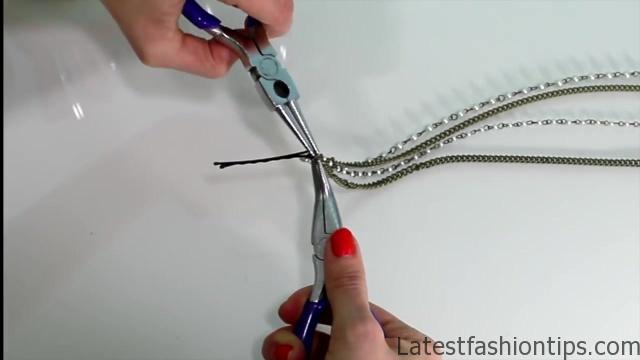

Now, I will going to measure inches for my next one, and if you eyeballed it all you have to do is measure an inch extra from what you have already cut, and then cut that. So if you do not have wire cutters you can grab either end of the link of the necklace with each of your pliers. So one player on one end, and one on the other, and then you are going to twist them in opposite directions, and when you do that it opens up the link. So that you can just remove one side of the necklace from the other, and then you are good to go, and you kind of broken these apart without using wire cutters. So you do an effort works best for you but we are going to keep doing that with for note three more chains. Because we are going to go from a total of five chains. So this one is going to be inches long. So we are going to measure that to inches, and then cut that again then the next one is going to be inches long, and then the one after that will be inches long, and that’s it. So you are going, and inches with these our second step is to attach them to a jump ring now you need a jump ring bigger than the one. I have this one came with the chain, and honestly it was. So small it was difficult to work with go with a bigger jump ring it will make your life easier use your pliers to twist it open just like. I showed you before, and then you are just going to basically thread the opening of that jump ring into the necklace one at a time starting with the longest strand, and going to the shortest strand, and you just keep doing that until you have them all incorporated on the chain then you can go ahead, and pop the bobby pin into the jump ring as well, and then twist it back to close it, and that’s it for this side, and then all you are going to do is repeat the exact same thing on the other side again the is a lot easier with a bigger jump ring. I cannot stress to you enough how important it is to have a big enough jump ring to work with.
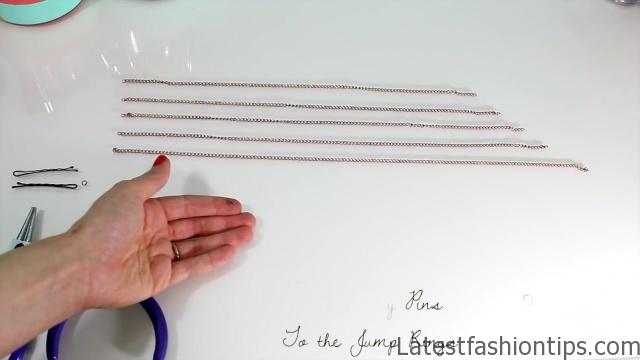
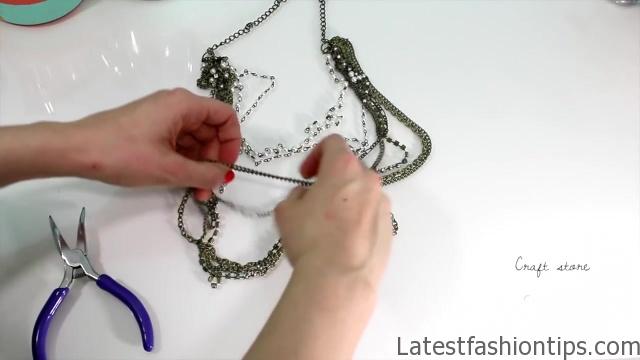
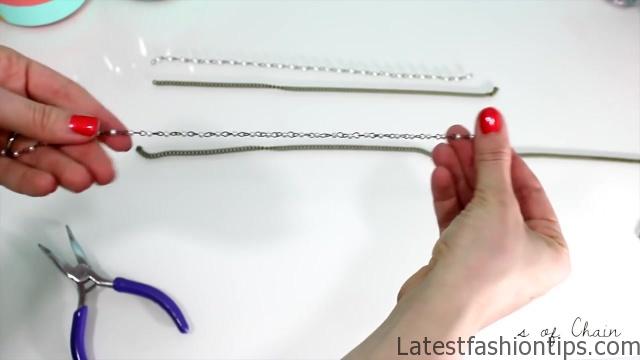
So after you have got all those chains on there again just pop the bobby pin onto it, and then twist the jump ring closed to finish this off again. I just threw out that this rose gold would look amazing on like brunette or blonde hair. Because my hair is red it kind of blends in a little bit but goodness. I just think this rose color could look. So pretty on. So many different hair colors. So that’s it for our plain chain necklace no not a necklace it is a hair chain okay moving on. So now we have a little bit more complicated one if you are going to do different strands. So first of all you are going to select your ideal strands. So if you are taking one from a necklace pick the strands that you want. I really loves these two pearl strands, and then. I picked two more chains but you could also do this at a craft store they will have lots of different kinds of chains and, I will chains with beads to pick from. So just pick the ones you like the most if you are dealing with the necklace open up the jump ring where all of the necklaces are put together or, I will sorry about the strands of the necklace are put together, and then just remove the strands one by one until you have all the ones that you want out, and then if you want you can close the ring back up to kind of hold on to the rest of them, and then open up the other side, and do the exact same thing, and of course if you want to you can close a jump ring back up then you are just going to go ahead, and pull all your pieces apart. So you can see what you have, and then once you have got all your chains ready you are going to go ahead, and line up, and the order that.
You want them to appear on your hair chain this helps you to keep track of which pieces to cut at which to leave. Because at least for me. I get kind of confused when, I will doing my own stuff. So it helps me to go ahead, and lay stuff out as much as possible. So now you are going to measure again, and we are going to go with the shortest piece first for this one. I want to experiment with what eleven inches would be like. So I started with eleven inches on the top one twelve inches for the second one thirteen for the third, and fourteenth for the fourth basically you can use your own measurements, and just always add an inch, and you are going to be fine now, I will using the jump rings from the Extender on the necklace. Because they are a lot bigger than what. I was working with before. So it is a little bit easier and, I will just opening in them up by twisting them then, I will grabbing my bobby pins to get ready, and then we are going to finish off with our final step which is to open up the jump ring, and just attach each of the necklaces on starting from the longest piece, and going to the shortest piece, and then of course finishing off with our bobby pin, and that’s basically it. So it is a really easy DIY. I totally recommend getting creative, and playing around with the different textures of chain that you can find in your craft store. Because there’s a lot of really interesting cool things that you could do it that’s just depending on your personal style, and of course you can wear these in lots of different ways, and you can do lots of different colors. So if you try it out definitely share it with me by using the hash tag Kandy Melissa. Because that’s what. I check on Twitter, and Instagram the most, and of course you can comment on my Facebook wall it show me there. I just love seeing what you guys create. And I would love seeing you guys try these out if you liked any of the hairstyles that. I use to demonstrate this hair chain then make sure to check back Wednesday for a tutorial on these different braids. I will see you guys actually Monday with a review post, and then again on Wednesday.
Maybe You Like Them Too
- Celebrating Natural Black Women’s Hair: A Guide to Gorgeous Hairstyles
- Short Hairstyles For Women Over 60
- 20 Thrilling Twist Braids Style to Try This Season
- The Top 10 Asymmetric Hairstyles
- 10 Gorgeous Shaggy Bob Hairstyles To Get You Out Of A Style Rut


