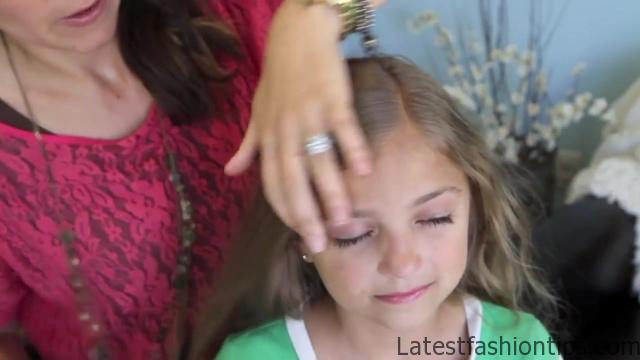
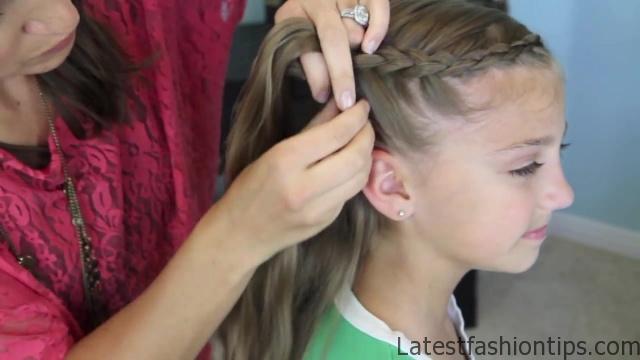
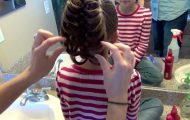
Hey guys. I’m Abby from LA. And today we are going to show you the braided flower. So I literally have received probably pictures of this via email this week. It’s funny. It’s kind of almost a little bit of a joke because every time my email dings, I go look at it, and it is the same picture over, and over, and over. So we are going to show you how to do it. I have started by parting her hair, I will turn her around so you can see. I’m going to part it on the left, even a little more than it is right now. Make a part, and then kind of comb the hair so it is pretty flat. I will turn her around in just a sec so you can see her. Now her hair has just a few little waves in it from whatever she had in her hair this morning. And that’s fine. I’m just spritzing just the tiniest bit of water. Now I’m going to start it as though I’m going to do a Dutch French braid. So I’m going to pick up a little section right here in front. And break it up into three pieces. And start a Dutch braid. And I’m not really going to part specifically the hair. I’m just going to kind of add in. You can see like I do not have a really hard part right in here. I’m just mostly doing it by look and feel instead. And I’m going to keep braiding until I get to about I would say even with the corner of her eyebrow. So I will probably do one more little piece. And then what I’m going to do is start turning the braid. So now when I pick it up, I’m going to just pull just slightly towards the back of her head.
Dutch Flower Braid Updos Hairstyles Photo Gallery


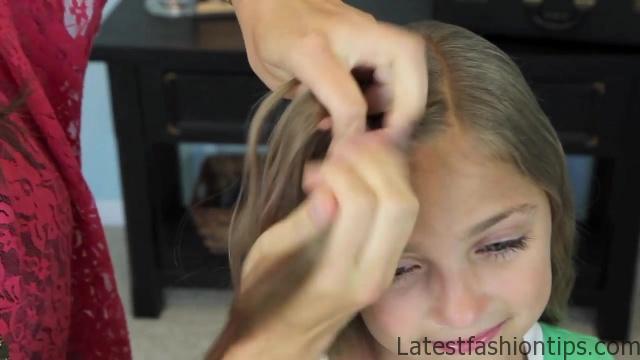
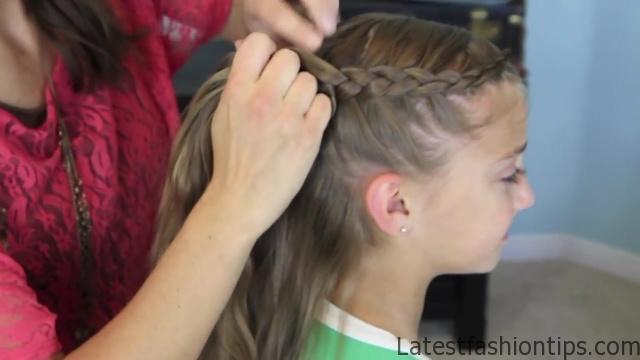
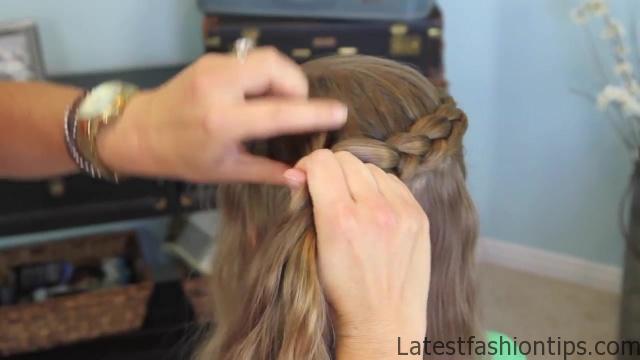


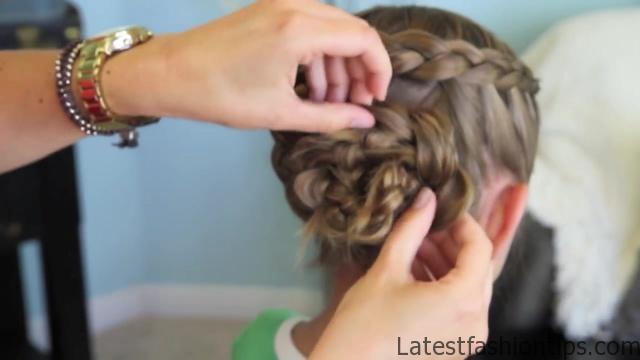

You can see that I kind of moving physically. I’m still adding hair from both sides. It’s still a Dutch braid. Nothing else has changed other than the direction the braid is now running. And when I get to I’m going to do one more. I will show you. There’s a method to all this madness. So I’m going to do one more on top. And then what I’m going to do is pick up one more. So can you see where I’m about on her ear? I’m going to do that one piece right there. And then I’m going to go aim straight across her head. So I’m going to kind of go straight across the back of her head. And the reason we picked up this is because I’m going to have the bun sit like right here, where this little pocket is. And I want the hair to look really side swept up and pretty, and then the bun. So now instead of picking up too much hair here, I’m just going to really grab teeny, tiny, little pieces. And I’m going to be pulling from mostly the top of her head. So here I show you, I’m literally just going to pick up this tiny little piece right there, right under the braid. And then I’m going to have to start scooping the hair from all the way on the front of her face into the braid. In the meantime, still aim straight back straight to the side, I guess it is technically. Can you see now where I’m grabbing the hair from?
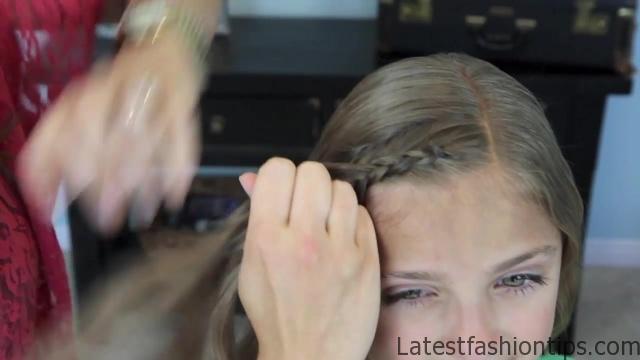
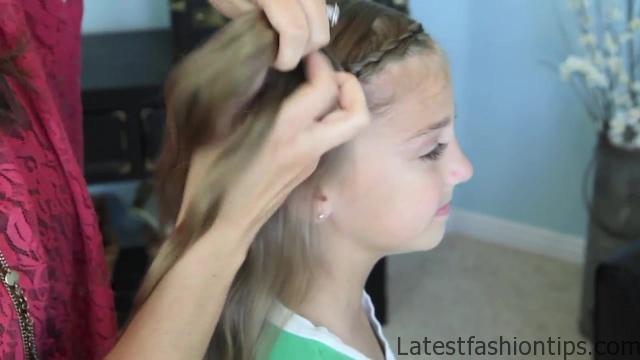
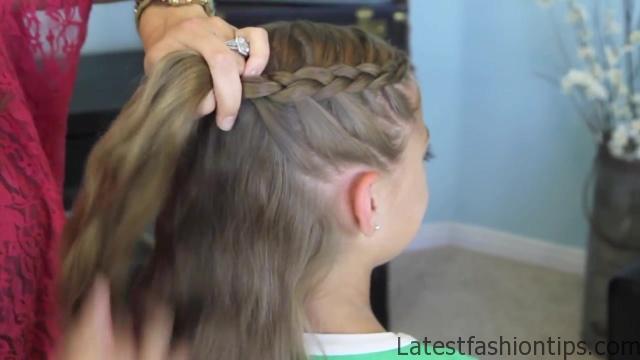
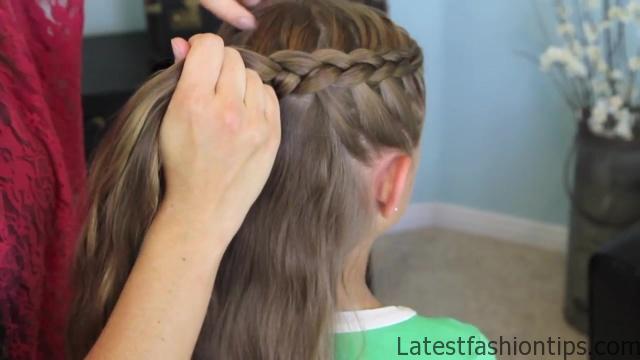
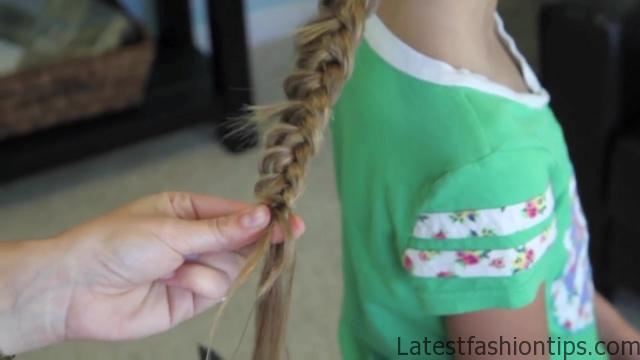
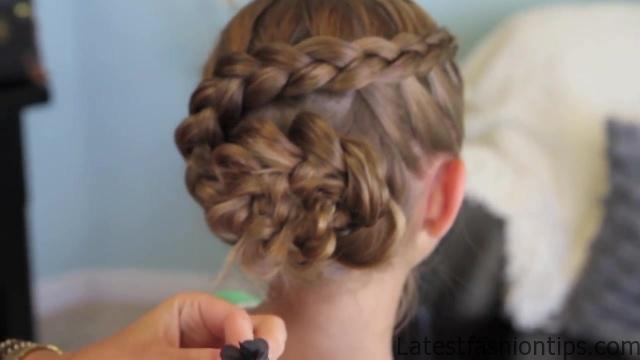
Again, one more little piece here. And we are going to pick up almost the rest of her front hairs right there. OK, one more, and then we are going to start going down. So you can see, I’m going to show you where I’m at now. I have all the hairs here pulled in, and I’m going to start taking the ones right over her ears. And then you start pulling the braid back down again towards her neck as I’m doing this. So this is giving the brain that nice S-shape we want. And now, this is why we left this hair here, I’m going to start pulling it down into the braid. So that’s we have that pretty S everyone wants. OK, we are almost there a couple more. And last piece. So now we have got the basics of the braid in place. We’ve got the nice S. Now we want to do the flower portion. We’re going to do that. I’m going to wet it down a little. We’re going to create just a regular braid. We’re going to go down maybe two. I call this a section, and this is section. And we are only going to pull hair out from one side. And I’m going to do this under side because I’m going to wrap my flower up like that. So we are going to go back and we are going to literally just barely pull that edge piece out way out, so it makes a big bubble, like that. Then you are going to have to braid down a couple more sections. You can only do this a section or two at a time because otherwise your hair gets too far down and then it won’t loosen. Can you see how we have got those big bumps? And at some point, your ends are going to start popping out like hers are right there. That’s OK, do not worry about it. So braid down a little bit more, just barely, barely pull that edge hair.
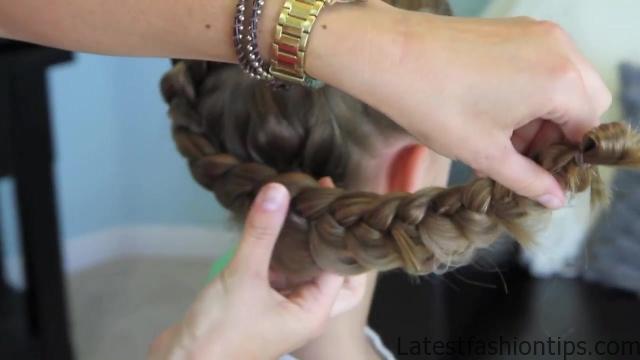
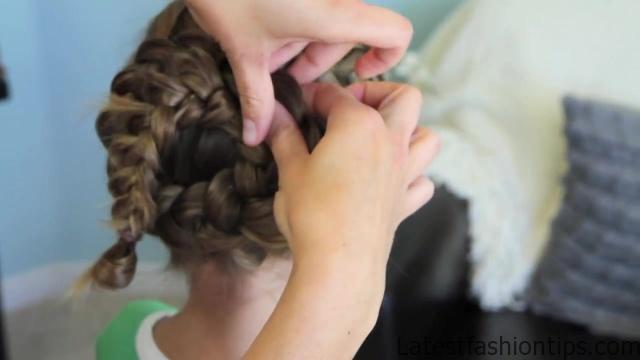
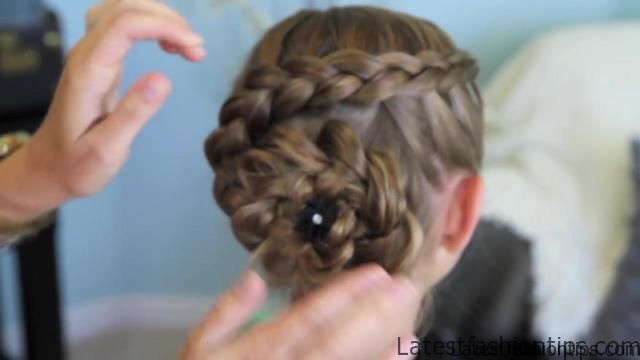
That’s all we want pulled out. Not the whole thing, just that little tiny piece. Braid down. If you need to add a little more water, go ahead and do that just give you a little bit more grip. Pull a little, little bit. And you are just going to have to kind of keep doing this until your ends start popping out too much, or you run out of hair, whichever comes first. So we are about there. I’m going to secure with a rubber band. And I’m actually going to her ends a pretty long, so I’m actually going to fold them in half. An that will just help me to hide it. So we have this kind of wacky looking half pancake braid going on. You’re going to take it up, flip it around, flip it, and just roll it in. I will do it one more time so you can see it again. Take it, wrap it up where you kind of want the imagine where you want your flower to sit. And then just twist those ends into the center like that. And you can see that when we get those ends all pinned down and tucked, it is going to leave us our flower. So now what I’m going to do, I’m going to go in here and just secure the bun. I can see that one there we go. So secure where you need. You can use bobby pins, or those hairpins, if you bought them for when we did the bow braid. Hairpins would work great here too. Tuck that end in. And then you can go back, and just tug those little pieces up a little bit more. And that’s what gives you the nice flower shape. One more and helps it to pop out and add dimension. When you have your flower completely secured, then you are going to just take a little clippy of your choosing. This one’s just one that kind of has a little spiral back on it so you can just twist it in. And I’m just going to twist that down into the little center of her flower. And I just ask just a little bit of pop into the middle of the flower as well. And your flower bun is done, and this is the great flower braid. I hope you guys enjoy. I’m sure you are going to get lots of comments on this. I love this flower. And we will see you one the next tutorial.
Maybe You Like Them Too
- Celebrating Natural Black Women’s Hair: A Guide to Gorgeous Hairstyles
- Short Hairstyles For Women Over 60
- 20 Thrilling Twist Braids Style to Try This Season
- The Top 10 Asymmetric Hairstyles
- 10 Gorgeous Shaggy Bob Hairstyles To Get You Out Of A Style Rut
