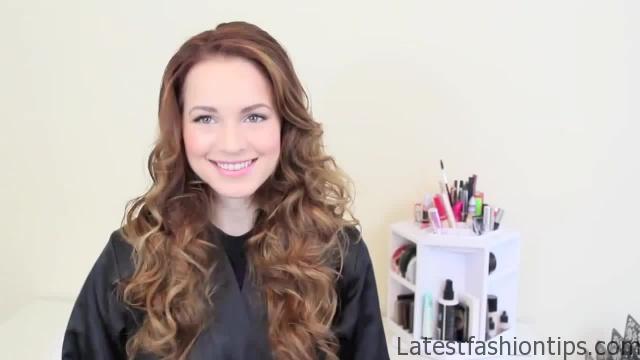
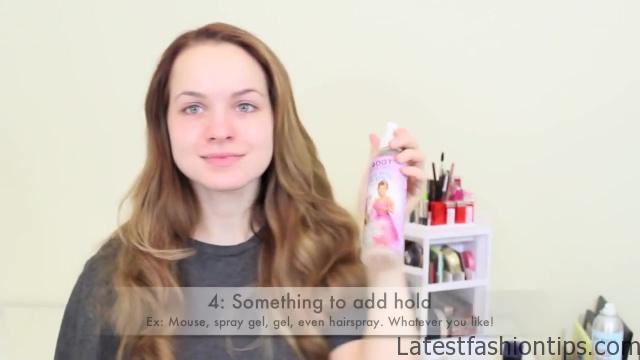
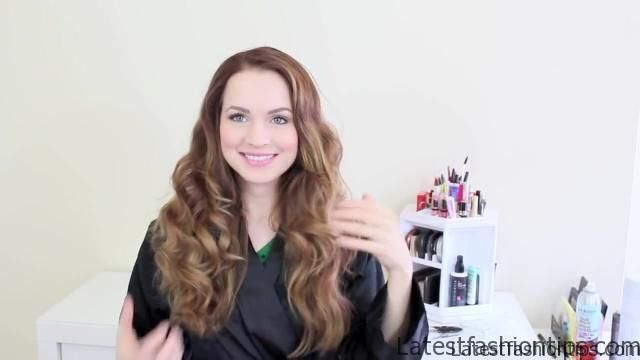
Hi guys welcome to the most requested tutorial of all time, I will going to show you guys how to do some heatless curls and, I will actually using a method that one of my subscribers mentioned in a comment that, I have tried to go back, and find that comment. And I can’t but thank you subscriber for giving me this idea let’s talk about what you will need first of all you will need something to make a bun with, I will using these little foam bud makers that kind of Bend into place or you could use a typical little net one as well or if you want to you to just cut off the toe of a sock, and roll it up use an ankle sock for little curls, and a really long sock for bigger curls, and then you will need a spray water bottle, and a hairbrush, and something to add some hole to your hair like a spray gel or a mousse or even hair spray now let’s talk about how to make the curls basically we are going to make a bun Mohawk on our heads. So basically you are going to separate your hair from the ears forward, and then go ahead, and brush it to get it all going one direction.
Easy Heatless Curls Tutorial Photo Gallery
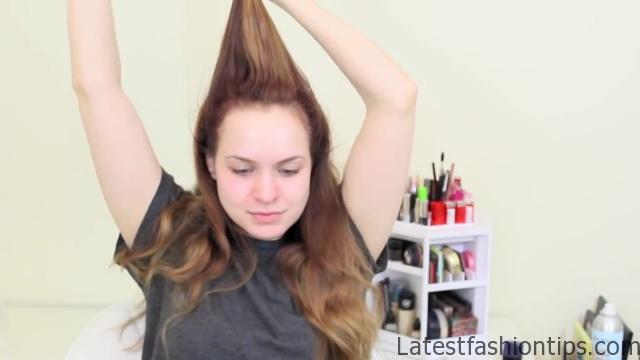
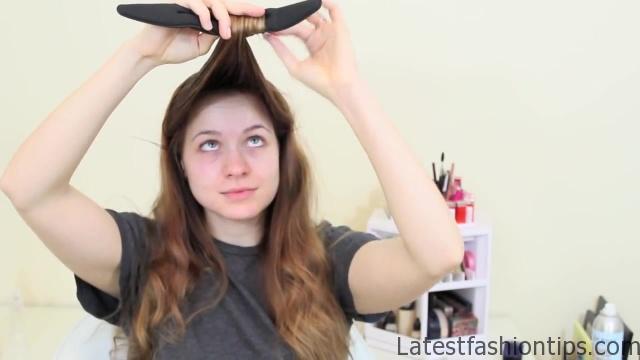
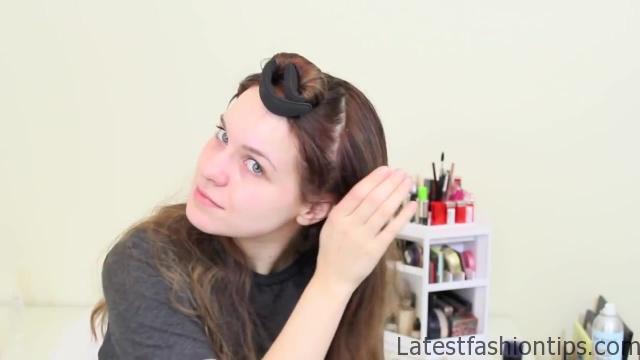
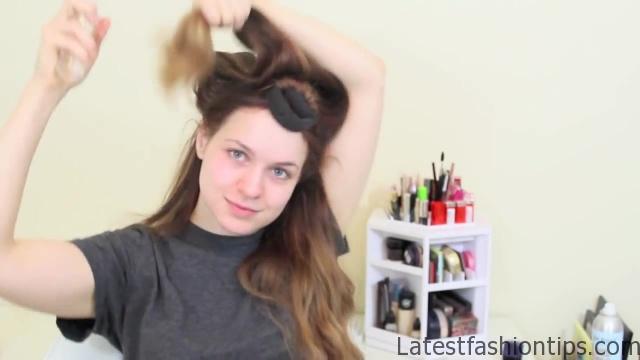
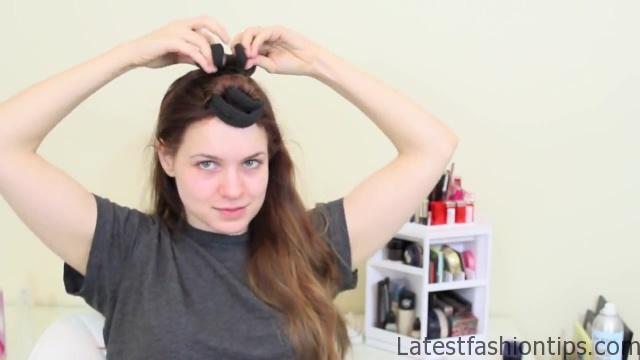
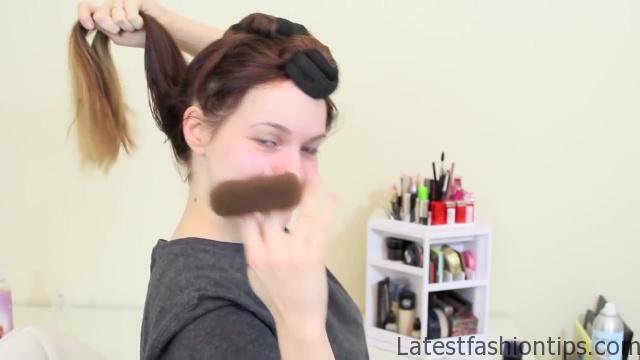


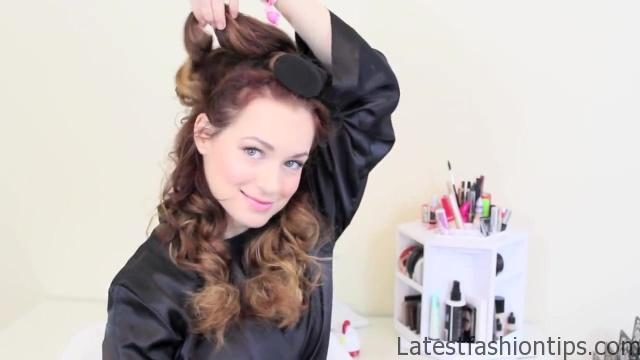
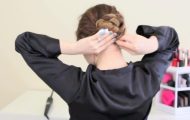
So that it is not, I will going to be as frizzy or crazy once you pull it out later once you have got it all brush you can go ahead, and spray it with some water to get it down if you are a nighttime shower or you could just wait for your hair to air dry to percent or use a hairdryer, and then spray your hair or put through your hair or whatever you are using to hold it, and brush it against make sure that all of that is evenly dispersed now for these little foam bun maker things you are going to wrap your hair around it going away from your face, and roll it back up until the little bun maker is right up against your head, and then you are going to bend it forward to create a little button, and it holds really well there it won’t move at all during the night, and this has been my favorite one just. Because you get a little bit more control, and they are ridiculously cheap now you are going to go ahead, and continue that. So I went back about two inches, and picked up the next section of hair, and then repeated all the same steps. So I went ahead, and brushed it. So that it was all nice, and smooth it was. I had that there then. I went ahead, and sprayed it with water. Because, I will a morning shower. So my hair was completely dry at this point. So I just missed it a little bit just to get my hair down you really do not want it saturated. Because it won’t dry by morning but you do want to enough to where you will make curls. So just a little bit damp then go ahead, and brush through it again, and then you are just going to go ahead, and wrap it, and pin it against your head and, I will going to show you what the very last drill how to do this with a bud maker or a sock. I only have one bum maker, and Jason won’t let me cut up his socks. So I had to use my other ones for the rest of these but anyway then you are just going to continue.
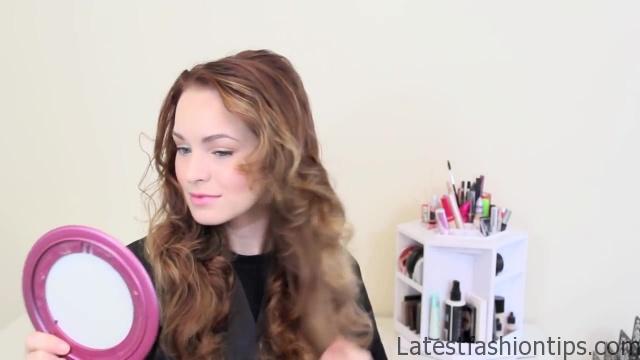
I suggest seeking like one to two inch sections for this. So for me that’s four buns but if you have more hair than. I do you might need more than that, and if you have less hair than. I do you might need less than that the is going to be something that you have to play around with just a little bit to find out what’s right for you. So for the sock bun. I like to go ahead, and put my hair through it, and then go ahead, and wrap the end of my hair around it just to go ahead, and get it started, and then basically you are going to kind of turn that little donut inside out over, and over, and over again until you have it flush against your head, and a lot of times you have to keep pulling it back to get rid of any slack in there. So that you get it nice, and tight against your head, and then you have your four little buttons, and sometimes. I like to do this little section as two instead of one it makes my curls extra big, and extra curly looking which. I like but that’s totally up to you then you are going to go to sleep. So that these have a chance to dry then in the morning feel them to make sure they are dry if they are still a little wet you can h it with a hair dryer to kind of finish it off just in case then go ahead, and let them down, and they are going to be kind of weird, and bring lid die, and just a little bit of a mess. So we are going to have to kind of work with them once you get them out you can go ahead, and see that you already have some nice curls right here.
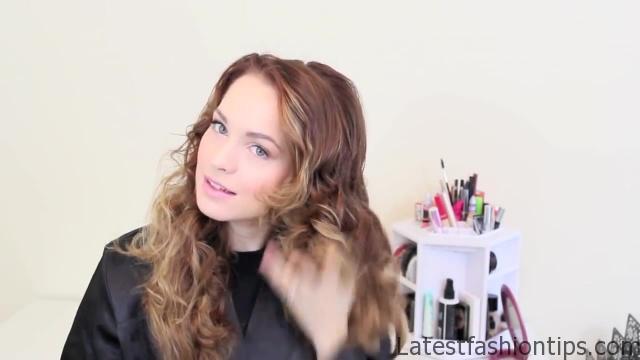
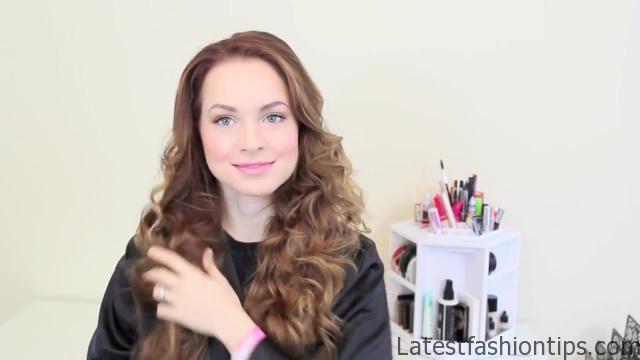
So go ahead, and let all of them down, and again make sure as you are doing this that they are completely dry, and if they are not hit them with a hair dryer just to make sure, and if you do that on a cool setting. So you are not using any heat just in case you are afraid of heat completely. So once you have got this all down you kind of have to break them apart. So that they are not. So ring lid die, and that makes them crazy frizzy. So a brush do that with my fingers, and the is kind of what it looks like after that. So totally cute but basically then. I just take my fingers. And I pull the curls in the direction they are supposed to go, and it pulls the phrase out of it, and kind of gets them all going into the right direction. So it looks a little less crazy if you have any really frizzy bit. So you can take your hairbrush, and kind of brush it around your hands to go ahead, and smooth them down just a little bit more you could also use a smoothing treatment like biosilk just to kind of smooth down any extra bits then go ahead, and spray it with a spray gel or a scrunching gel, and scrunch it back up that is the way that. I found the us to get these curls really looking nice, and to get rid of that frizz it works really well on my hair. So I definitely suggest trying that if you have a scrunch spray or anything like that and. So then. I actually went, and recalled these two little sections. Because they were just kind of crazy. I do not usually have to do that but just in case, and the is my natural hair texture, and the is what it looks like once, I have got the curls in. So definitely get those curls in there, and it is really easy, and you do not have to use a curling iron, and the is what it looks like if. I do those two little buttons instead of just one. And I really like how that looks then if. I give it an hour to a rush through it. I get these like waves they are huge but it is kind of cool pretty waves as well. So there’s a lot of ways that you can wear this for sure let me know if you do it. So many pictures. I love to see be sure to check out my previous post. And I will see you guys again on Friday with another hairstyle post see you then ha you.
Maybe You Like Them Too
- Celebrating Natural Black Women’s Hair: A Guide to Gorgeous Hairstyles
- Short Hairstyles For Women Over 60
- 20 Thrilling Twist Braids Style to Try This Season
- The Top 10 Asymmetric Hairstyles
- 10 Gorgeous Shaggy Bob Hairstyles To Get You Out Of A Style Rut
