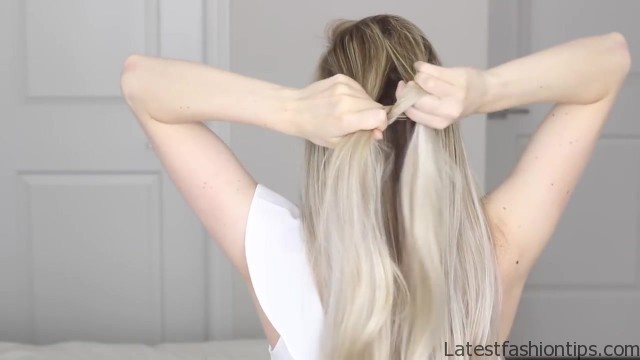
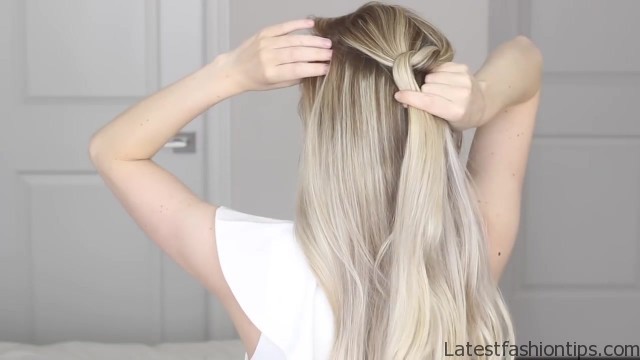
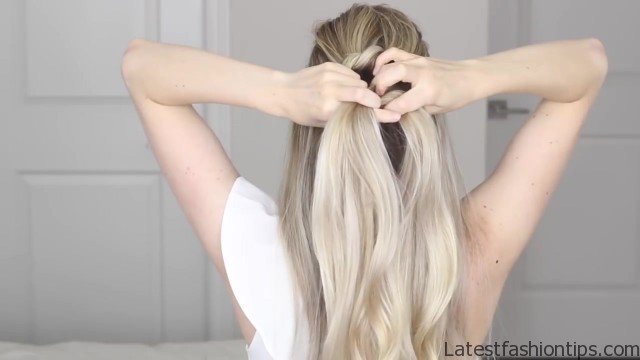
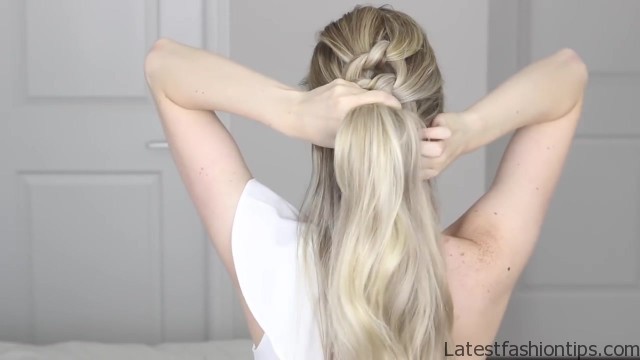
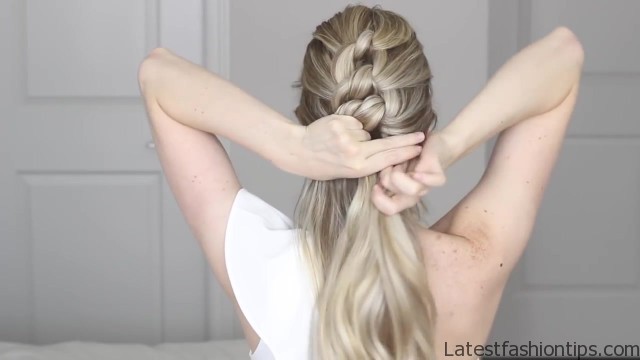
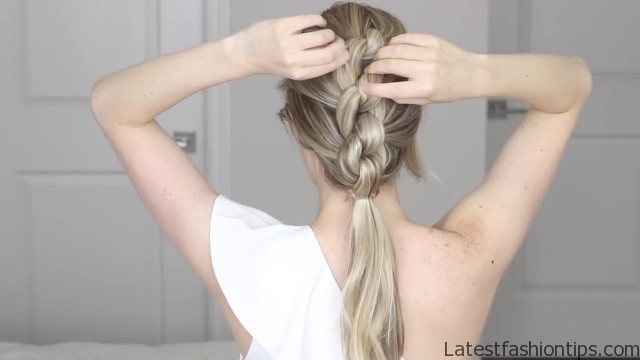
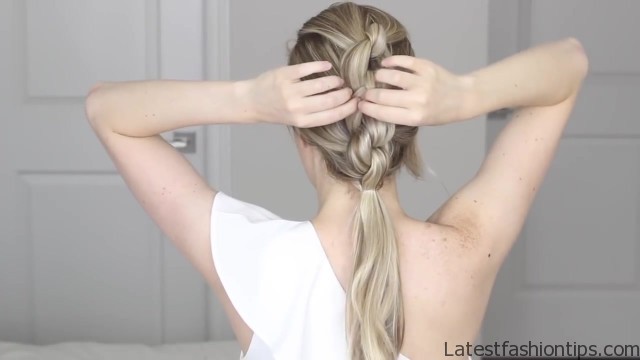
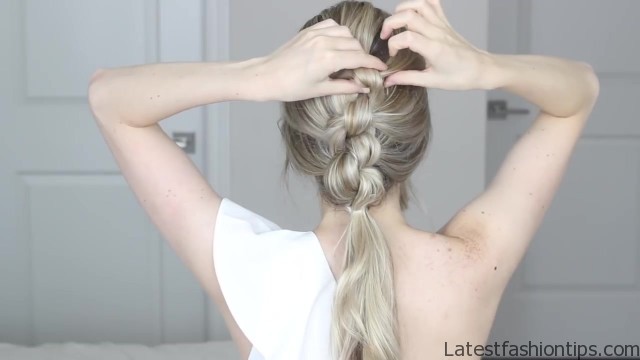
Hey guys today I want to share with you this really soft beautiful and elegant Knotted updo if you have any weddings proms or special occasions coming up then this hairstyle would be Perfect because the technique is so simple to yet it makes quite a statement. You guys are going to love How easy this is all you need are some Bobby pins and a hair elastic, and let’s get started what you want to do is throw all of your hair behind your shoulders And then you want to grab all of your hair that’s above your temples and Gather it together just like this Now with the section you just want to divide it down the middle into two equal sized pieces Then we are going to tie these together So, I’m just crossing my right section over the left section and then, I’m going to loop that left section up and through. So this is the same step as the first step of tying a shoe So we want to repeat the same steps again this time gathering all of the hair above my temples And, I’m going to join it into the right side And then, I’m going to do the same thing grab all of the hair above my temples and join it into the left side So you should still have two separate sections, and then same as before we are going to tie these together So, I’m crossing that right section over the left one and then bringing that left section up and through to create a knot now we are going to repeat the same thing this time grabbing all of the hair that’s above about the middle of my ears And, I’m just joining it into that right section and, I’m doing the same thing on the left side So now that you have your two sections same thing as before it just tie them together As you are working your way down it can get trickier since there is more hair, but just take your time with it And then, I’m going to repeat these steps one more time with all the remaining hair So, I’m just joining it into that right side remembering to grab your neck hairs as well And, I’m doing the same thing on the left side and tying them together.
Easy Knotted Updo Ponytail Tutorial Photo Gallery

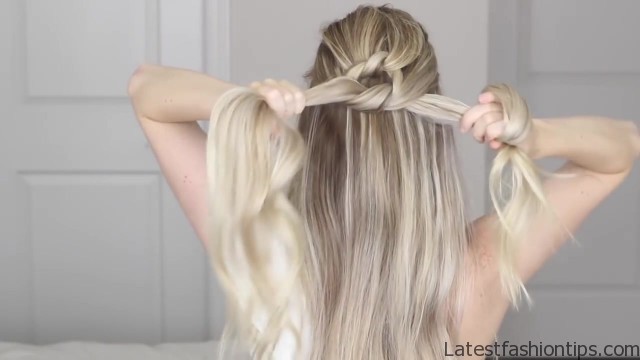

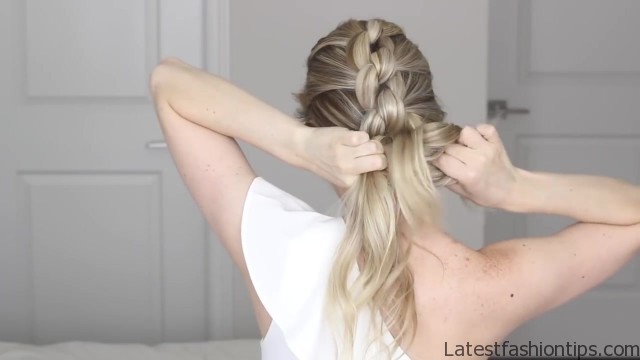
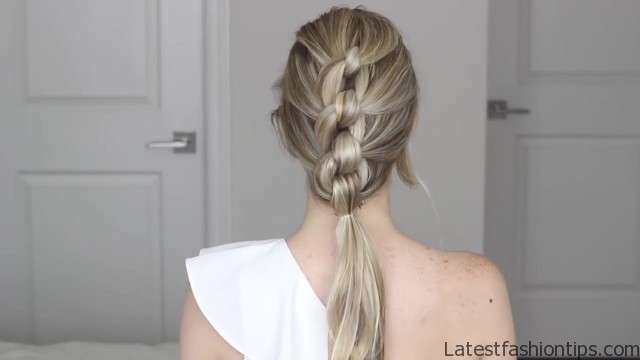
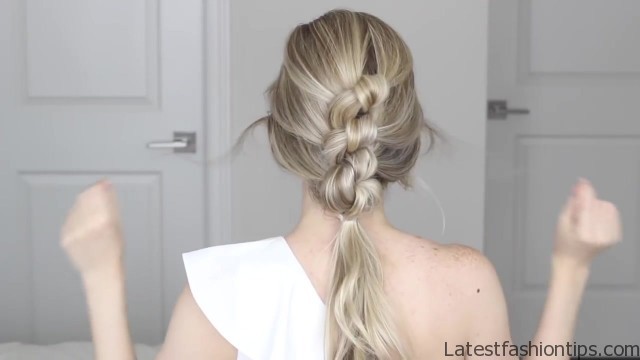
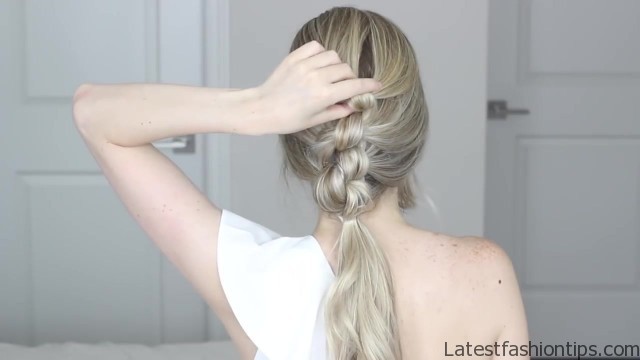

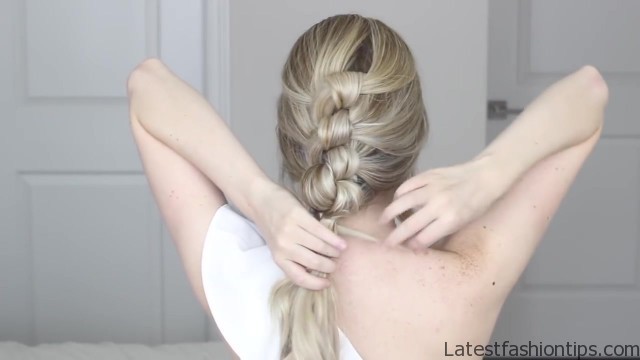
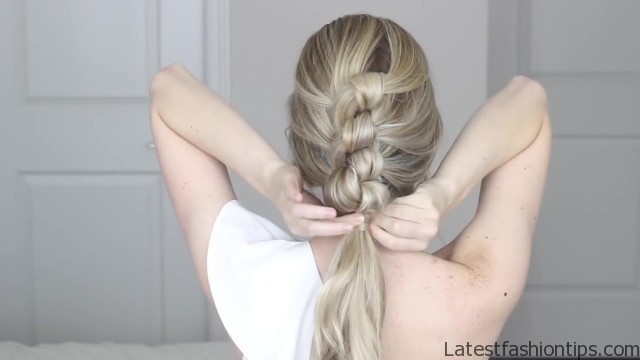
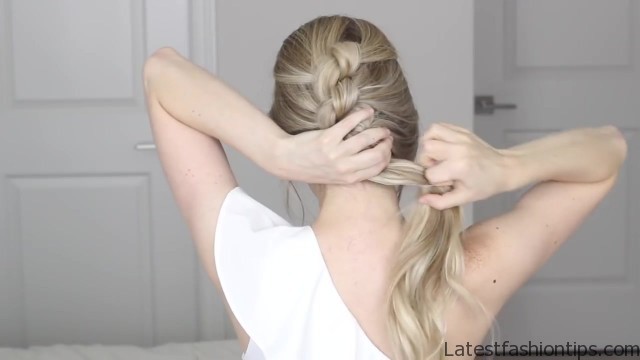
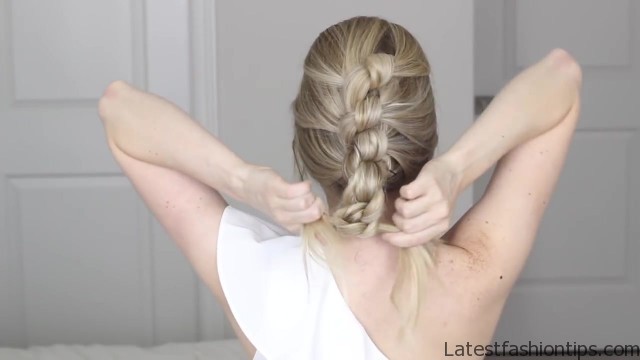
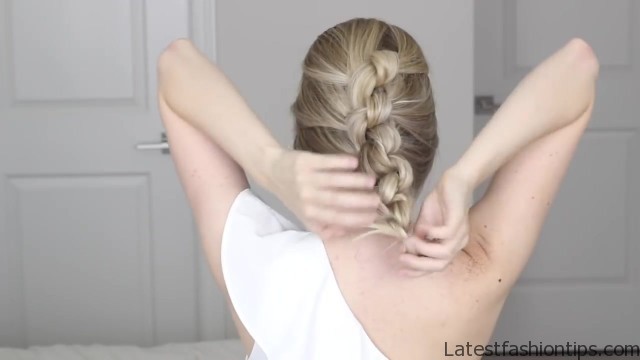
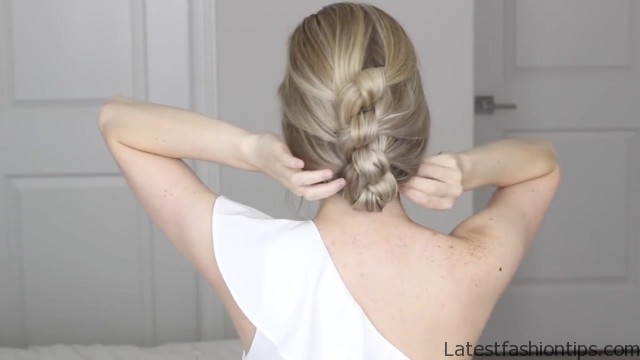
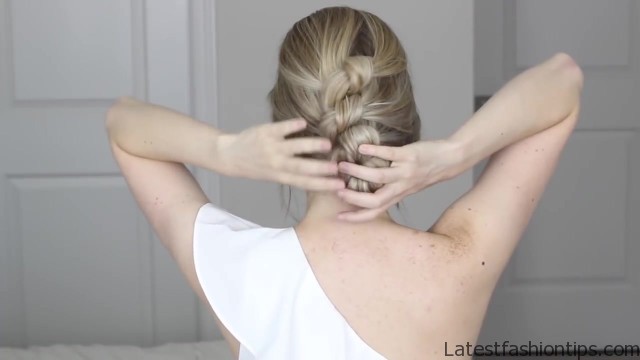
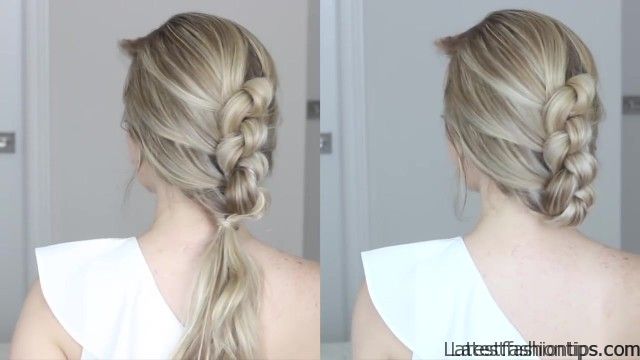
So once you are done knotting It should look a little similar to this and what, I’m going to do is tie it off with a hair elastic Just to hold everything in place while, I’m pancaking the braid. So to pancake it, I’m just using my index finger and thumb And, I’m pulling on the outside of each knot almost fanning it out to create a thicker looking braid and, I’m also going to pull On some small sections just to help add some more dimension Feel free to pull apart the braid let me assure you it is very strong And you have nothing to worry about. I also gently pulled at the sides of each layer just to give the hairstyle a softer Appearance and, I pull out some small pieces to frame my face even though pulling apart your braid is Completely optional as you can see here it just helps create the illusion of a Fuller thicker braid So now, I’m going to take some Bobby pins and secure the knots to my head optional But it helps keep the hairstyle in place So we are having the top knot and, I’m pulling it up slightly then sliding two Bobby pins underneath the knot and across To secure it tightly to my head And then, I’m just repeating this three more times underneath each of the knots Even though pinning is optional you can see the slight difference It makes there’s more volume at the crown and it definitely feels more secure. I personally love this hairstyle just like this and to make it look more put together it just took a small piece of hair from the underside of my Ponytail and, I wrapped it around my hair elastic and then Bobby pinned it to the underside of that elastic, I’m loving low ponytails first summer.. I think this is a really cool Look if you wanted to create an uPdo all you have to do is remove that hair elastic and continue The same steps as before you just want to continue tying your two strands around one another until you reach the very ends of your Ponytail and once you have reached the end of your hair is secure with a hair elastic And. I like to create a bun on the end of mine It just helps prevent my ends from poking out,.
So then just grab the end of your ponytail and begin It underneath and how you reach the nape of your neck Once you reach the nape of your neck make sure it is rolled tightly and begin pinning it into place if you are using Bobby pins Just remember to grab smaller sections and use more of them and when you are pinning. I would recommend creating crosses it just makes your Bobby pins more secure So there we have you guys that’s how easy it is to recreate this beautiful Knotted up -do. I absolutely love this hairstyle, not only because. It’s so easy to do, but there’s. So many different variations of it, I’m personally loving the low ponytails first summer especially Over the shoulder with a one shoulder or off the shoulder top and hip as they are super cute you can also do this with Straight hair to make it a lot more sleek and formal. You could do a half up half down ponytail a half ponytail There’s. So many different things you could do.
If you do recreate it do not get the tag me on Instagram Or Twitter.. So I can see it, but. I really hope that you guys enjoyed this post and found it helpful If you did do not forget to give a thumbs up Comment down below let me know what you thought and what you’d like to see next So thanks again. So much for reading and I will talk to you guys soon. Bye you.
Maybe You Like Them Too
- Stephen A. Smith A Biography
- Steny Hoyer A Life in Public Service
- Sheryl Underwood A Life in Music and Comedy
- Scott Walker A Life in Song
- Sara Evans A Biography
