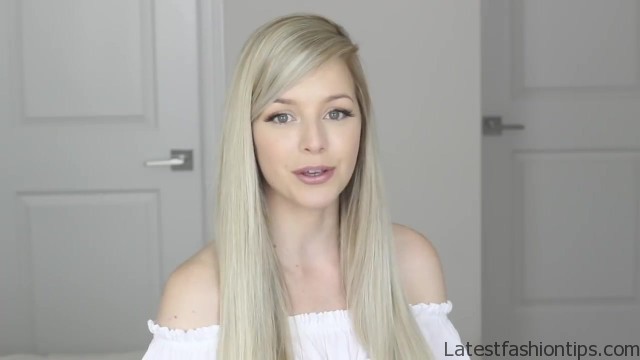
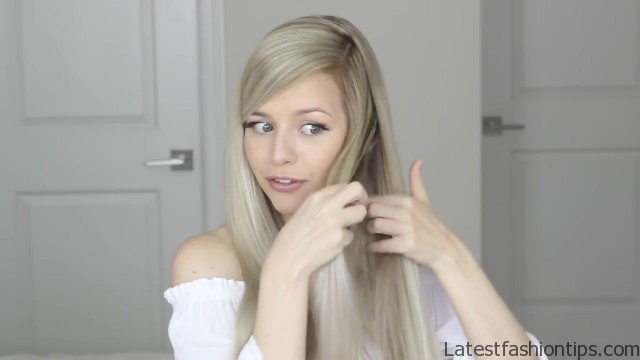
I wanted to share to you is this super simple yet beautiful modern chic Chignon hair style. I really wanted to share this hairstyle with you guys because. I think. It’s so perfect for any special event especially prom or a wedding also think it would be great for work and, I know a lot of you aware these updos for a church and, I think that it is absolutely perfect for that it is literally three simple steps you guys it is going to work on all hair types, and it is perfect for shoulder length hair or longer. So let’s get started today, I’m starting off with straight hair. I feel almost 70s when my hair is this straight but you can also start off with wavy or curly hair you guys know how much. I love that undone look but today, I’m going for a more modern chic appearance all you are going to need for this hair tutorial are one to two hair elastics depending on your hair length you will see what.
HOW TO EASY Bun Tutorial Perfect for Work Prom Weddings Photo Gallery
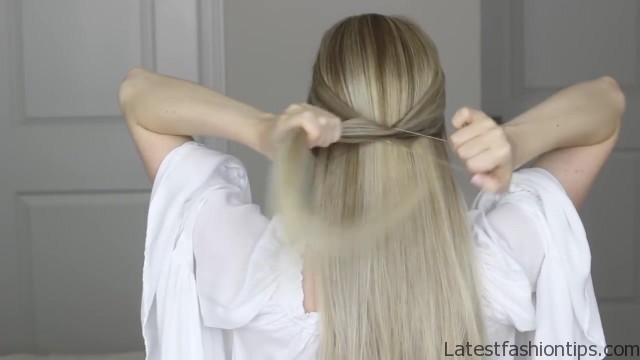

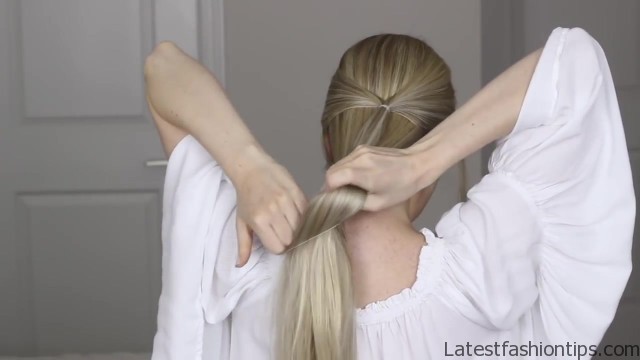
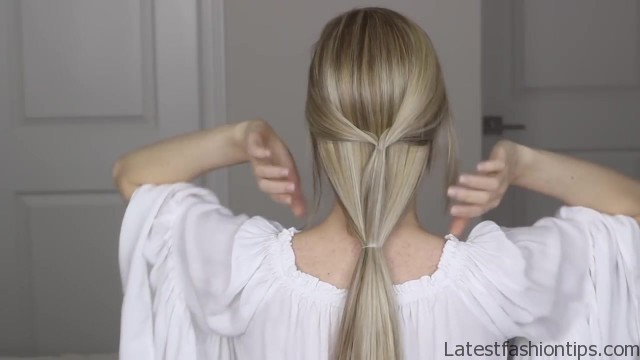


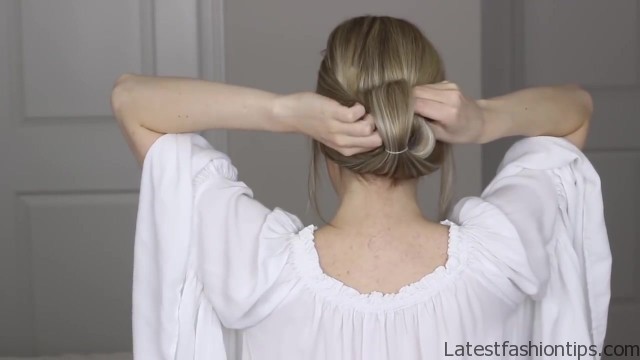
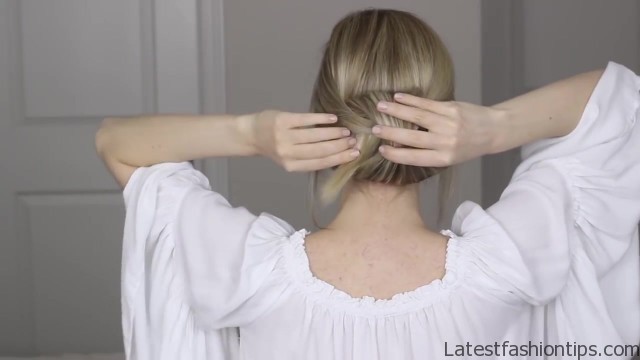
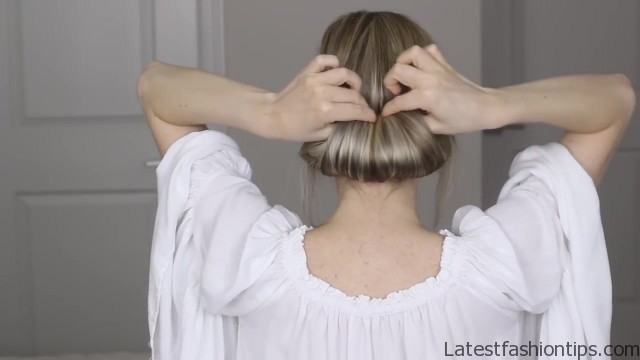
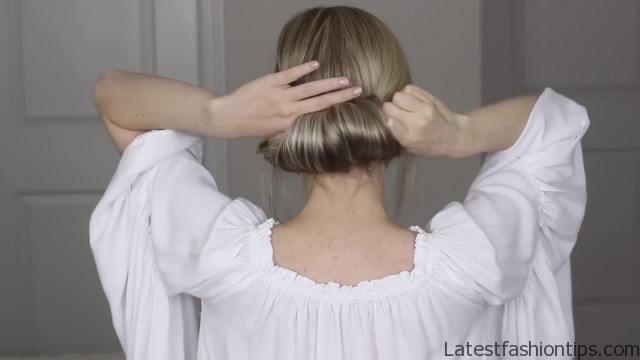
I mean in a minute and like always any good up do you need a bunch of bobby pins on hand to help you pin into place. So step number one to those hairstyles we are going to create a half a ponytail. So the best thing to do part your hair is normal and just go to the very back of your part draw a line straight down until you hit the middle back of your ear and that’s going to be our first section and then you just want to repeat the exact same process on the other side once you have your second section you just want to join these two together at the back of your head with a hair elastic you want to make sure that you only grabbed this sides and that in between your two sections you still have all of the hair the back of your head going straight down and your hair should look a little something like this from the side. So now step two what you will want to do is grab all of your hair and secure it with that second hair elastic just below the needs of your neck this is going to help with our next step to ensure that the hair stays together and remains nice and smooth if your hair is shorter just secure all of your ends together with that ponytail we just created we are going to move it up and over that first half a ponytail from step 1 as, I’m looping it, I’m going to gently pull mine through the left side but it does not matter which side you choose once my ends are through.
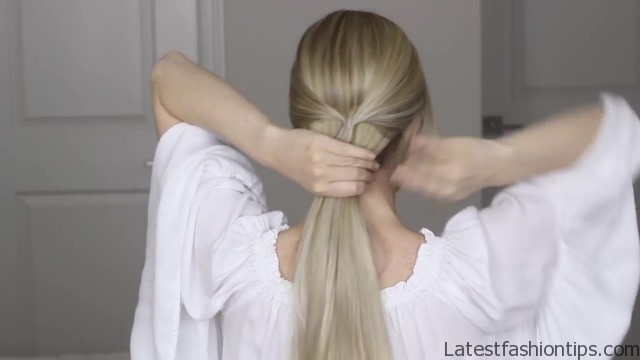
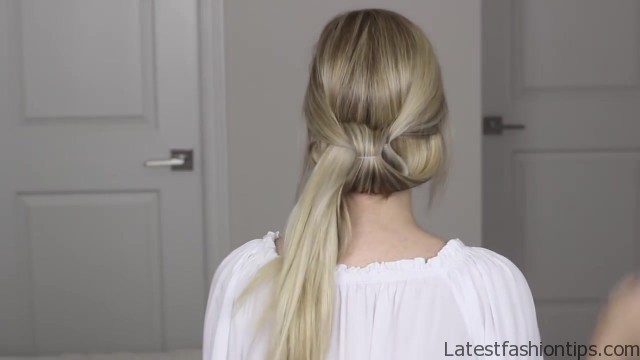
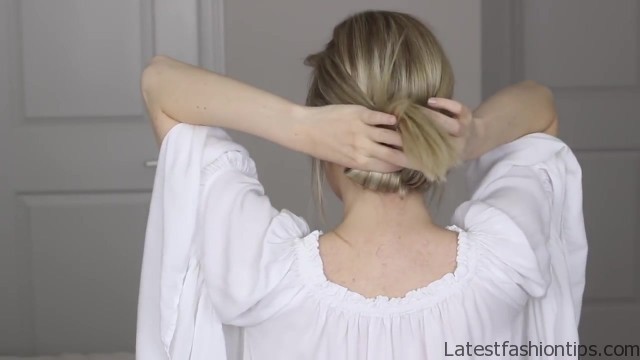
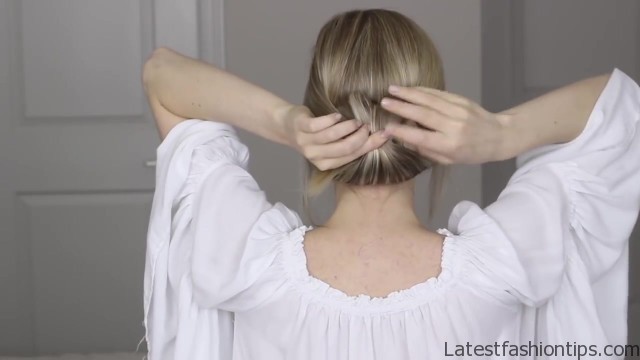
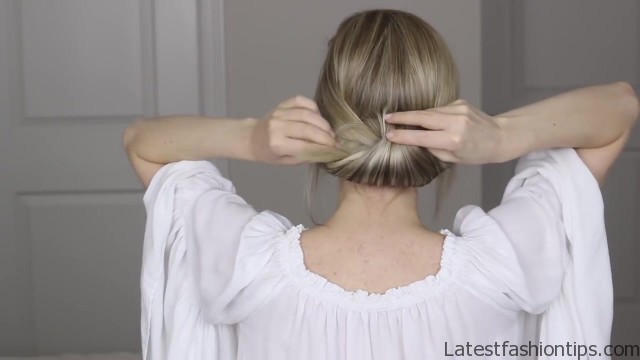
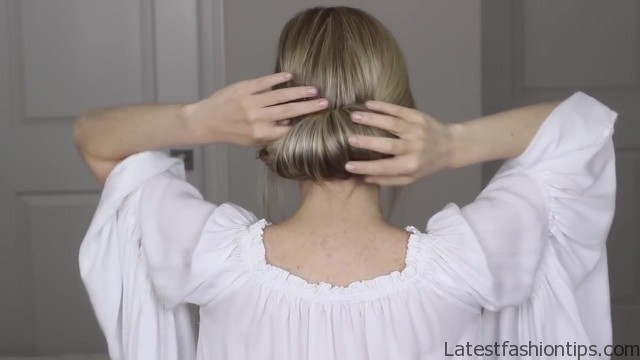
I’m just gently looping the rest of the ponytail and you want to guide it through slowly instead of just pulling on it to help prevent the appearance of flyaways depending on your hair’s lengths you could stop here and proceed to step three but if your hair is longer we are going to repeat the exact same process until the ponytail is completely wrapped. So one more time, I’m just going to reach through that loop that we created and, I’m grabbing on to my ends and then with my other hand, I’m finding that first ponytail that we created and looping my ends up and through and again pulling them out the left side now. I have about four inches sticking out the ends and all you have to do is tuck them in, I’m going to grab the entire bundle we have created and very slowly and gently tighten it up, I’m just working with the loop that we have created and pushing them up and through that half a ponytail just a little bit more until everything is nice and tight sitting where. I want it take your time guiding it through remember tighten it nice and slow to help prevent those flyaways from appearing if you still see your hair elastic like mine do not worry just place your fingers below it on either side and gently pull and the elastic will slide up this section and then we can tuck it away this also works as a great anchor point when pinning later now step three is securely pin your bun into place since we created loops it is very easy to slide your fingers into these loops and place as many bobby pins as you need in there.
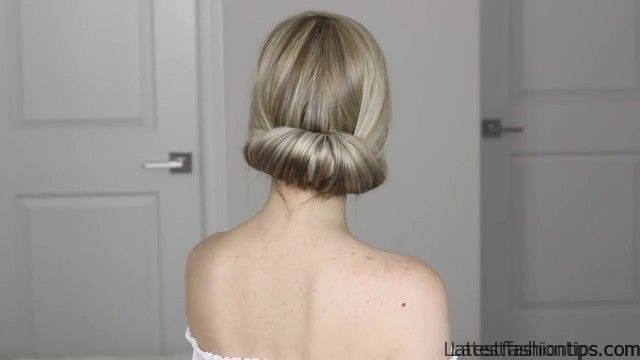
I alternated sides and worked my way towards the middle. I try my best to create crosses with my pins inside my loops just to make sure they are secured better and once you are done it should look a little something like this and, I’m going to go ahead and take some hairspray and, I’m just going to spray it right on my fingers to help smooth away any flyaways and those pesky neck hairs. So there you have you guys that’s how easy it is to do this modern Chignon hairstyle this hairstyle is perfect to have in your back pocket. So you can whip it out when you need a last-minute hairstyle. I love that it can be formal but it is not too formal that you can also dress it down but. I hope you guys found this post helpful if you did do not you – give it a thumbs up and comment down below let me know what you thought and where you would wear this hairstyle but thank you again you guys for all of your support and I will talk to you guys in my next post bye.
Maybe You Like Them Too
- Stephen A. Smith A Biography
- Steny Hoyer A Life in Public Service
- Sheryl Underwood A Life in Music and Comedy
- Scott Walker A Life in Song
- Sara Evans A Biography

