Hi guys today I have the coolest hair tutorial for you.. So I came across this picture of this 4 strand 3d braid and, I knew right away that. I want to learn how to recreate it.. So I could share it with you guys.
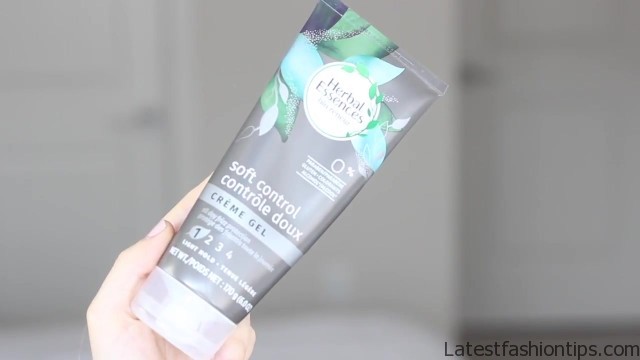
I just love how unique it is and how its detailed on all this side. So, I’m going to break down the steps make it nice and simple and show you how to recreate it. So, I’m gonna go ahead and put my hair into a ponytail and let’s get started to prep my hair, I’m applying this Herbal Essences light hold gel and, I’m just running it down my ponytail. I love this for braids because it gives you just enough hold to tame your flyaways and gives you a nice smooth soft finish first step divide your ponytail into four equal sized pieces. I like to separate mine down the middle and then. I divide the side sections down their middle one more time to make quarters now you should have 4 equal sized sections and we are going to transfer them all into our left hand in a very specific way with your left hand you want your palm facing down and place the first section which is the outer left section in between your thumb and index finger next place the second section which is beside our previous one in between your index finger and middle finger then place your third section in between your middle finger and ring finger and then lastly place your fourth section which is your outer right section in between your ring finger and pinky finger your braid it should be set up like this and keeping your section separated in between your fingers is super important now before we begin the braid one more step we want to swap section two and three with your right hand pick up the second section and bring it over the third section and then pick up the third section and place it where the second section was and then place the second section where the third section was. So all.
How To Four 4 Strand Braid Tutorial Photo Gallery

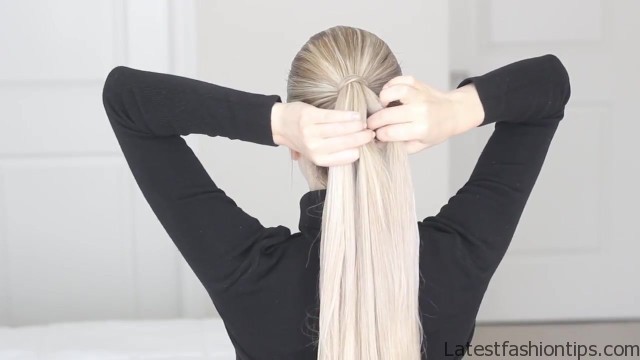
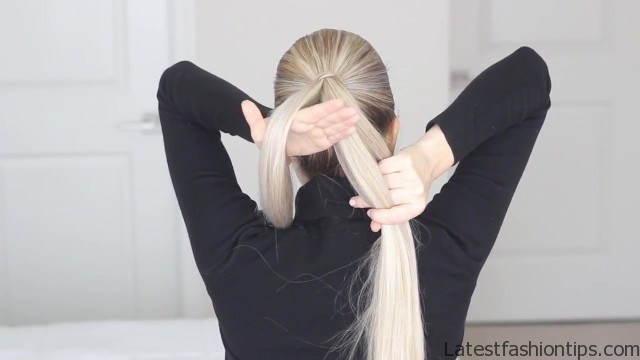
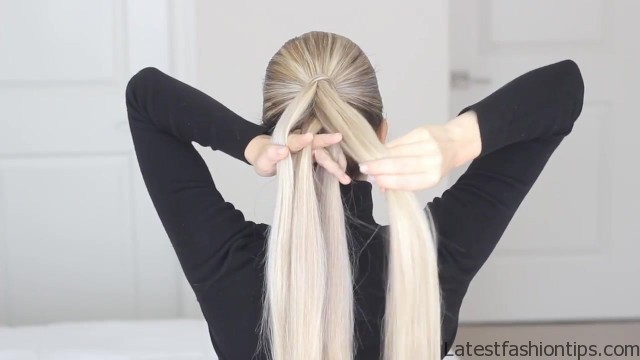
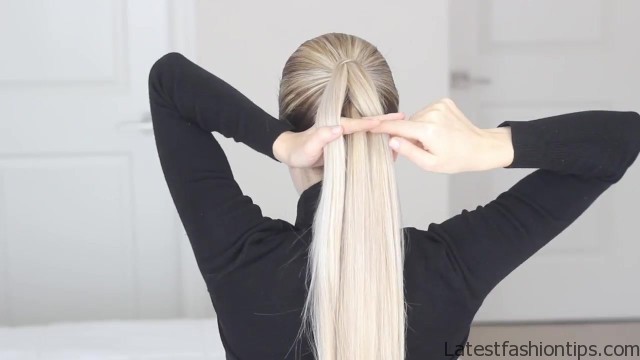
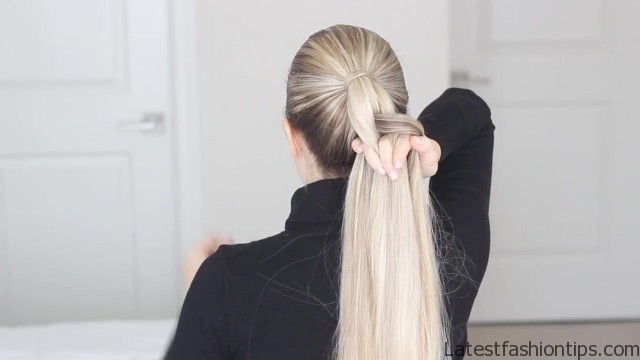
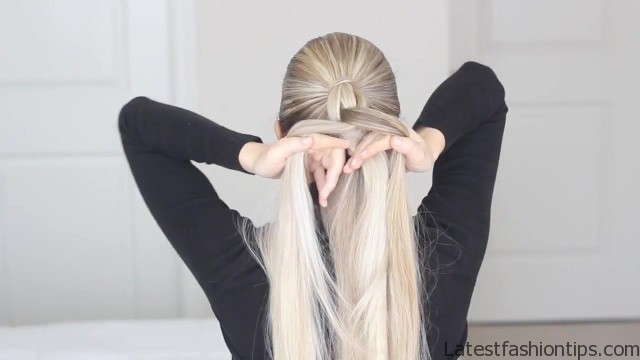
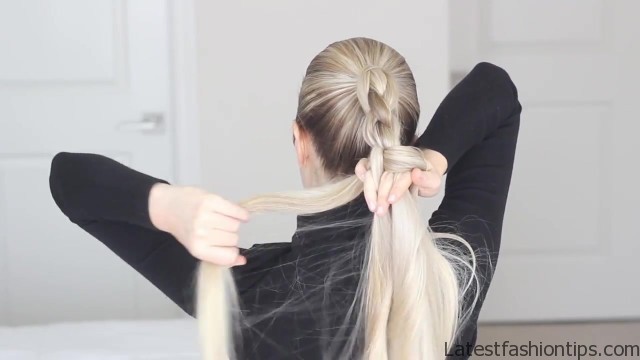
I did was cross the second section over the third section and used my fingers to keep them separated okay now time to braid we are going to swap all of these sections from left hand to our right hand take your right hand palm facing down and grab the left middle section using your index finger and thumb. So your index fingers should be on the right of the section and your thumb on the left of it once you have grabbed your section bring your hand around. So your palm is facing down and that section of hair should be in between your index finger and thumb now with your right hand grab the outer right section with your middle finger and you want this to sit in between your index finger and middle finger on your right hand next twist the last two sections on your left hand clockwise. So bring that left section over the right and then place them in between your fingers. So what what is the outer left section is that in between your middle finger and ring finger and then that second section is in between our ring finger and pinkie finger now that all of our sections are transferred into our right hand we are going to repeat the same steps except mirrored and bring them back into our left hand okay. So take your left hand palm facing down and grab the right middle section using your index finger and thumb and your index finger should be on the left of the section and your thumb on the right of it once you grab your section bring your hand around. So your palm is facing down and the section of hair is should be in between your index finger and thumb now with your left hand grab the outer left section with your middle finger and you want this to sit in between your index finger and middle finger on your left hand next twist the last two sections on your right hand counterclockwise.
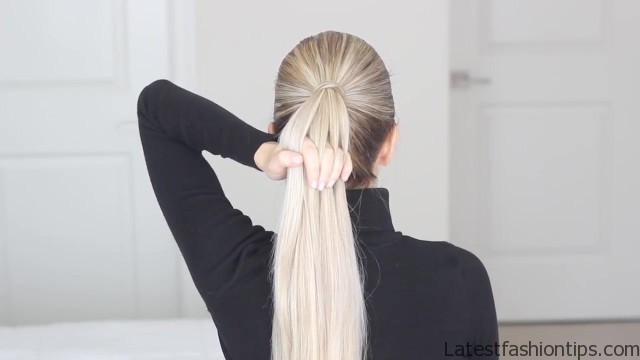
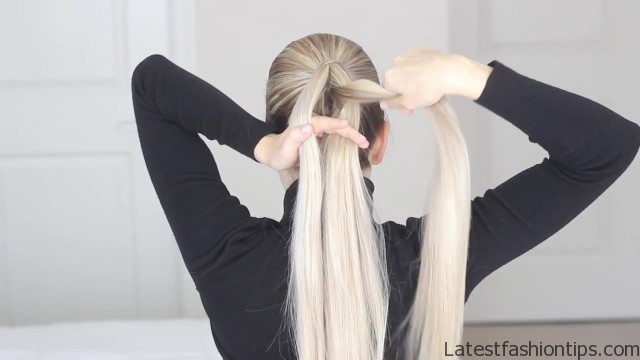
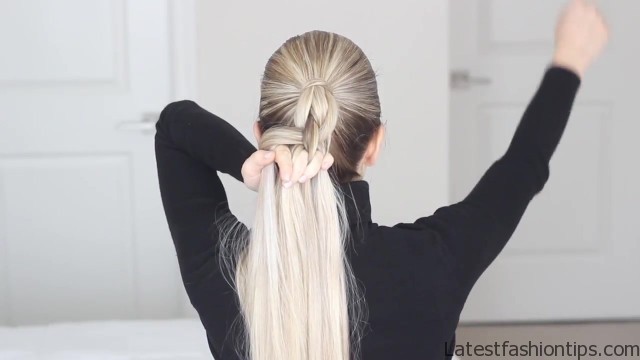
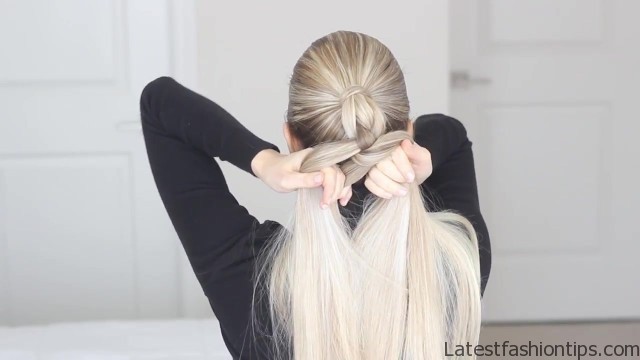
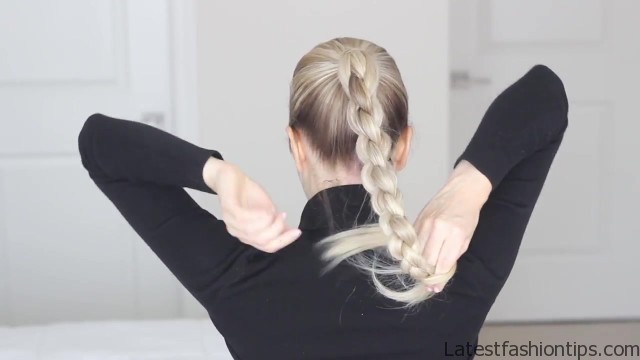
So now bring the right section over the left and place them in between your fingers. So what was the outer right section is that in between our middle finger and ring finger and then the second section is in between our ring finger and pinky finger this time, I’m going to bees it up. So use your index finger and thumb on your right hand and grab that left middle section and, I find it easiest to grab below my fingers place the section of hair in between your index finger and thumb now grab the outer right section with your middle finger and you want this to sit in between your index finger and your middle finger next twist the last two sections on your left hand clockwise and place them in between your fingers and it should look similar to this. So again quickly from right to left take your left hand and grab that right middle section place the section of hair in between your index finger and thumb on your left hand now grab the outer left section with your middle finger and place this in between your index finger and middle finger on your left hand next twist those the last two sections in your right hand counterclockwise and place them in between your fingers. So you want to keep repeating this pattern down the remainder of your ponytail. So once you learn how to transfer the braid from your left hand to your right hand you are gonna repeat the same steps to transfer from your right hand to your left hand except it is mirrored. So instead of grabbing the outer left section you will grab the outer right section and instead of turning the hair clockwise you will turn the hair at counterclockwise.
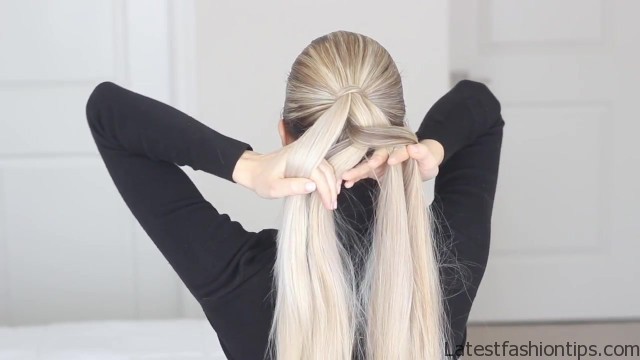
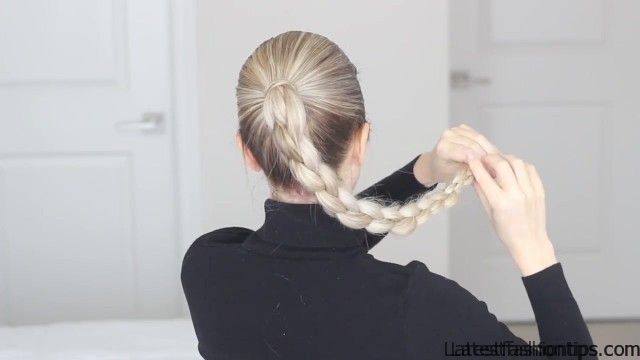
I just think this braid is so unique and worth practicing and the most important tip is making sure you are keeping your sections organized in between your fingers once you have that down you will be able to do this braid no problem once you have reached the end secure it off with a hair elastic there we have it you guys that’s how to recreate this unique four strand braid let me tell you guys. I had to practice this braid at least ten times before. I got it down. So do not get discouraged if you are having a hard time keep practicing and then once you get the motions down you won’t believe how simple it actually is also. I suggests practicing on a friend. It’s so much easier on your arms to create hairstyle this way versus having them upside down behind your head. I will also link some similar unique braids down below if you’d like to check those out as well but.
I really hope you enjoyed this post if you did do not forget to give it a thumbs up comment down below let me know what you guys thought and, I will talk to you guys in my next post bye.
Maybe You Like Them Too
- Stephen A. Smith A Biography
- Steny Hoyer A Life in Public Service
- Sheryl Underwood A Life in Music and Comedy
- Scott Walker A Life in Song
- Sara Evans A Biography
