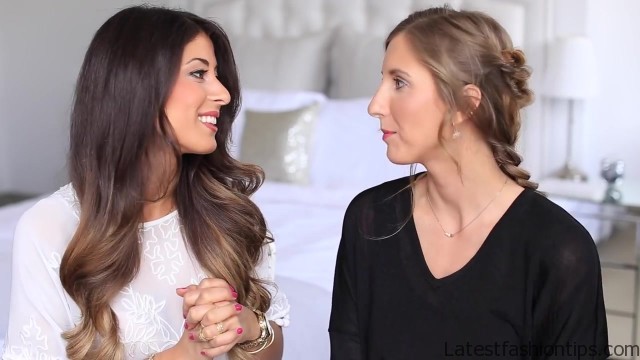
Hi, I have a gift for you today her name is Annie hi everyone Lonnie is a friend and Sonya also works with us here in our London office. So, I really wanted to show you guys this really awesome braid that, I think is super beautiful and it is perfect for the summer however it is very very complicated. So is Lonnie you she is just beautiful here and she’s waitings 34 muxes right 31 um.
So I will be showing you how to create this hairstyle this really cool layered braid on Lonnie and yeah it is the first time I’m actually doing a hairstyle on somebody else, I know I’m kind of crazy you know yeah a little bit it is a pretty sad on camera, I excited are you nervous how are you feeling I’m very excited is the first time on the camera. So I’m excited but a little bit nervous as well as you can probably tell it is just a warm up next time you will do the hair stuff right yes yeah yeah, I do not know if it goes yeah look how this goes right, I think you are gonna do great yeah alright. So let’s get started alright.
So the first thing I’m gonna do is brush her hair to make sure there are no tangles can, I just say this is so weird I’m not used to doing anything on anybody else, I use it alright. So yeah let’s go to brushing the hair.
Layered Braid Hair Tutorial Photo Gallery


So we are just gonna make sure there are no tangles before we start twisting and braiding everything and like, I mentioned. I have already added a dirty blonde locks in hair extensions Tucson is here because for this braid we are going to be doing multiple braids. So you do need that thickness and length of course alright.
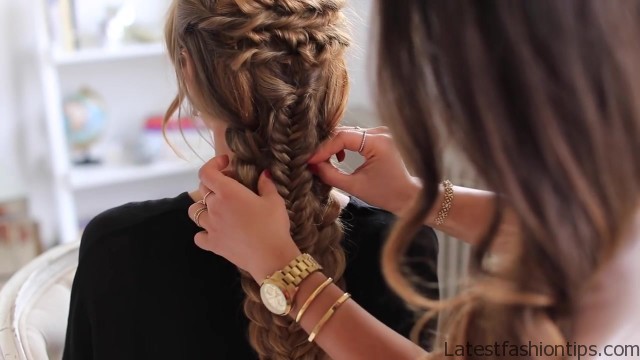
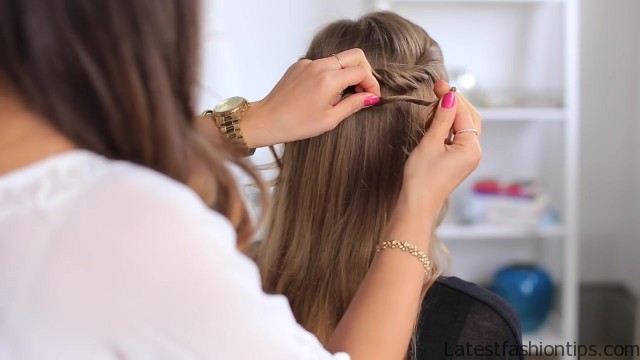
So once we are brush to here be doing some twists I’m going to start with creating four twists here at the top of Sonny’s head and I’m just going to add slanting me before a bobby pin yeah I’m going to separate her bangs at the front and then just grab this section of hair and that’s the section I’m going to be twisting. So I’m going to twist the section towards the left once, I have my twist in place what I’m going to do next is with my right hand I’m going to go in and pull out certain sections of this twist and what this is going to do is going to really fan out this twist and make it look a bit more messy a bit more natural and definitely more voluminous. So all I’m doing is as notice how I’m holding it with my left hand.
So I’m holding onto the ends not to lose them and with my right hand I’m just slowly and carefully pulling on small sections of hair right which kind of pulls it out and then when, I happy with the results I’m going to pin it in place like that perfect. So I’m just going to insert a bobby pin in there now I’m going to do the same thing from the left side. So again grab a small section of hair leave her bags out in the face and I’m going to twist it right I’m going to do that right below the first one and once, I get to the end of the twist I will do the opposite thing.
So I will go into the twist I will hold the ends with my right hand and then I will start pulling on the section to fan out this twist and especially Lani has more finer hair this works really great on expanding the hair and making it look like it is much much thicker then just going to pin it here in place as well just put as many bobby pins as you need to make sure it is safe and secure there then I’m going to go ahead and create two more I’m going to be doing the exact same thing. So grabbing a section from the right doing it to the left and from the left to the right and I’m just going to speed that up for you guys alright. So the first step of the hairstyle is finished done if you want to see it yes okay I will go go take a picture oh wow it is pretty awesome.
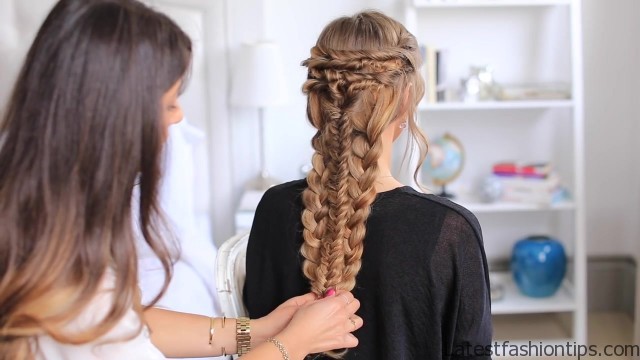
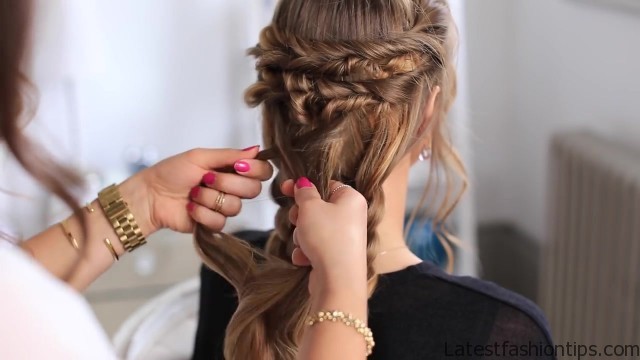
So you could stop at that if you want kind of yeah, I can go it looks gorgeous, I love it especially if you have waves already in your hair but we are gonna go one more step actually three more steps and what we are going to do here is we are actually going to split the hair in three sections. So there’s going to be the middle section and we are kind of working with equal sized sections. So we have this one here I will just give it to use on it and you can just hold this one thank you you will be mine this is instant and then what we are going to do is going to separate these two in the middle.
So you have two sections and I’m gonna start with just creating a regular three strand braid on the left side first and I’m just going to create a regular three strand braid okay. So once, I reach the end of the braid I’m going to go back into the braid and I’m going to fan it out and I’m going to make it really big. So I’m just going into sections of the braid holding the bottom because we do not want any hair to completely escape and just pulling it with the other hand and then holding it with my right hand point with my left.
So just in that kind of motion we are fanning out the braid and then I’m just going to use a clear hair elastic to secure this at the bottom now I’m going to go into the right section I will give you Sahni this middle section back hit and then I’m going to use this right section to do the same thing. So I’m going to create another three strand braid on the right side awesome. So we now have two regular braids and with fan them out now with this third section that’s in the middle and at the top I’m going to create a beautiful fishtail braid and if you do not know how to create a fishtail braid I’m going to link a post down below.
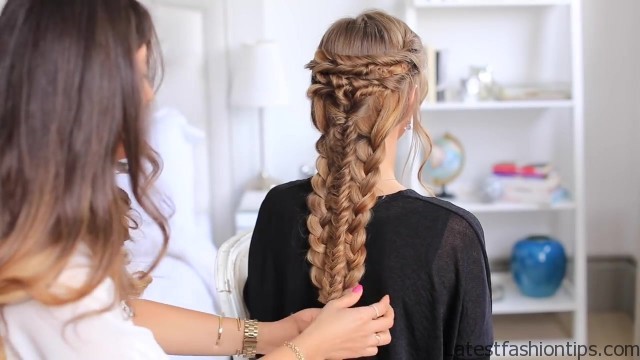
So check it out but it is super simple I’m just going to show you the basic steps of the fishtail braid is used for the section into with your index finger you go in bring a section from the right to the left add it to the left and then same thing from the left section you kind of go into the hair bring a section from the left to the right and that’s your first fishtail and then you just continue doing this all the way down all right. So now that, I finish doing the fishtail braid I’m gonna do the same thing like, I did on the regular braids I’m going to hold it with one hand here at the bottom and start fanning out sections. So one by one I’m going to fan it out and make it look big now that, I found out the fishtail braid I’m also going to secure it at the bottom this is really coming up nicely together now the next step is to pin the three braids together and how I’m going to do that is I’m going to go behind the fishtail braid and I’m going to pin it I’m going to start at this braid then I’m going to weave it into the middle and then I’m going to end with a third.
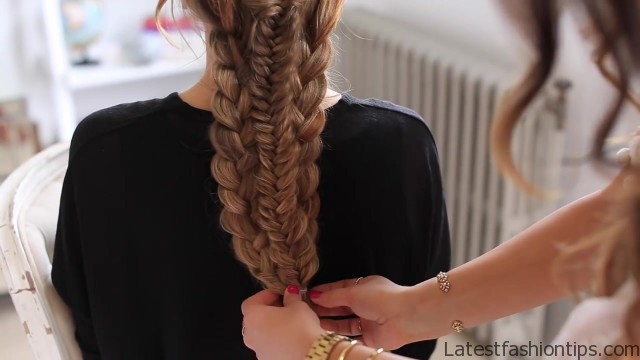
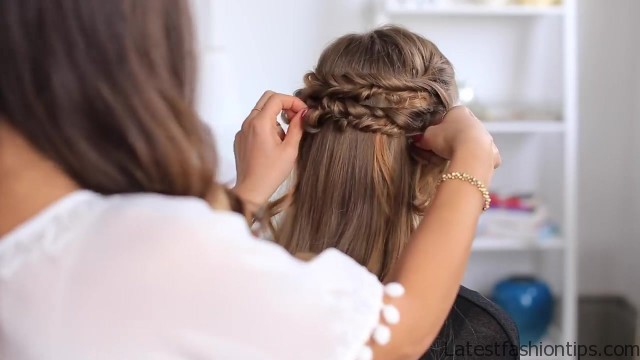
So I’m starting with the middle braid weaving it through the fishtail braid you can’t really see it because it is going right through the middle of the fishtail braid and yet we do not want to see it and then the ends grab the third braid and that way you feel it like kind of binds it together and then I’m going to add one more kind of here at the bottom of the braid and then you feel now it is like one braid it is all nicely pinned together now the last step is just to put one hair elastic to hold the three braids together alright. So now I’m gonna grab a hair elastic and secure everything together at the bottom and then at this point, I will just go into the braid and adjust anything that needs to be adjusting maybe fan out the side braids a bit more I’m going to fan out the end of this fishtail braid a little bit a little more here at the bottom. So we will see less of the elastic and that is it that’s the finished look.
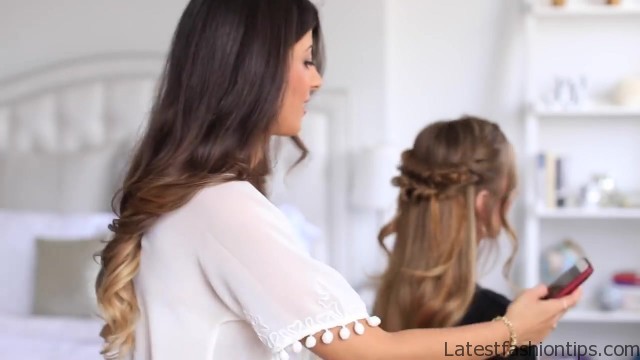
So this was fun yeah Superjail a good time we do this every morning, I do not know about that. So let us know how you enjoyed this hairstyle down below leave us a comment would love to hear from you also please when you recreate this beautiful yourself, I think this hairstyle is actually perfect for the summer what do you think it is a love to wear it for summer, I think I will be asking you to create it on any time yeah, I think it is great to wear it to like music festival or any kind of a summer party that’s outside it is just very romantic and feminine very summery yeah. So tag us in your pictures when you post it on Instagram would love to see thank you.
So much for tuning in thank you love you guys I will see you soon.
Maybe You Like Them Too
- Tamar Braxton A Life in Music
- Sunny Hostin A Biography
- Steve Coogan A Life in Comedy
- Sterling K Brown A Biography
- Stephen A. Smith A Biography
