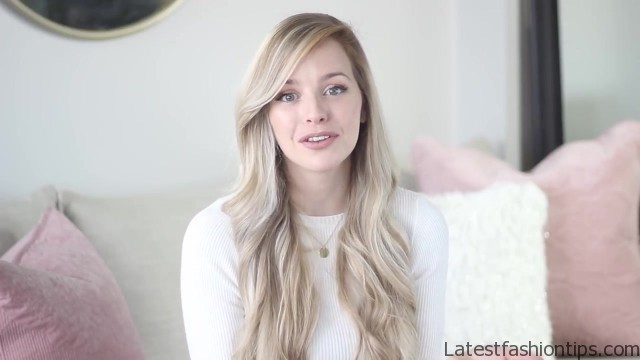
Hey guys. I have a very easy tutorial for you today, and it is this simple knotted ponytail with really soft waves now this hairstyle can also be worn really casual and beachy but with the holidays coming up. I thought this hairstyle would be perfect especially for a work party or family event imagine showing up with this hairstyle you’d be the only one there with it and you’d be the only one who knew how easy it actually was to create and a big shout out to Conair for partnering with me for this post you guys are going to love this new hair tool. So let’s go ahead and get started okay. So starting off.
HOW TO Easy Knotted Ponytail Tutorial Photo Gallery
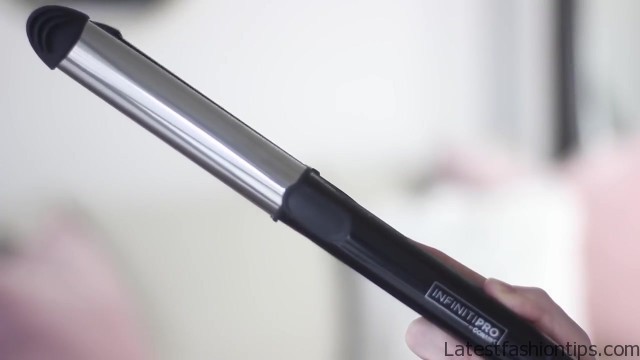
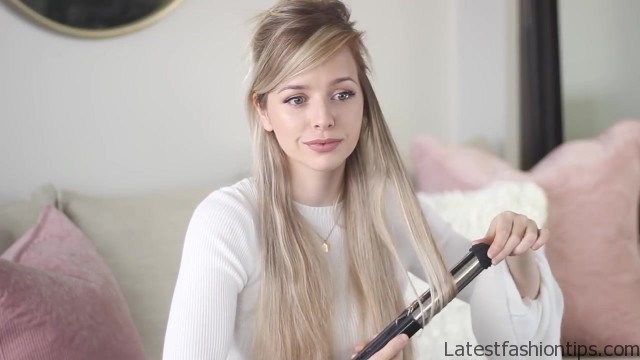


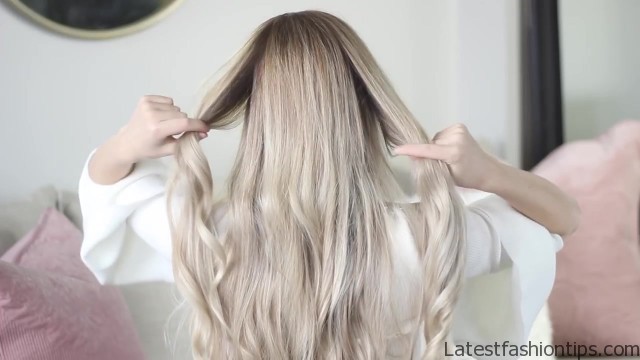
I just roughly blow-dried my hair it is nice and clean but. I do want to create like a soft romantic look.. So I’m going to add some curls using Conair’s new two-in-one stainless-steel styler the ceramic plates only take 30 seconds to heat up and they go up to 400 degrees Fahrenheit and the outer stainless steel barrel heats up to 265 degrees now the reason why the outer barrel heats up as well is because this is a multitasking tool you can curl your hair you can straighten your hair which. I thought you guys would love because it’d be perfect for traveling that way you only have to bring a one hair tool and you will have more room for all the clothes that you are not going to wear now there are five heat settings, I’m going to set it to 355 degrees to make things easier, I’m gonna divide my hair into two sections. So all of the hair that’s above my temples, I’m just going to clip out of the way for now okay where this hairstyle. I want all the hair that’s above my chin to be smooth.
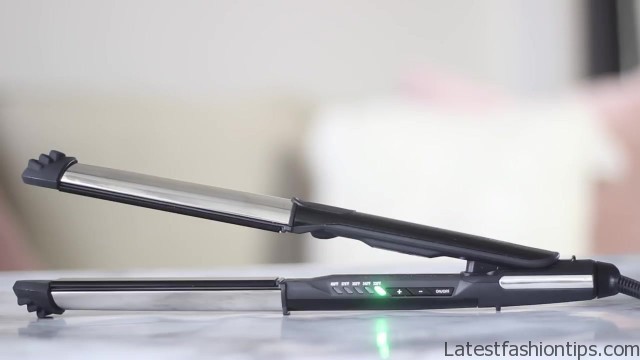
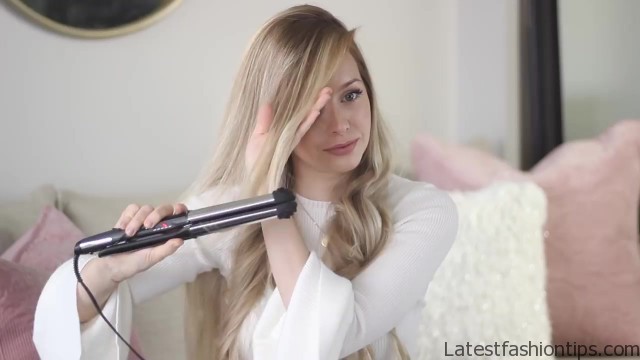
So, I’m going to straighten to my chin and then, I’m going to curl all the rest of my hair away from my face that way the hair at the bottom of my ponytail has a really nice wave to use this tool it is easy hold it in your dominant hand and place your hair in between the clamps where you want your curl to start and then slowly twist the styler one full turn away from your face and this will wrap the hair around that heated barrel and then you just want to slowly slide your hair through. I like to place my fingers on those two removable silicon tips at the end. I find that this gives me the most control once I have curled my section. I like to just give it a little bit of twist and, I like to let it cool and set on my shoulder. I love that these plates are extra long it just makes it. So much easier to curl especially when you have longer hair and they are one in 1/8 inch wide which is going to give you a nice defined curl. So, I’m going to take my top layer down and keep those straight pieces behind my shoulders and then continue at those same steps.
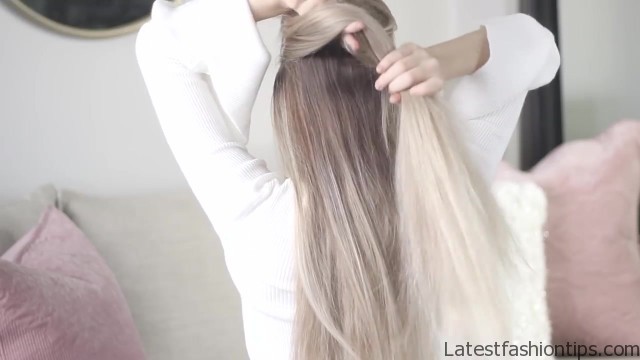
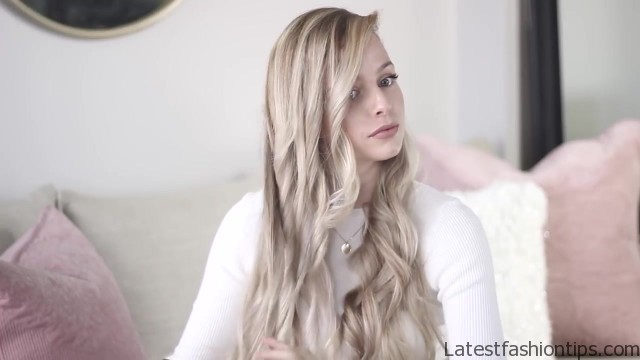
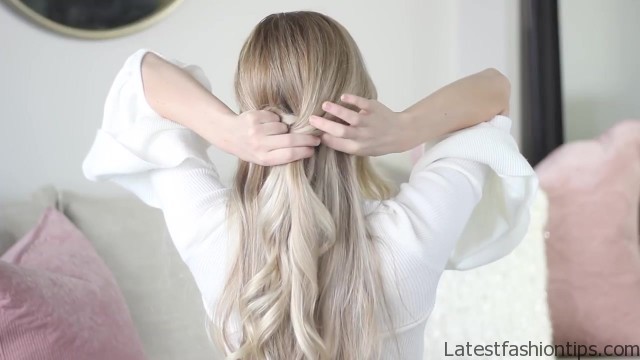
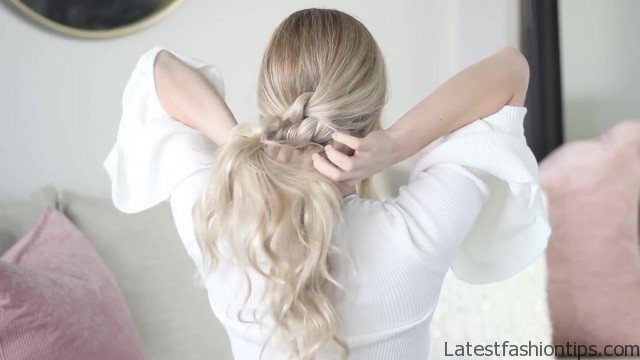
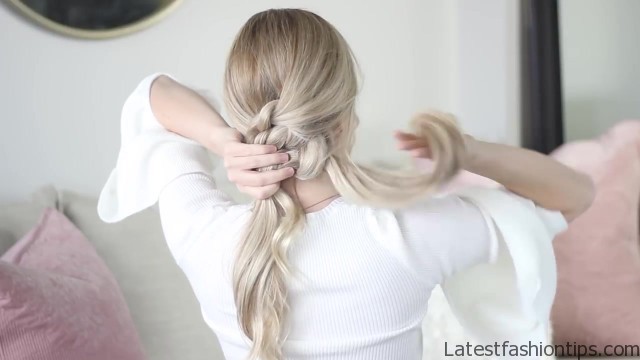
So straighten down to your chin and then curl away from your face and just let it cool my biggest tip when it comes to curling your hair like this is always keep your styler moving and take your time and work in smaller sections oh and for those of you asking how I curl my bangs it is super easy. I start right at the root and, I just curl them away from my face if you do not get it right away keep practicing. I promise you you will get it and you can always practice with the styler turned off that way you do not have to worry about excessive heat on your hair and then once my curls are cooled, I’m just going to make my hand into a claw and, I’m just going to brush them out stopping them because. I want to achieve more of a wave than having a uniform curl. I can’t get over how quick that was but now that my hair is prepped let’s turn around and begin knotting first step part your hair is normal and just throw it all behind your shoulders next gather the hair that’s above your temples on both sides of your head. So now you should have two equal sized sections that look similar to this we are going to tie these around one another.
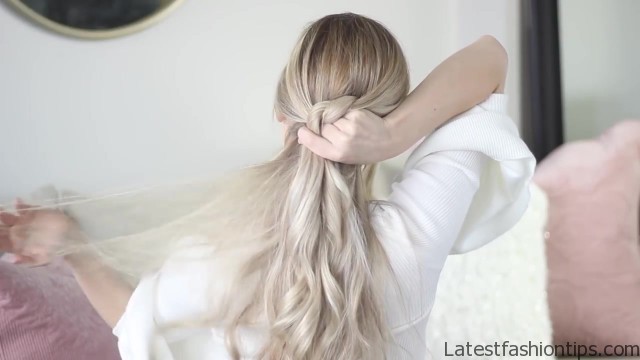
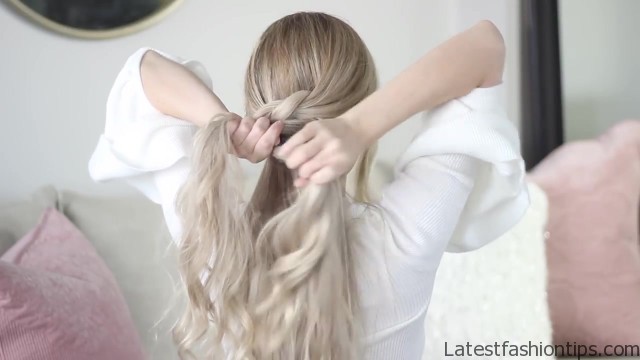
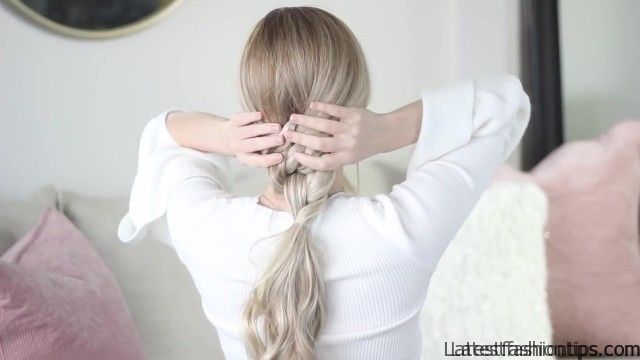
So bring that right section over the left and then bring that left up and pull it through that hole. So this is actually the same step as the first step of tying your shoe pull it tightly but not too tight and you want the knot to sit right at the base of your head now we are going to French knot it is simple. So gather all the hair that’s above your ears on the side of your head and you just want to make sure it is completely sectioned off to prevent tangles then join it into that right section and then repeat the same steps on the left side to gather all of that hair that’s above your ear on the left side of your head and remember to completely section it off and then join it into that left section now you should only have two separate sections and again you want to tie these together. So bring that right section over the left and then bring that left section up and pull it through and remember to pull it tight but not too tight, I’m going to repeat this one more time this time gathering all the remaining hair at the nape of my neck and just dividing it into two equal sized sections and joining them into our previous two section and again just tie these two sections around one another. So bring that right section over the left section and then bring that left section up and pull it through feel free to continue this pattern all the way down your ponytail it would look. So cool but lately I have really been loving half braids then secure it off with a small clear hair elastic and feel free to pull on your knots if you want them to appear even larger there we have it you guys that’s how easy it is to recreate this knotted ponytail. I really hope you guys enjoyed this and found it helpful I’d love to know where you would wear this hairstyle and if you do end up recreating it do not get to share with me on social media and as always.
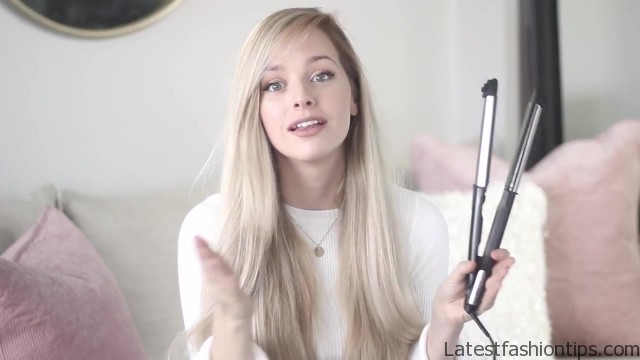
I will list all the product information for the Conair infinity Pro if you are interested in the description down below but thank you again. So much for reading you guys and I will talk to you in my next post bye.
Maybe You Like Them Too
- Stephen A. Smith A Biography
- Steny Hoyer A Life in Public Service
- Sheryl Underwood A Life in Music and Comedy
- Scott Walker A Life in Song
- Sara Evans A Biography
