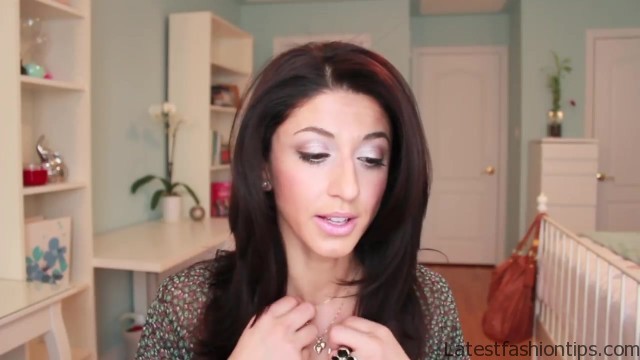
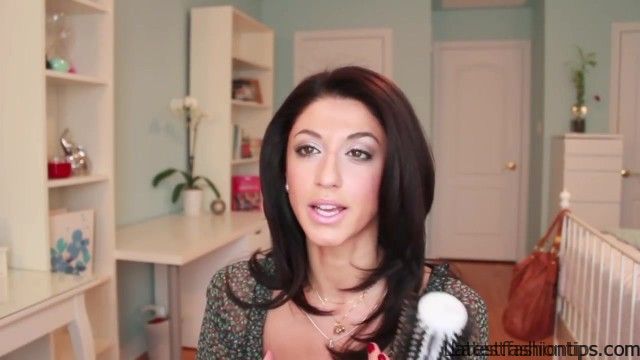
Hello my lovelies I’m going to be showing you guys how, I blow-dry my hair, I made this question asked almost every single time, I show my hair just the way it is and everyone always wants to know how, I blow-dry it, I have a post on it is called straight hair with volume and that’s pretty much exactly the same thing except in that post, I was concentrating mostly on the roots towards the middle of the hair and, I wasn’t. So much blow-drying the ends because, I was going to be using a straightener to sort of flutter in the ends and in this post I’m going to show you exactly what, I do every single time, I get out of the shower like my everyday hair and from this on you can curl your hair you can wave your hair whatever you want to do if your hair is blown out and blow-dried like this you can do anything this is what it looks like from all sides and yeah I’m going to be showing you the techniques the tools I’m using and one of the tools is actually was sent to us from brush lab it is this amazing ceramic ionic brush and we were sent a few of them for review Mimi has one in an orange color and, I have this gorgeous kind of lime green, I love it.
So much it is perfect it is kind of one of the essential things to create this look is a brush that has a wider kind of barrel or like a big round brush that’s kind of essential. So I’m going to be using this brush today and a little giveaway that you sign in the title of the post is actually another brush that they sent gorgeous hot pink color does not look that pink in the post it looks kind of like Barbie pink but it is kind of fuchsia and it is by Brush lab and this brush right here is boar bristles and as much as we wanted to keep it to ourselves we thought that it’d be nice to give it away to someone. So at the end of the post once you watch the post if you leave your comment down below the giveaway is going to be open for just one week from the day that the post is posted.
How to Blow Dry Straight Hair with Volume Photo Gallery


So um we are going to be giving it away to one of the people that comment you do not have to say enter me you do not have to say you know, I want to be entered or contest or anything just as long as you leave a comment saying whatever hopefully something nice you will be entered and the winner will be chosen by random gorg. So whoever is the winner is going to get this brush right here by brush laughs this gorgeous pink color bow bristles it is perfect for blow-drying perfect for kind of blow drying the hair straight. So I’m excited for someone to have this brush as well and if you want to know how to create this look or not really create this look how to blow-dry the hair the way, I do it then just keep reading and hopefully you will be able to learn a few tricks and tips that, I do for my own hair that would be helpful to you.
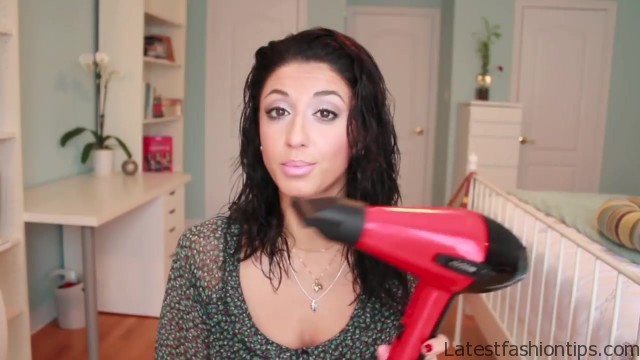
So if you want to know how to do it then just keep reading okay. So in order for you guys to be able to do this blow-dry you are going to need a few things that are kind of essential because good tools is really what determines the results first thing is obviously a really good blow dryer this is one by Elgin professionals, I got it Mimi has the same one and with you, I believe you have seen it in one of her posts as well and this is turbo high pressure Elle Qing professional series blow dryer that we both got from Beauty choice calm really really happy with this blow dryer it is amazing we actually found out about it from our hairdresser and what, I really love about this blow dryer is it is very powerful it is lightweight it is comfortable to use but it is also has this attachment the nozzle that is kind of very concentrated and it does not move around because most of the blow dryers. I have had in the past would always you know move around and it was really difficult to use.
So you are going to need a good blow dryer invest in one if that’s you know if you do not have one because really that’s kind of like an essential thing and definitely you are going to need a good ceramic ionic brush that’s um to create the particularly that I’m doing is as wide as possible this is probably like two inches two and a half inches something like that really wide barrel something that’s comfortable like this brush loved one that, I talked earlier has the soft grip and it is very comfortable to use because you are going to be doing a lot of to it like turning with your fingers and this is really comfortable. So a good ceramic ionic brush is kind of essential you are also gonna be a few clips to hold your hair up and before, I start blow drying my hair I will just tell you what, I did quickly for what, I put products, I used on my hair and the first thing, I do is right after, I get out of the shower is use this macadamia healing oil um, I have a post on the macadamia deep deep mask deep conditioning mask, I think it is called. I have done a review for that and, I still use it and, I love it this one, I got on sale um the regular price is like forty five dollars, I got it for $19.
99 at winners, I do not know if you can see that right there the camera won’t focus but um anyway. So because it was a good deal, I got it and, I just applied on my ends when my hair is wet, I can’t say, I would repurchase it because, I have not seen a significant difference in my hair but, I mean it is an oil and it is healing and it is a treatment. So I’m sure it is not doing any damage.
So I’m going to continue using it but do not think I’m going to repurchase that rather try something else that’s out there also right after, I use that, I use this Herbal Essences long-term relationship leave-in split and protector for long hair it is quite a mouthful the name but. I have been using it for a while you guys probably see that in my past posts. So, I just apply like maybe you know about two pumps and just on the ends of my hair and then definitely spray a heat protectant all over your hair this one you guys have seen many times this use is the Tresemme heat tamer spray.
So, I just spray that all over my hair and that’s the only products, I use on my everyday blow-dry which you are about to see. So let’s begin and the first thing I’m going to do is just separate my hair into sections, I love doing it in sections, I know some people just kind of you know start wherever do kind of an all-over dry, I have to do it in sections that’s just the way I’m used to and I’m going to show you guys the technique that, I do but, I won’t be showing the whole thing while the blow dryers on I’m going to fast forward it because otherwise it would be quite long because when, I blow-dry my hair, I do it really thoroughly because, I take smaller sections and it takes me about 25 to 30 minutes. So obviously you can’t I’m not going to be able to you know show the whole process without fast-forwarding.
So but, I will show you the technique um that, I do. So, I just have to rig my hair into the bottom section like this I will show you from the back and then, I separate the back into two and then, I separate this one side into two as well. So you see how thorough it is that’s why my blow dry the results are kind of kind of like a straight hair but it still has volume.
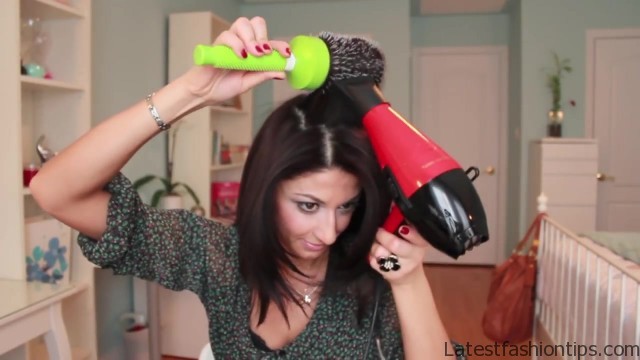
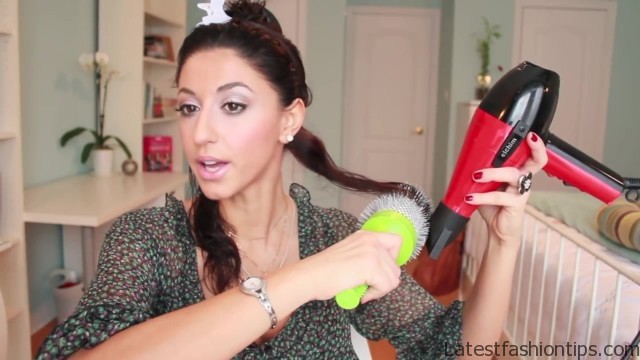
So so what, I do is, I pick up the hair, I pick up the brush and, I go all the way to the roots like right at the end and, I kind of wrap the hair around the brush like that. So you see the ends are on the brush and that’s why the bigger brushes are better and this brush love brush is amazing because it really groups the hair really nicely because of the bristles and, I love how soft this you know the handle is so what, I do and I’m going to do this without turning on the blow-dryer otherwise you will be able to hear me over the blow-dryer.
So, I just bring the blow-dryer really close to the roots and, I kind of instead of doing this because that will burn the roots burn your head, I kind of put it down like this and, I start to concentrate on the hair on the blow-dryer right and where I’m you I’m kind of turning the brush. So right now it is not it is wet hair that’s why it is not kind of going through nicely but this is what, I would do, I just kind of you know start twisting it and turning it and making sure kind of like all the hair is gripped onto the brush like you see the ends are there as well and that’s all, I do, I just kind of move the brush and a blow-dryer together and, I just kind of do this motion right here obviously keeping the blow-dryer the nozzle right kind of at the edge of the brush and, I just kind of move it down and then right at right when, I get to the ends, I do not let the hair slip from the brush, I just kind of start turning it up and come back and do the same thing and that’s basically all, I do and then when, I get to the ends, I kind of concentrate the blow-dryer and the brush at the end because, I have really damaged ends. So, I just kind of do that a few times just like this like I’m kind of turning the brush over and over and over and then, I let go and you will see, I mean obviously my hair is still wet but um you will see how the ends are going to twist and turn inside.
. So I have been talking for seven minutes. So I’m going to start blow drying my hair and hopefully this was helpful the technique was helpful to understand and you guys will be able to do it.
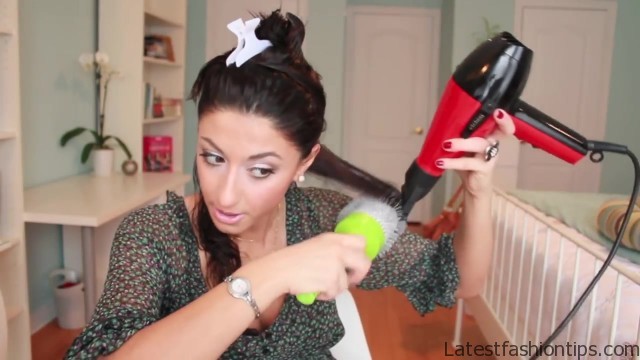
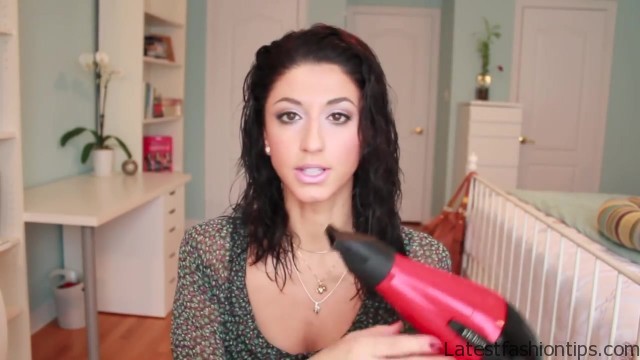
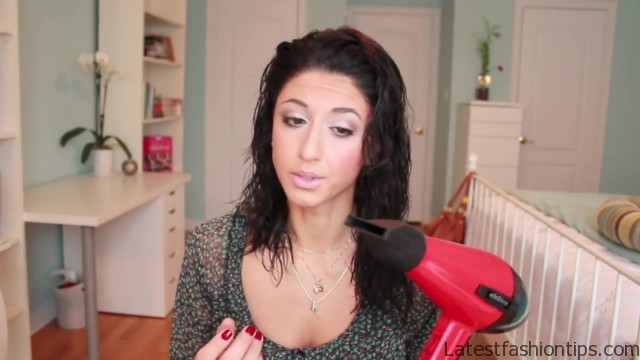
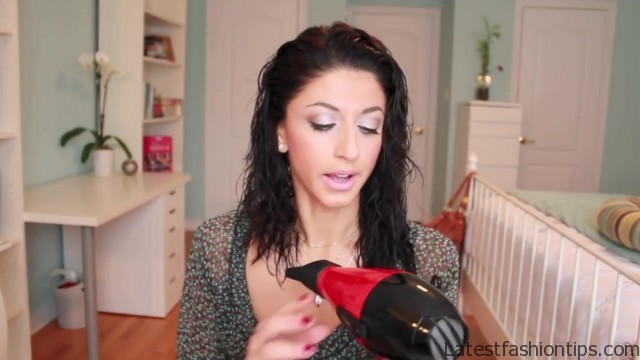
So let us begin, I forgot to mention when, I was showing the technique if you want more volume what you have to do is kind of when you put the hair up on the brush instead of going down like this you are going to kind of go up like this and then down and that gives your hair that volume you see right there from the brush it creates that kind of bump right at the roots. So not attached and I’m just going to continue blow-drying the hair all right. So once I’m done blow-drying the hair I’m just kind of generally, I parted parted whichever way you parted, I parted kind of in the middle but mostly towards the left side and I’m going to just take the the front section and just blow-dry it to kind of style it into place.
So what, I do is, I just kind of put all the hair on top of the brush and, I just use the blow dryer to kind of push the hair towards the side like this. So let me show you what, I do and then for the back what, I do is, I just take the crown and, I kind of blow drive up like towards the back but upwards like this and that’s it that’s pretty much all, I do every single time, I wash my hair when, I want a thorough blow-dry or blow out this is exactly the technique and the products everything that, I use. So, I really hope that you guys found it helpful let me just show you what its gonna look like obviously depending on the length of you here depending on the texture of your hair depending on um, I do not know the cut of you here it is going to look different it is not going to look identical to this but and if you do not get the technique right away do not get discouraged it takes a little while to get the hang of how to use the brush how to kind of twist it and all that.
So as long as you re watch the post a few times um if you need to pause it because, I know, I was fast word fast-forwarding it if you need to pause it and sort of figure out what I’m doing exactly what the brush and which sections I’m taking you can do that. So yeah, I hope this post was this post tutorial was really helpful to you guys if you were always wondering how, I get my hair to look this way um like you say, I do not really do anything that special it is just about the blow-dryer the amazing brush, I love this brush. So much it was exactly what, I was looking for for the longest time.
So I’m really really happy to have it. So it is the brush the blow dryer and the technique. So if you practice if you have those those kind of good foundation products and tools and you practice with time I’m sure you are going to get it no doubt about it.
So um, I hope this was helpful and, I will see you guys in the next tutorial ciao you.
Maybe You Like Them Too
- Tamar Braxton A Life in Music
- Sunny Hostin A Biography
- Steve Coogan A Life in Comedy
- Sterling K Brown A Biography
- Stephen A. Smith A Biography


