I. Introduction
II. History of Nail Art
III. Types of Nail Art
IV. Tools and Materials for Nail Art
V. Steps for Creating Nail Art
VI. Design Ideas for Nail Art
VII. How to Keep Nail Art Looking Fresh
VIII. How to Remove Nail Art
IX. Safety Tips for Nail Art
X. FAQ
| Feature | Description |
|---|---|
| Nail art | The art of decorating fingernails and toenails. |
| Nail design | The process of creating nail art. |
| Nail inspiration | Ideas for creating nail art designs. |
| Nail tutorial | Instructions on how to create nail art designs. |
| Nail art supplies | The tools and materials needed to create nail art designs. |
II. History of Nail Art
Nail art has been around for centuries, with evidence of its practice dating back to ancient Egypt. In Egypt, nail art was seen as a symbol of beauty and status, and was often used to indicate a person’s social class or occupation. Egyptian nail art typically featured intricate designs, often using henna or other natural dyes.
Nail art continued to be popular throughout history, with different cultures developing their own unique styles. In China, for example, nail art was often used to symbolize good luck or prosperity. In India, nail art was seen as a way to express one’s personality and individuality.
In the modern era, nail art has become increasingly popular, with new designs and techniques emerging all the time. Today, nail art is a way for people to express themselves creatively and to show off their personality.
III. Types of Nail Art
There are many different types of nail art, each with its own unique style and flair. Some of the most popular types of nail art include:
- French manicure
- Ombre nails
- Glitter nails
- Marble nails
- Animal print nails
- Nail art decals
- 3D nail art
- Watercolor nail art
- Negative space nail art
Each type of nail art has its own unique set of materials and tools, as well as its own set of techniques. For example, French manicures typically require a white nail polish and a clear top coat, while ombre nails require two or more different shades of nail polish.
The best way to learn about the different types of nail art is to experiment with different techniques and styles. You can find plenty of inspiration online, in magazines, and in nail art books. With a little practice, you’ll be able to create beautiful nail art designs that you’ll love.

IV. Tools and Materials for Nail Art
There are a variety of tools and materials that you will need to create nail art. Some of the most basic supplies include:
- Nail polish
- Nail polish remover
- Nail files
- Cuticle cutters
- Cuticle oil
- Nail brushes
- Topcoat
In addition to these basic supplies, you may also want to invest in some more specialized tools and materials, such as:
- Dotting tools
- Sponges
- Stencils
- Stickers
- Gems
- Foil
- Ribbons
With a little creativity and some basic supplies, you can create beautiful and unique nail art designs that will turn heads wherever you go.
V. Steps for Creating Nail Art
Creating nail art can be a fun and creative way to express yourself. Here are the steps involved in creating your own nail art masterpiece:
- Prepare your nails by filing and cleaning them.
- Apply a base coat to protect your nails.
- Choose the colors and designs you want to use.
- Apply the polish to your nails, using a thin layer for each color.
- Use a toothpick or thin brush to create your designs.
- Seal the polish with a top coat.
Once your nail art is finished, you can enjoy it for a few days before it starts to chip. To help your nail art last longer, avoid using your nails to pick at things and apply a fresh coat of top coat every few days.
VI. Design Ideas for Nail Art
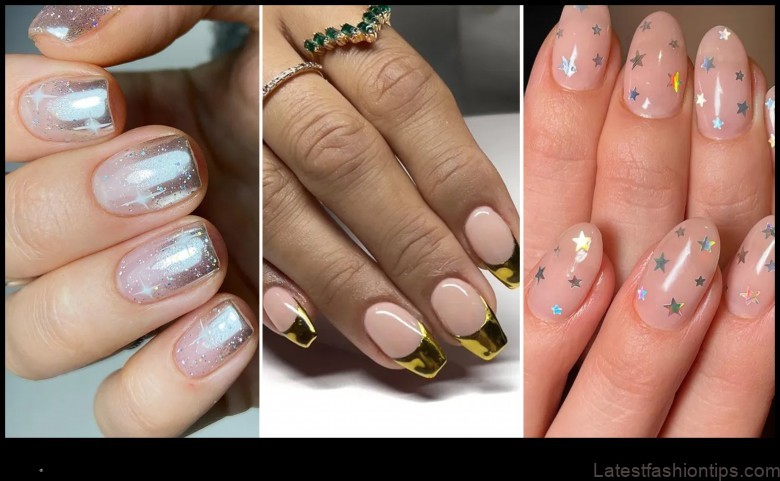
There are endless possibilities for nail art designs, and the only limit is your imagination. Here are a few ideas to get you started:
- Geometric designs: Use geometric shapes to create a modern and edgy look.
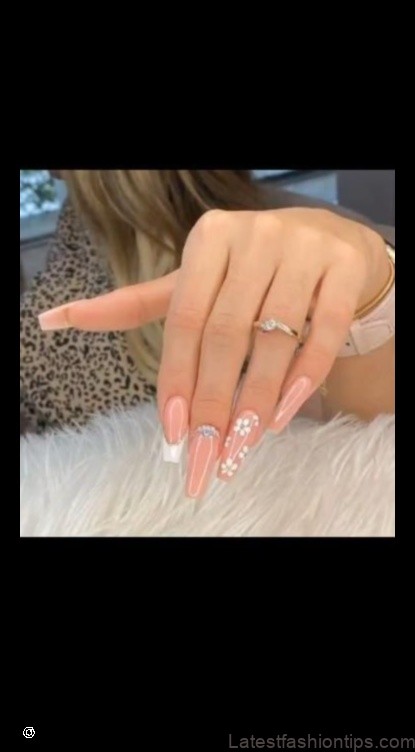
- Floral designs: Add a touch of nature to your nails with floral designs.
- Animal print designs: Animal print is always a popular choice for nail art.
- Abstract designs: Create a unique and one-of-a-kind look with abstract designs.
- Negative space designs: Leave some of your nail bare to create a stylish and minimalist look.
- 3D designs: Add dimension to your nails with 3D designs.
- French manicure designs: Give a classic French manicure a modern update with colorful tips or add some nail art.
- Ombre designs: Create a gradient effect on your nails with ombre designs.
- Nail art decals: Add a touch of personality to your nails with nail art decals.
- Nail art stickers: Easily add nail art designs to your nails with nail art stickers.
These are just a few ideas to get you started. The possibilities are endless when it comes to nail art designs, so let your creativity run wild!
VII. How to Keep Nail Art Looking Fresh
Nail art can be a beautiful way to express your personality and style, but it can also be a lot of work to keep it looking fresh. Here are a few tips for keeping your nail art looking its best:
- Use a good base coat. A base coat will help to protect your nails and prevent the polish from chipping or peeling.
- Apply two coats of polish. This will help to create a more opaque and durable finish.
- Seal the polish with a top coat. A top coat will help to protect the polish and prevent it from chipping or smudging.
- Be careful when doing activities that could damage your nail art, such as washing dishes or doing housework.
- Reapply your nail art every few days to keep it looking fresh.
By following these tips, you can help to keep your nail art looking its best for longer.
How to Remove Nail Art
Removing nail art can be a challenge, especially if you’ve used a strong adhesive or if your nails are long and difficult to reach. Here are a few tips for removing nail art safely and effectively:
- Start by soaking your nails in a bowl of warm, soapy water for a few minutes. This will help to loosen the adhesive and make it easier to remove.
- Gently rub the nail art with a cotton ball or pad soaked in acetone or nail polish remover. Be careful not to get the remover on your skin, as it can be drying and irritating.
- If the nail art is still difficult to remove, you can try using a nail art remover brush or a cuticle pusher to gently scrape it off.
- Once the nail art is removed, be sure to moisturize your nails to help prevent them from drying out.
Here are a few additional tips for removing nail art:
- If you have sensitive skin, you may want to avoid using acetone or nail polish remover, as these products can be drying and irritating. Instead, try using a gentle remover that is specifically designed for sensitive skin.
- If you’re having trouble removing nail art from your cuticles, you can try using a cotton swab dipped in acetone or nail polish remover. Be careful not to get the remover on your skin, as it can be drying and irritating.
- If you’re removing nail art from long nails, you may want to use a pair of nail clippers or scissors to trim the nails down first. This will make it easier to remove the nail art and prevent it from breaking.
IX. Safety Tips for Nail Art
Nail art can be a fun and creative way to express yourself, but it’s important to take precautions to avoid any potential risks. Here are some safety tips for nail art:
- Use only high-quality nail polishes and products that are specifically designed for use on nails.
- Follow the directions on the product label carefully.
- Test a small amount of the product on your skin before applying it to your nails to make sure you don’t have any allergic reactions.
- Be careful not to get nail polish in your eyes. If this happens, rinse your eyes thoroughly with water and seek medical attention if necessary.
- Remove nail polish with a gentle nail polish remover that is free of acetone.
- Avoid biting or picking at your nails, as this can damage the nail bed and lead to infection.
- If you have any concerns about nail art, talk to your doctor or a dermatologist.
FAQ
Q: What is nail art?
A: Nail art is the decoration of fingernails and toenails using a variety of materials, including polish, glitter, beads, and decals.
Q: What are the different types of nail art?
A: There are many different types of nail art, including:
- French manicure
- Ombre nails
- Drip nails
- Negative space nails
- 3D nails
Q: How do I get started with nail art?
A: To get started with nail art, you will need the following supplies:
- Nail polish
- Glitter
- Beads
- Decals
- Nail art brush
- Nail art dotting tool
You can also find many helpful tutorials online that will teach you how to create different nail art designs.
Table of Contents
Maybe You Like Them Too
- How to Choose the Right Woman Dress for Your Body Type
- How to Achieve Healthy, Shiny Hair
- Street Style Revolution How to Embrace Your Inner Individuality
- How to Achieve Healthy, Shiny Hair Without Breaking the Bank
- Nail Art Renaissance 50 Innovative Designs to Try

