
I. History of Nail Art
II. Types of Nail Art
III. Tools and Materials for Nail Art
IV. Steps for Doing Nail Art
V. How to Keep Your Nails Healthy While Doing Nail Art
VI. Nail Art Trends
VII. How to Choose the Right Nail Art for Your Nails
VIII. How to Remove Nail Art
IX. Nail Art Mistakes to Avoid
X. FAQ
| Topic | LSI Keywords |
|---|---|
| History of Nail Art | nail art, nail polish, self-expression, fashion, beauty |
| Types of Nail Art | nail art, nail polish, self-expression, fashion, beauty |
| Tools and Materials for Nail Art | nail art, nail polish, self-expression, fashion, beauty |
| Steps for Doing Nail Art | nail art, nail polish, self-expression, fashion, beauty |
I. History of Nail Art
Nail art has been around for centuries, with evidence of it dating back to ancient Egypt. In ancient Egypt, nail art was seen as a symbol of status and wealth. Egyptian women would often paint their nails with henna or other natural pigments.
Nail art became increasingly popular in the 1920s and 1930s, as women began to experiment with new ways to express themselves. In the 1920s, nail art was often inspired by the flapper style, with bright colors and geometric designs. In the 1930s, nail art became more glamorous, with long, pointed nails and intricate designs.
In the 1940s and 1950s, nail art took a more conservative turn, with women opting for simple, French manicures. However, in the 1960s, nail art once again became more experimental, with the rise of the hippie movement. In the 1970s, nail art became more colorful and creative, with the introduction of new nail art techniques, such as airbrushing and stamping.
In the 1980s and 1990s, nail art continued to evolve, with the rise of new trends, such as acrylic nails and gel nails. In the 2000s, nail art became even more popular, with the advent of social media platforms like Instagram and Pinterest. Today, nail art is a global phenomenon, with nail artists from all over the world creating stunning and innovative designs.
III. Tools and Materials for Nail Art
Nail art can be done with a variety of tools and materials, but the most basic supplies include:
- Nail polish
- Nail polish remover
- Base coat
- Top coat
- Nail art brushes
- Nail art stickers
- Nail art gems
- Nail art glitter
- Nail art tape
You can also use other tools and materials to create more intricate nail art designs, such as:
- Stencils
- Dotting tools
- Wax paper
- Q-tips
- Sequins
- Foil
- Rhinestones
With a little creativity and some basic supplies, you can create your own unique nail art designs that will express your personality and style.
IV. Steps for Doing Nail Art
1. Prepare your nails by pushing back your cuticles and filing them into a desired shape.
2. Apply a base coat to protect your nails from the polish.
3. Choose your nail art colors and designs. You can use nail polish, stickers, glitter, or other nail art supplies.
4. Apply the nail art to your nails.
5. Seal the nail art with a top coat to protect it from chipping.
6. Enjoy your new nail art!
V. How to Keep Your Nails Healthy While Doing Nail Art
Nail art can be a fun and creative way to express yourself, but it’s important to make sure that you’re taking care of your nails while you’re doing it. Here are a few tips for keeping your nails healthy while doing nail art:
- Use a base coat before applying any nail polish. This will help to protect your nails from the chemicals in the polish and will help the polish to last longer.
- Apply polish in thin layers. This will help to prevent the polish from becoming too thick and clumpy, which can damage your nails.
- Don’t leave polish on your nails for too long. The longer you leave polish on your nails, the more likely it is to damage them.
- Remove polish carefully. Using a harsh remover or picking at your nails can damage them.
- Give your nails a break from nail art every once in a while. This will give them a chance to rest and repair themselves.
By following these tips, you can help to keep your nails healthy and beautiful while still enjoying the fun of nail art.
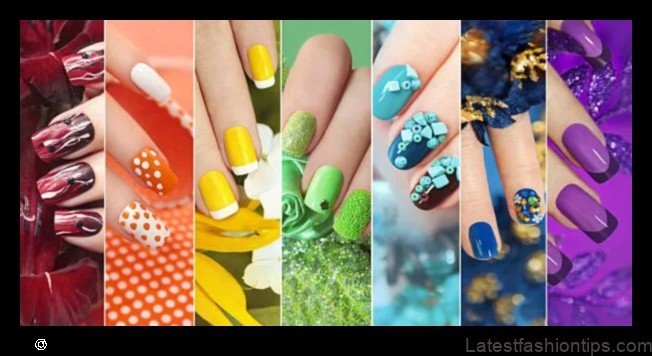
VI. Nail Art Trends
Nail art trends change constantly, but some of the most popular trends in recent years include:
Geometric nail art: This trend features geometric shapes, such as squares, triangles, and circles, painted on the nails.
Negative space nail art: This trend involves leaving parts of the nail bare, creating a more minimalist look.
Abstract nail art: This trend features abstract designs, such as swirls, lines, and dots.
Colorful nail art: This trend features bright, bold colors, often in combination with each other.
3D nail art: This trend features nail art that appears to be three-dimensional, such as raised flowers or animals.
Nail art trends can be a fun way to express your personality and style. Experiment with different colors, shapes, and designs to find a look that you love.
VII. How to Choose the Right Nail Art for Your Nails
There are many different types of nail art designs, and it can be difficult to know which one is right for you. Here are a few things to consider when choosing a nail art design:
- Your personal style. What kind of clothes do you typically wear? What kind of makeup do you wear? Your nail art should complement your personal style.
- The occasion. Are you getting your nails done for a special event, such as a wedding or a night out on the town? Or are you just getting them done for everyday wear? The occasion will help you narrow down your choices.
- Your nail shape. Not all nail art designs look good on every nail shape. If you have short nails, for example, you may want to avoid designs that are too elaborate.
- Your budget. Nail art can be expensive, so it’s important to set a budget before you start shopping.
Once you’ve considered these factors, you can start browsing through nail art designs. There are many online resources available, such as Pinterest and Instagram, where you can find inspiration. You can also find nail art designs in magazines and books.
When you’re choosing a nail art design, it’s important to be realistic about your skills. If you’re not very experienced with nail art, you may want to start with a simple design. You can always add more complex details as you get more comfortable with the process.
Here are a few tips for choosing the right nail art for your nails:
- Start with a simple design. If you’re not very experienced with nail art, start with a simple design that you can easily replicate.
- Choose a design that complements your personal style. Your nail art should reflect your personality and sense of style.
- Consider the occasion. If you’re getting your nails done for a special event, choose a design that’s appropriate for the occasion.
- Be realistic about your skills. If you’re not very experienced with nail art, don’t try to create a complex design that you’re not likely to be able to replicate.
How to Remove Nail Art
There are a few different ways to remove nail art, depending on the type of nail art you have done.
If you have gel nail art, you will need to use a special gel nail remover. Gel nail removers are typically acetone-based, and they will dissolve the gel polish so that you can easily remove it.
To use a gel nail remover, soak a cotton ball in the remover and place it on your nail. Wrap your finger in aluminum foil to keep the remover from evaporating. Leave the cotton ball on your nail for about 10 minutes, or until the gel polish starts to soften.
Once the gel polish has softened, you can use a nail file to gently scrape it off of your nails. Be careful not to file too hard, as you could damage your nails.
If you have acrylic nail art, you will need to use a special acrylic nail remover. Acrylic nail removers are typically ethyl acetate-based, and they will dissolve the acrylic powder so that you can easily remove it.
To use an acrylic nail remover, soak a cotton ball in the remover and place it on your nail. Wrap your finger in aluminum foil to keep the remover from evaporating. Leave the cotton ball on your nail for about 10 minutes, or until the acrylic powder starts to soften.
Once the acrylic powder has softened, you can use a nail file to gently scrape it off of your nails. Be careful not to file too hard, as you could damage your nails.
If you have regular nail polish, you can remove it using a nail polish remover. Nail polish removers are typically acetone-based, and they will dissolve the nail polish so that you can easily remove it.
To use a nail polish remover, soak a cotton ball in the remover and place it on your nail. Wrap your finger in aluminum foil to keep the remover from evaporating. Leave the cotton ball on your nail for about 10 minutes, or until the nail polish starts to soften.
Once the nail polish has softened, you can use a nail file to gently scrape it off of your nails. Be careful not to file too hard, as you could damage your nails.
You can also remove nail art using a commercial nail art remover. Nail art removers are typically made with a blend of ingredients that will dissolve the nail art without damaging your nails.
To use a nail art remover, follow the directions on the product label. Typically, you will need to apply the remover to your nails and then wipe it off with a cotton ball.
No matter which method you use to remove nail art, be sure to follow these tips to protect your nails:
- Soak your nails in warm water for a few minutes before removing the nail art. This will help to soften the nail polish or acrylic powder so that it is easier to remove.
- Use a gentle nail file to remove the nail art. Be careful not to file too hard, as you could damage your nails.
- Apply a cuticle oil or moisturizer to your nails after removing the nail art. This will help to keep your nails hydrated and healthy.
IX. Nail Art Mistakes to Avoid
Here are some common nail art mistakes to avoid:
- Using too much polish. This can make your nails look bulky and weighed down.
- Using too many colors. A few well-chosen colors will look more polished than a rainbow of colors on your nails.
- Not cleaning your nails properly before applying nail polish. This can lead to chipping and peeling.
- Not using a base coat. A base coat will help protect your nails and make the polish last longer.
- Not using a top coat. A top coat will help seal the polish and give it a shiny finish.
- Not letting the polish dry completely before applying another coat. This can cause the polish to smudge and look unprofessional.
- Cuffing your nails. This can damage the nail bed and make your nails look shorter.
- Biting your nails. This can damage the nail bed and make your nails look unhealthy.
By avoiding these common mistakes, you can create beautiful nail art that will last longer and look more polished.
FAQ
Q: What is nail art?
A: Nail art is the application of designs, patterns, and colors to the nails. It can be done at home or by a professional nail artist.
Q: What are the different types of nail art?
A: There are many different types of nail art, including:
* Simple designs, such as stripes, dots, and hearts
* 3D nail art, which involves creating raised designs on the nails
* Water marbling, which involves creating a marbled effect on the nails
* Stamping, which involves using a stamp to transfer a design onto the nails
Q: How do I do nail art?
A: There are many different ways to do nail art, but the basic steps are as follows:
1. Prepare your nails by cleaning them and applying a base coat.
2. Choose a design and apply it to your nails using a nail art brush or stamp.
3. Seal the design with a top coat.
Table of Contents
Maybe You Like Them Too
- Dare to be Different 50 Edgy Hairstyles That Will Turn Heads
- The Science of Hair Care Alchemy A Guide to Crafting the Perfect Routine
- Grooming Greatness A Guide to Men’s Hair Care
- Radiant Confidence 50+ Hairstyles for Women Who Love Themselves
- Ink Impressions A Tattooed History

