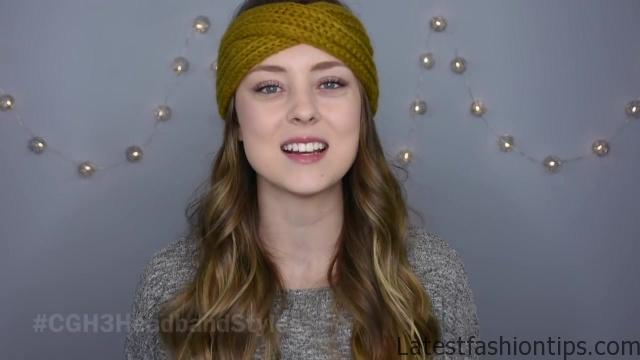
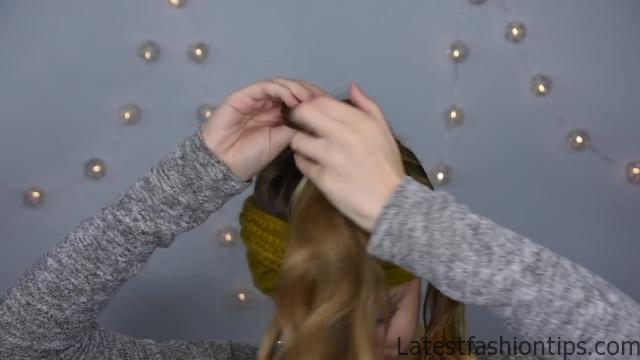
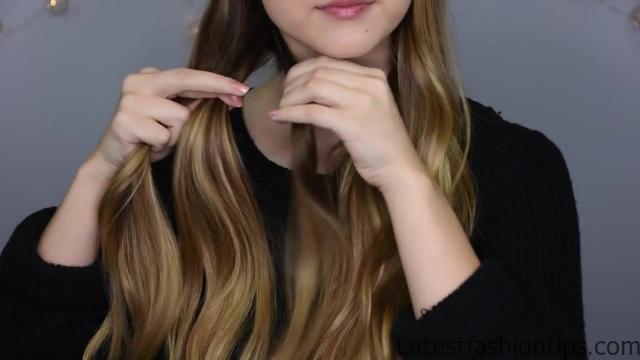
Hey everyone, I’m Jordan from Braids by Jordan, and today I’m going to be showing you three ways to wear a knitted headband. If you have not already comment to Hairstyles, make sure to hit the comment button, and give this post a big thumbs up. So, let’s get started. The first hairstyle is this braided bun. So start off by putting on the headband, around your neck, and then pulling all the hair up into a high ponytail. Once the ponytail is how you like it, you can pull the headband up. Divide off a small section of hair from the ponytail, and clip it out of the way. Take a small elastic and wrap it around the remaining hair. On the last wrap, only pull the hair half way through to make a loop. Take a section of hair from the loop, and twist it, then pin it down with bobby pins. Continue twisting and pinning until you like how it looks. This’ll be the front of the bun.
3 Easy Headband Hairstyles Photo Gallery

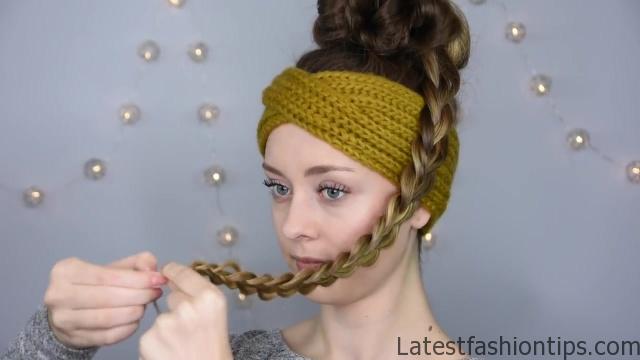

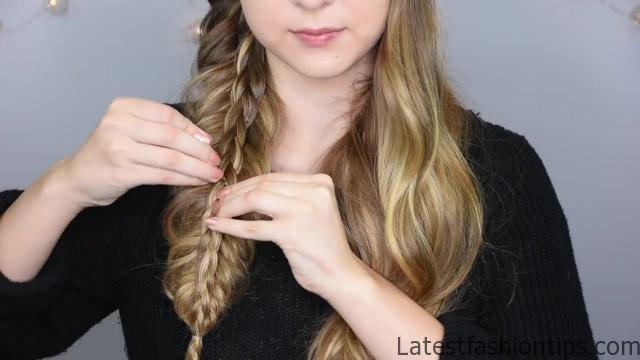
Take the remaining hair and tuck it back into the elastic. Again, twist then pin the hair with bobby pins. Divide the remaining section into three equal pieces, and then start a regular three-strand braid. Every so often, go back and pancake the braid by pulling gently on the edges. At the end of the hair, secure the braid with a clear baby elastic. Wrap the braid around the bun and secure it with bobby pins. Make sure to tuck the ends of the braid into the bun, and adjust any pieces of the bun if necessary. And that’s it. The second style is the Double-Stacked Fishtails. Start off by parting your hair into two, and then putting on the headband. On the first side, section off a small piece of hair and move it to the back. Divide the remaining hair into two, and start an inverse fishtail braid. So section off a small piece of hair from the outside of the left side, and cross it underneath and into the inside of the right side. And repeat that with the right side, so take a small section of hair from the outside of the right piece, and cross it under and into the inside of the left side. Then just repeat those steps until you reach the end of the hair. Every so often, go back and pancake the braid by pulling gently on the edges to give the braid more volume. Once you reach the end of the hair, secure the braid with a clear baby elastic. Then take the section we left out, and divide it into three to start a regular three-strand braid. Braid all the way down, and then at the end of the hair, secure the braid with a clear baby elastic. Place the braid at the center of the fishtail, and then secure the two braids together at the bottom.
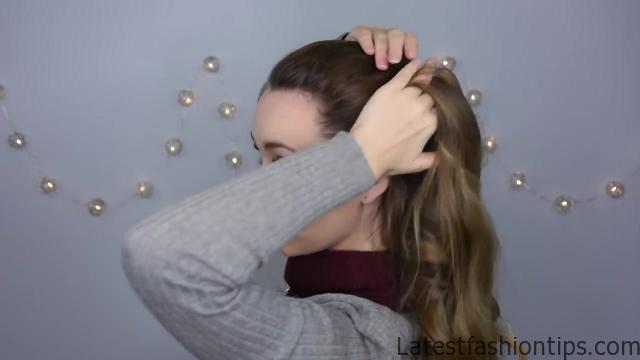
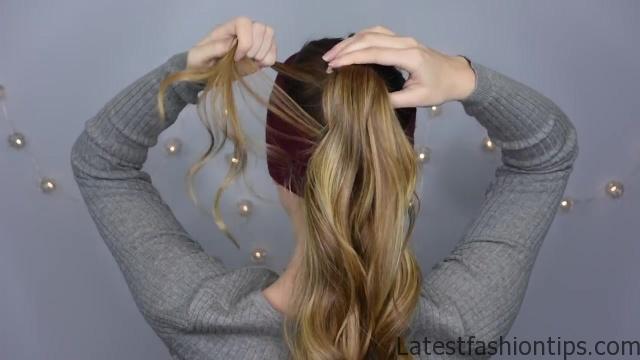
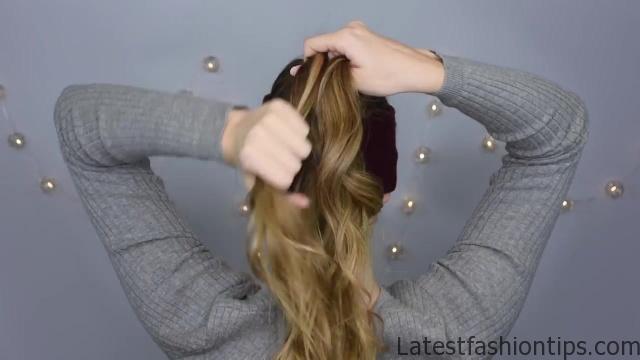
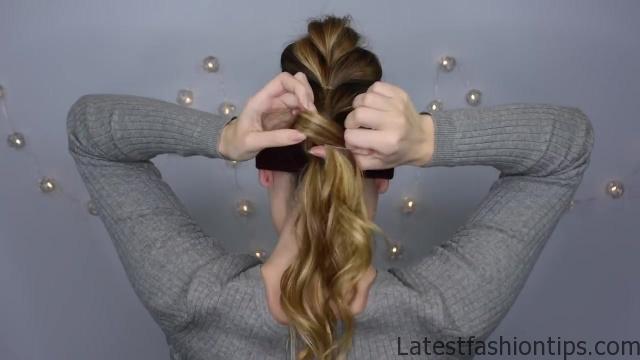
Take some bobby pins and carefully secure the braid to the fishtail. Remove the extra elastics from the bottom of the braid, and then repeat on the other side. And that’s it! This last style is the Inverse Pull-Through Pony. Start off by putting the headband around your neck, and pulling all the hair up into a ponytail. I decided to wrap a second elastic around my ponytail to make sure the style stayed secure. Once the pony tail sits where you like it, you can pull up the headband. First we are going to hair-wrap the elastics. So take a small section of hair from the ponytail, and put a Topsy Tail through the middle of the elastics. Wrap the hair around the elastics, until they are covered, and then pull the hair back through the elastics with the Topsy Tail. You can also use a bobby pin to secure the hair if you do not have a Topsy Tail. Then I took some sections from the ponytail and teased them slightly to give the ponytail more volume. Split the pony into top and bottom sections, then split the bottom section into two. Put the top section in between the bottom two, and secure the bottom sections together on top with a clear baby elastic. Then go back and pull gently on the edges of the first pull-through to give the braid more volume. And repeat those steps all the way down the ponytail. So split the bottom section into two, then put the top section in between, and secure the bottom sections on top. If the braid gets too long, you can pull it over to one side and secure the elastics there. And that’s it. I hope you guys like these hairstyles, and if you did, make sure to give this post a thumbs up, and comment below which one was your favorite. If you wanna see my last tutorial, you can click the link here, and if you wanna CGH posts, you can click the link here. To comment to Hairstyles, make sure to click this link, and if you wanna see more from me, you can head over to Braids By Jordan, or there’ll be a link to my YouTube Channel in the subscription box below. And I will see you guys in a few weeks with another hair tutorial. Bye!.
Maybe You Like Them Too
- Celebrating Natural Black Women’s Hair: A Guide to Gorgeous Hairstyles
- Short Hairstyles For Women Over 60
- 20 Thrilling Twist Braids Style to Try This Season
- The Top 10 Asymmetric Hairstyles
- 10 Gorgeous Shaggy Bob Hairstyles To Get You Out Of A Style Rut

