Hey guys it is Abby. Before we get into the post, I just wanted to remind you guys that on Thursdays we have extra hair tutorials over here. These are strictly just bonus tutorials for you guys. On Sundays me and my kids and family will always be here, so if you just want to see us be sure to come on Sundays. But Thursdays at seven PM, we like to bring in contributors that are gonna bring great ideas, and new tips and tricks and show you guys some awesome DIYs, that sometimes I do not do as many of. So be sure to show them the great CGH Family love that you show all of us, we like to love and spread positivity around here. So be sure to hang over, giveem a thumbs up and let’s go into the tutorial.
Cave Woman Half-up Halloween Hairstyles Photo Gallery
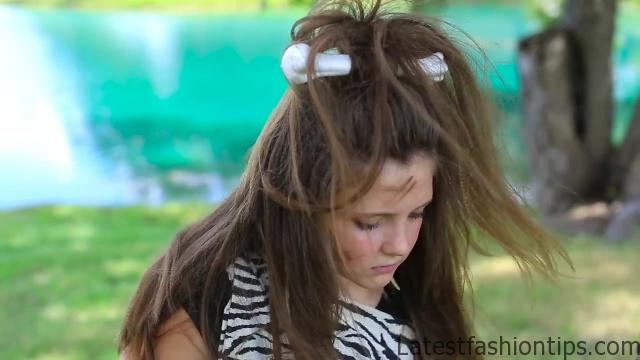

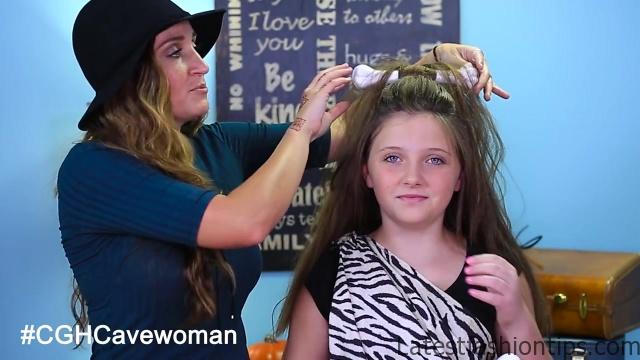


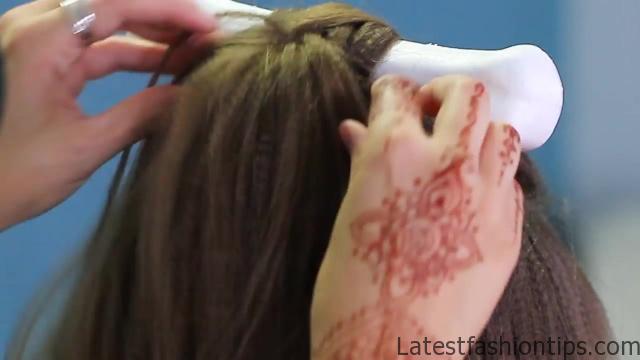
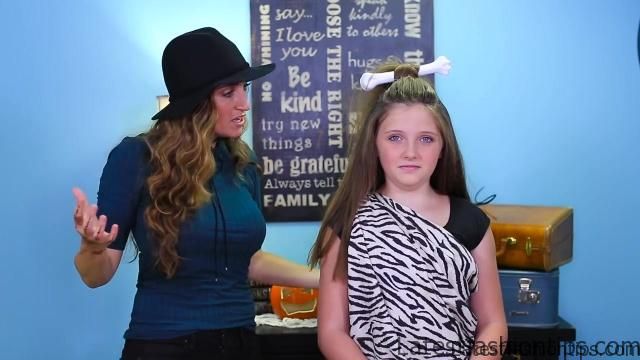
And today I’m here with Rylan, or should I say Cave Rylan. (grunting) Yes. It is September, which means we are starting off our Spooktorials. And we are gonna kick it off today with this great cave woman hair. We’re gonna show you how to do this cute little knot that helps to hold any bones that you might need to place in your hair. Now if you love our Spooktorials be sure to give us a thumbs up. And let’s get to the post. Okay to begin this Spooktorial for cave woman hair, what I have done is used my mini crimper, this one, and just crimped, crimped, crimped, crimped all through her hair to make it really crazy and zany. You can use a regular crimper too, you just want the fullness and the volume. And then I went to Michaels and I picked up a selection of bones like this that come in different sizes. I’m using this one, it is just Styrofoam, so it works great. I pulled her hair up into a little top section and I secured it with an elastic. Okay I’m gonna take this top ponytail and I’m gonna section off maybe the top third of hair, like this. I’m gonna have Rylan hold the bone in place for me, right here, right next to the elastic. Just like this.
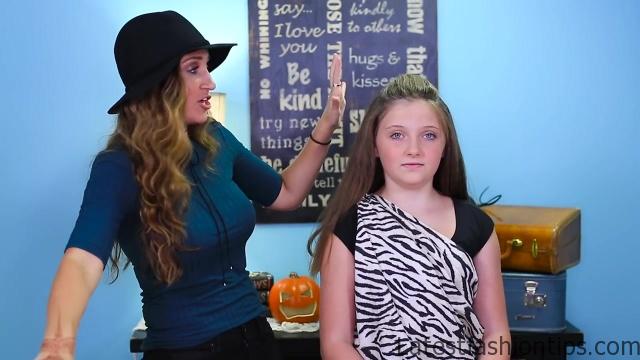
I’m gonna divide the hair in half. We’re gonna wrap it up and over the bone, down underneath the bone and then down underneath the entire ponytail, like this. Crossem, then we are gonna go back underneath the bone. Flip this back, so it is out of the way. You’re gonna come back up to the front, cross again, right here so it leaves a nice little X on the front of the hair, and then take it one more time behind the ponytail, and secure it with an elastic back behind the hair. And then we are gonna just flip the ponytail back. You shouldn’t be able to see the elastic that’s hidden in there, but it is gonna leave this nice little cross on the hair, on the bone. Once you have it all secure then you can just take the back hair and fluff it with your fingers or a comb, and you are just gonna make the hair really ratted and kind of ratchet looking, just like a cave person. Really you can even pop some leaves in there or twigs, whatever you want. One last tip and trick, if you want to make sure that the ponytail sits up on top of the head be sure to place the bone forward and you can even stick a couple bobby pins right in here to secure it, so that you get that volume on the top. Now let’s do the final spin. Do do do do. Definitely have some ratchet hair to match our cave woman style. Yay! Be sure to comment to our blog by clicking this button right here. If you want to check out our Behind The Braids posts, including Brooklyn getting asked to Homecoming, you can click right there. And if you missed our Braiding Bunch post just click right here. See you guys next week. [Both] Bye! (roaring).
Maybe You Like Them Too
- Celebrating Natural Black Women’s Hair: A Guide to Gorgeous Hairstyles
- Short Hairstyles For Women Over 60
- 20 Thrilling Twist Braids Style to Try This Season
- The Top 10 Asymmetric Hairstyles
- 10 Gorgeous Shaggy Bob Hairstyles To Get You Out Of A Style Rut


