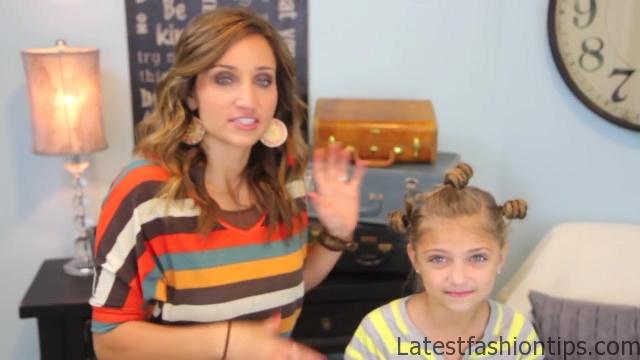
Hey, guys. Before we start the regular post, I thought I’d jump on and tell you guys some so exciting news. So on Saturday at : AM, we officially hit our ,th commentr. And we are so tickled pink about it. So as a thank you to all of you guys, our loyal fans and followers, we will be putting up an extra special post on Wednesday. So make sure and watch for it. Wednesday night and you are going to love it. We’ll see you guys then. Hey everyone. I’m Abby from LA. Today I’m here with Special K. And we are going to do and no-heat curl tutorial using Bantu knots. I think the most important thing when doing no-heat curls is the wetness of the hair. So her hair is obviously dry cause we just let it air dry after her shower. But we are going to have to add a little moisture. You do not want to start with sopping wet hair. Your hair just won’t dry completely, and then it is just going to be like a limp noodle when you are done the next morning. So we are going to start by I’m going to do just a section right here on top. So I do not like to see part lines when I’m done the next morning when the curls come out. So I’m going to take this whole front section.
Bantu Knot Curls Easy No-Heat Curls Hairstyles Photo Gallery
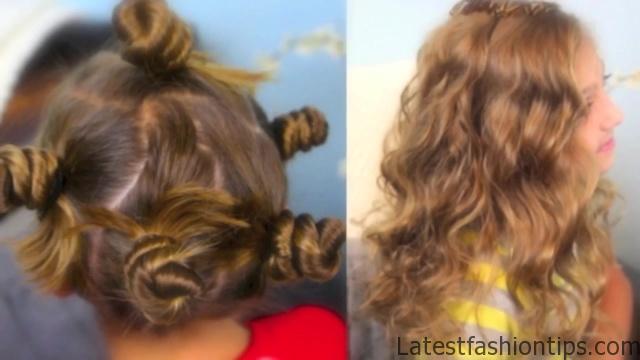
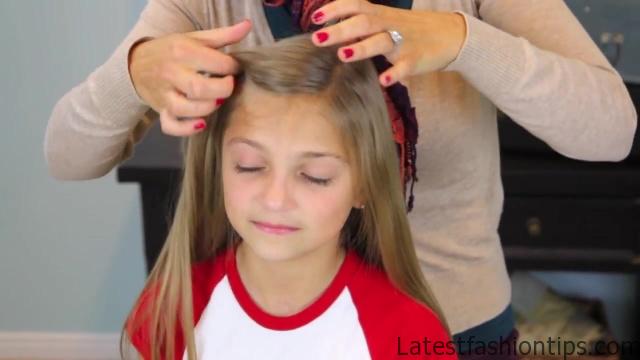

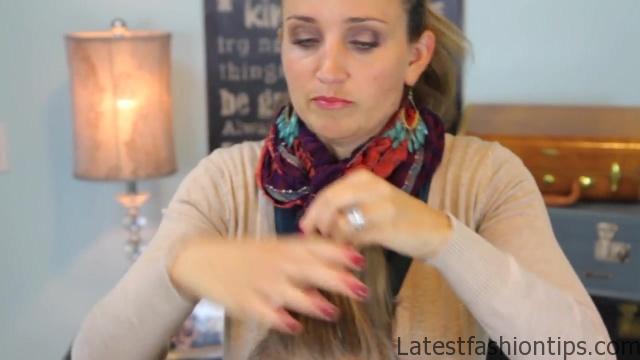

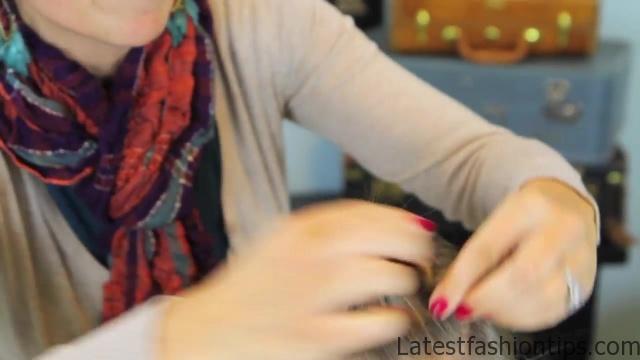

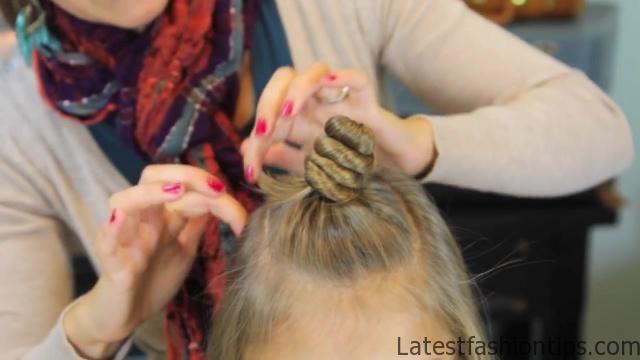
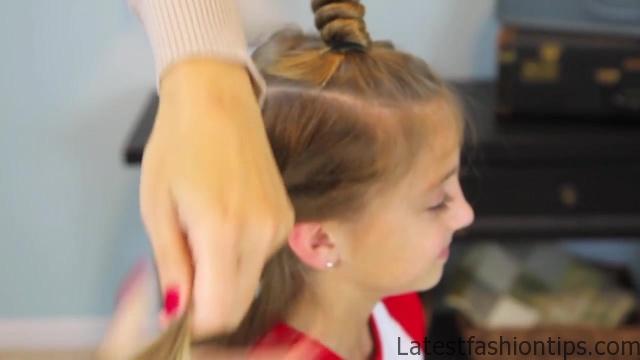
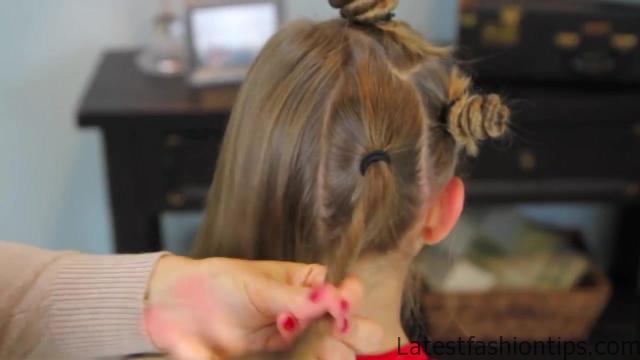
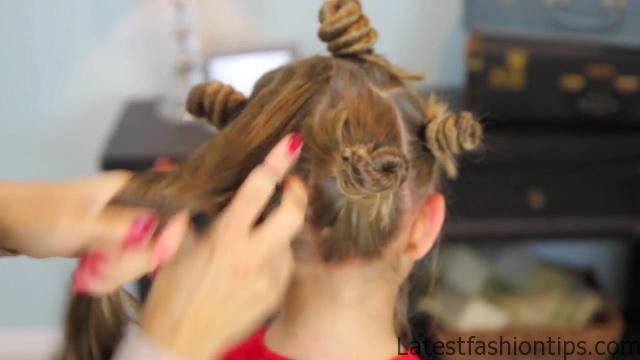
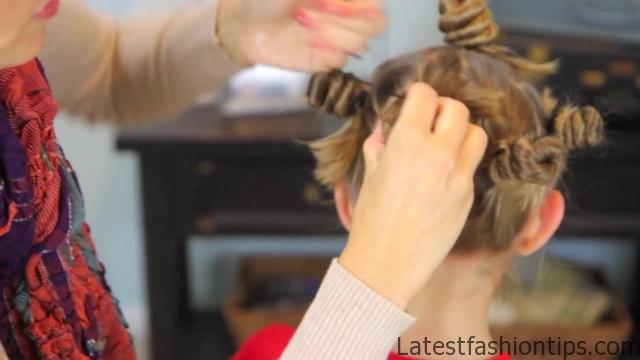
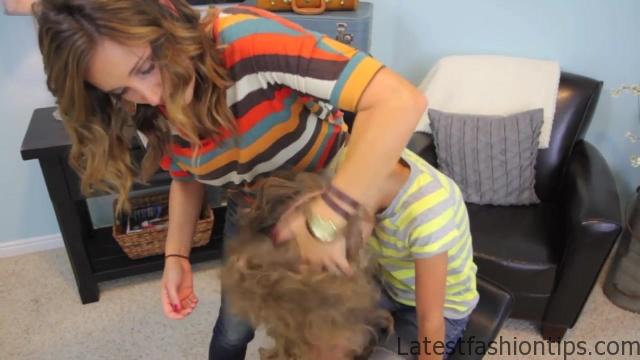
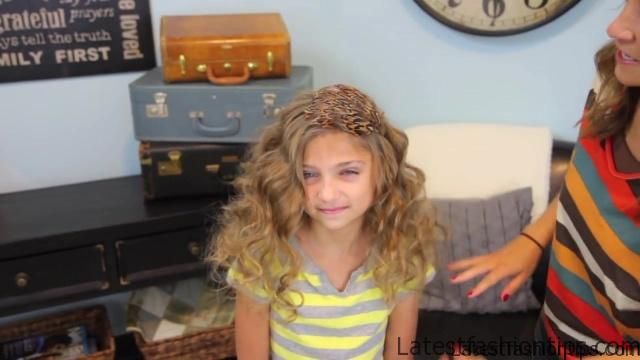
And it really does not have to be pretty. That’s the beauty of these no-heat curls. And then I’m just going to take my spray bottles it is just water and just lightly spritz her hair. Now, if your hair is starting from sopping wet, then just let it air dry until it is about half dry. Or if you want to use a blow dryer you can, but entirely up to you. At this point you can choose whether or not to add an elastic. I like to add an elastic just because my kids are younger and they roll around at night. And this just kind of helps secure it. But you do not want it to be so tight that it creates this crease line in the hair. So I’m just going to leave that elastic loose. You can see that it is loose on her head, so it is not going to hurt her to sleep on it. So I’m going to, again, just add a little spritz. And then I’m going to twist the hair. And then you are going to take the hair strand that’s all twisted and just twist it until it makes a little knot on the top of their head. This is called a Bantu knot. And you can leave some ends hanging out. Don’t stress out over that either because I actually think a little bit of straight on the end makes the curl seem really natural and nice. OK. I got to slow down. I’m moving so fast I can’t think. When you get done with your Bantu knot I used another elastic over the top of it again loosely to hold it in place. Another option would be to secure with bobby pins. If you are worried about this creating a crease line on the hair, you can just take a bobby pin or two would be better crossed and slide them over the hair. And that will also hold it into place. But that’s whether or not you think you can sleep on it and not have it fall out. It’s up to you. Now, depending on your hair thickness, you are going to decide how many you want. On her hair I find that five works really well because, of course, the smaller section that you take is going to create tighter curls. And I do not mine super tight.
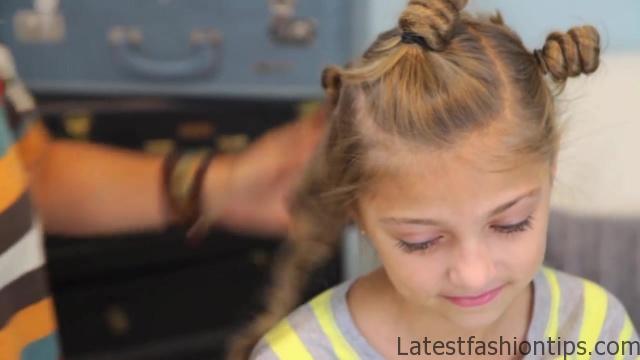
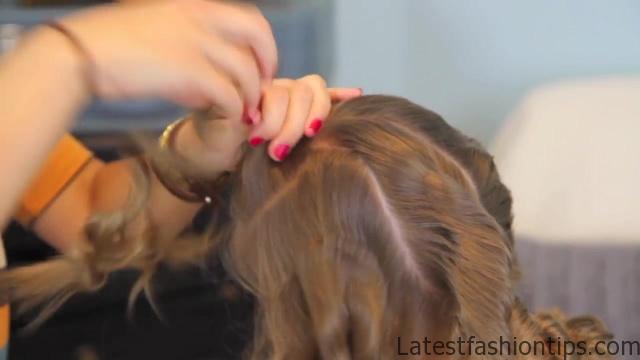
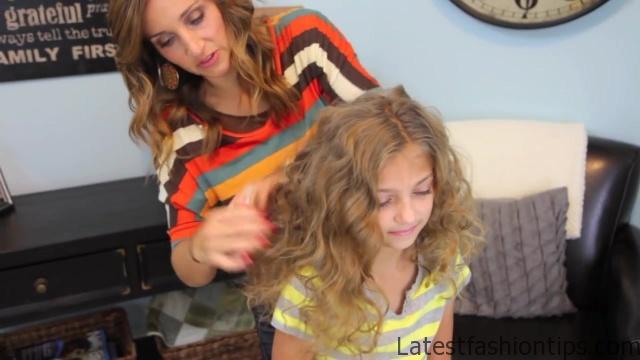
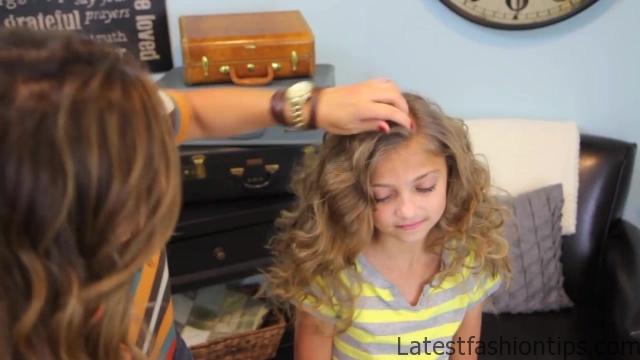
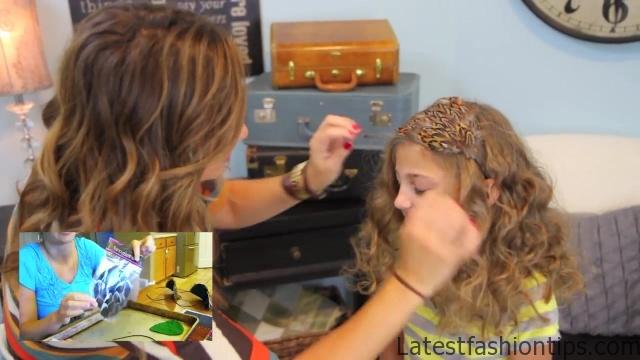
I want them kind of loose and soft looking. Last one. The whole thing is really fast and easy. Soak a little bit on that end. So I think the biggest trick, again, just to reiterate, is not to over wet your hair. Over wet’s never going to curl. It’ll just be limp when you take it out. OK. We’re done. So we have got our little Bantu knots in and ready, and we will see you guys in the morning when we take them out for the beautiful reveal. Good morning, guys. So we are back. She slept on the Bantu knots and we are ready to take them out. So we are just going to reverse the process. We’re going to just pull those elastics out gently and untwist our curls. And then the next elastic. There we go. And you can see we are going to have lovely curl. I’m going to have her you can start separating that one if you want a little bit. And last, but not least. That end. I’m going to have you flip your head upside down. And I’m just going to run my fingers through it to just try to separate out the curl. If I can see that some aren’t separating, I can just use my fingers. Shake it. But you can see that lovely curl we are already getting. OK. Flip it back up. Voila. Let’s give you a little part. You can see I’m just doing it all with my fingers. You can use a brush or a comb, but it is just going to pull the curl out more. And I want the curl to be pretty soft still. That way, as it loosens throughout the day it still leaves us with a nice looking curl. I think we had that one laying this way. That looks better. OK. And then once you get to this point, you can decide if you want to just leave them down or if you want to put a headband in. So I think a cute feather headband on her would look really cute. We have a tutorial on how to make these if you do not already have some. You can check it out. I think it is called Feather Headband. It’s very cute and very easy. Add a little hairspray where you need to. There you go. And you have these soft, soft, really pretty beachy waves out of Bantu knots, which, like I said, perfect for day two. Wear the fun Bun-Hawk, or something, day one, then second day curls. Finished product. And there you go. Hope you guys enjoy. We’ll see you later. Bye. Softer and looser like that. Take that piece, wrap it over the top, wrap it underneath.
Maybe You Like Them Too
- Celebrating Natural Black Women’s Hair: A Guide to Gorgeous Hairstyles
- Short Hairstyles For Women Over 60
- 20 Thrilling Twist Braids Style to Try This Season
- The Top 10 Asymmetric Hairstyles
- 10 Gorgeous Shaggy Bob Hairstyles To Get You Out Of A Style Rut
